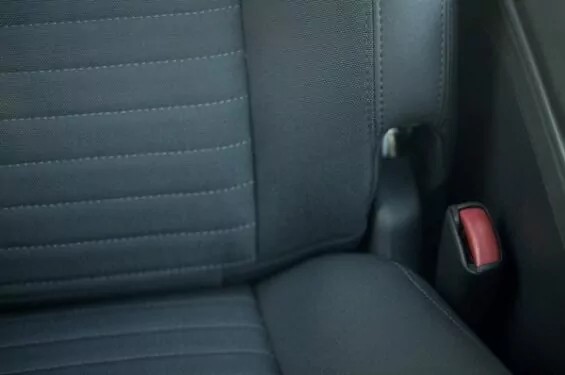
 Step-by-step guide to repairing car upholstery at home
Torn or damaged car seat upholstery can significantly detract from your vehicle’s interior appeal. Even a small rip or burn can make your car feel older and less cared for, especially if the rest of the interior is in excellent condition. Before you consider expensive seat covers or professional reupholstering services, you might be surprised to learn that many common car seat upholstery issues can be addressed with simple DIY techniques, saving you a considerable amount of money.
This guide will walk you through easy-to-follow steps for repairing your car’s interior upholstery, focusing on cost-effective methods for cloth and leather seats. Learn how to tackle minor damages and restore the look of your car seats without breaking the bank.
1. Thoroughly Assess the Upholstery Damage
The first crucial step in any car upholstery repair is to accurately evaluate the extent and type of damage. For leather upholstery, it’s important to note that significant tears or extensive damage might be beyond the scope of DIY repair and could require professional attention. Furthermore, if the damage affects critical safety components like seat belts or built-in airbags within the seat, it is imperative to consult a professional repair service. Attempting to repair safety-related components yourself can compromise the safety of your vehicle.
Remember, while DIY repairs can effectively improve the appearance of damaged upholstery, they might not restore it to a brand-new condition. If the tear is in a very noticeable location, or if you are aiming for a perfect, factory-fresh finish and plan to keep your car for a long time, professional upholstery repair might be a worthwhile investment. However, for many common issues, these DIY methods can offer a satisfying and budget-friendly solution.
2. Mending Tears in Cloth Seat Upholstery
For cloth car seats with simple tears, a straightforward sewing technique can often provide a robust repair. You’ll need a few specialized tools to achieve the best results. Invest in a curved upholstery needle, which is designed to navigate the contours of car seats, and purchase heavy-duty upholstery thread. It’s essential to select a thread color that closely matches your seat fabric for a less visible repair.
If you are new to sewing repairs, practicing your stitching technique on a spare piece of fabric similar to your car seat material is advisable. This allows you to refine your stitch and ensure a neat and secure closure. Once you are comfortable, carefully stitch the tear closed, pulling the edges together gently as you sew.
After the tear is completely sewn shut, enhance the durability of your repair by applying a fabric sealant along both sides of the stitched area. This sealant will prevent the edges of the fabric from fraying over time and reinforce the seam, ensuring a longer-lasting repair.
3. Patching Holes in Fabric Car Seats
Small holes in cloth seats, often caused by cigarette burns or pet damage, are also manageable with DIY techniques, particularly if they are less than two inches in diameter. A common and effective method involves using a fusible interfacing, which bonds to fabric when heated. Your first step is to find a fabric patch that closely matches the color and texture of your existing car upholstery. Fabric stores or online retailers specializing in upholstery supplies are good sources for finding matching fabric. Additionally, you’ll need to purchase fabric adhesive from a craft or hobby store.
Measure the size of the hole accurately and cut a fabric patch that is slightly larger than the hole, ensuring a small overlap on all sides. For a neat finish, make sure the edges of your fabric patch are even and square.
Next, cut a piece of fusible fabric adhesive that is larger than the hole you are patching. Carefully tuck the adhesive piece into the hole, positioning it beneath the torn area. Place the fabric patch directly on top, aligning it to cover the hole and overlap onto the surrounding undamaged upholstery. Following the manufacturer’s instructions for your specific fabric adhesive, use a household iron to apply heat to the fabric patch. The heat will activate the adhesive, bonding the patch to the interfacing and the underside of the original upholstery, effectively sealing the hole.
4. Addressing Scratches on Leather Car Seats
Repairing leather car seats presents different challenges compared to cloth. Superficial scratches, however, can often be improved with leather conditioning techniques. Begin by applying a high-quality leather conditioning cream to the scratched area. Use a soft cloth to gently buff the conditioner into the leather in a circular motion. Leather conditioners work by moisturizing the leather and helping to minimize the appearance of minor scratches.
If the leather conditioner alone is not sufficient to hide the scratches, you might consider using a specialized spray lacquer designed for leather repair. Apply a very small amount of spray lacquer to the scratched area. It’s crucial to follow the manufacturer’s guidelines precisely and apply the lacquer in thin, even coats. Remember, it’s always better to apply multiple light coats, allowing each to dry, than to apply too much at once, which can lead to an uneven finish. Patience is key to achieving a satisfactory result.
Another helpful resource for leather seat repair could be your car dealership. Many dealerships offer repair kits specifically formulated for the interior leather used in your car model. These kits are designed to match the original leather finish and color, potentially providing a more seamless repair.
Regardless of whether your leather seats have scratches, regular cleaning and conditioning are vital for maintaining their condition and preventing future damage. Regular leather care can significantly extend the life and beauty of your car’s leather upholstery.
By following these steps, you can effectively tackle common car seat upholstery repairs and maintain the interior aesthetics of your vehicle, saving money and enhancing your car ownership experience.
