
Alloy car rims are a significant aesthetic feature of any vehicle, often being the first element to catch the eye. However, they are also vulnerable to damage from daily driving hazards such as high kerbs, potholes, and road debris. Scratched, scuffed, or bent alloy rims can detract from your car’s appearance and even affect its resale value. Understanding how to repair alloy car rims is essential for maintaining your vehicle’s look and value.
Fortunately, repairing damaged alloy wheels is achievable, ranging from simple DIY fixes for minor damage to professional refurbishment for more serious issues. This guide will provide you with comprehensive information on how to repair alloy car rims, covering both DIY methods and when it’s best to seek professional help.
DIY Alloy Wheel Repair: Step-by-Step Guide
For light damage, such as minor kerb scratches or scuffs, repairing alloy wheels at home can be a cost-effective and satisfying solution. A DIY approach requires patience, care, and the right tools. An alloy wheel repair kit is your starting point, typically including sandpaper, filler, primer, and alloy wheel paint.
What You’ll Need: Alloy Wheel Repair Kit and Essential Tools
Before you begin, gather the necessary materials. An alloy wheel repair kit is readily available online or at auto parts stores. Alongside the kit, ensure you have:
- Cleaning supplies: Soap, water, and a sponge or cloth to clean the wheel.
- Masking tape and paper: To protect the tyre and surrounding areas from paint.
- Gloves and safety glasses: To protect yourself during the repair process.
- A well-ventilated workspace: Preferably outdoors or in a garage with open doors.
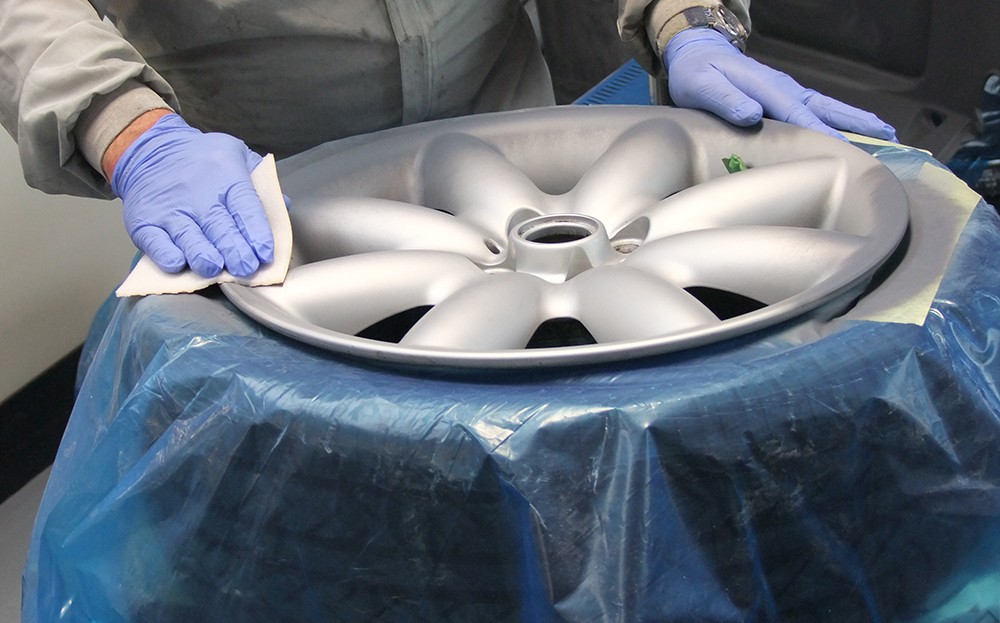
Step 1: Cleaning and Sanding the Damage
Begin by thoroughly cleaning the damaged alloy wheel with soap and water. Remove any dirt, brake dust, or grease to ensure the repair materials adhere properly. Once clean and dry, use the sandpaper provided in the kit, or your own heavy grit sandpaper for more effective initial sanding, to remove loose paint and smooth out the edges of the damage. Focus on the scratched or scuffed areas, feathering the edges to blend with the surrounding undamaged rim.
Step 2: Applying Filler for Deeper Scratches
For deeper scratches or gouges, apply the alloy wheel filler included in your repair kit. Mix the filler according to the manufacturer’s instructions. Using a small applicator, carefully apply the filler to the damaged area, slightly overfilling it to allow for sanding later. Ensure the filler is level with the surrounding surface. Let the filler cure completely as per the kit instructions.
Step 3: Sanding the Filler Smooth
Once the filler is fully cured, use progressively finer grits of sandpaper to sand it down to a smooth, even surface. Start with a medium grit to remove the excess filler and shape the repair. Then, switch to finer grits to refine the surface and eliminate any sanding marks. The goal is to achieve a seamless transition between the filled area and the original wheel surface.
Step 4: Priming the Repaired Area
After sanding, wipe the wheel clean with a tack cloth to remove any dust particles. Apply a thin, even coat of etch primer to the repaired area. The primer serves as a base for the paint, promoting adhesion and highlighting any imperfections you may have missed during sanding. Allow the primer to dry completely. If imperfections are visible after priming, repeat the filling and sanding process until you are satisfied with the result.
Step 5: Painting and Lacquering for a Perfect Finish
Before painting, mask off the tyre and any areas of the wheel you don’t want to paint using masking tape and paper. Apply several thin coats of alloy wheel paint, allowing each coat to dry slightly before applying the next. Thin coats prevent paint runs and ensure even coverage. Once the paint is dry, apply a coat of lacquer for added protection and shine, mimicking the original wheel finish. Allow the lacquer to dry completely.
Professional Alloy Wheel Refurbishment: When DIY Isn’t Enough
While DIY repair is suitable for minor damage, certain types of alloy wheel damage require professional alloy wheel refurbishment. Attempting to repair severely damaged rims yourself can compromise wheel integrity and safety.
Professional refurbishment is recommended for:
- Bent wheels: Impacts from potholes or kerbs can bend the wheel structure, requiring specialized equipment to straighten.
- Extensive kerbing: Deep, widespread kerb damage that goes beyond surface scratches.
- Corrosion: Significant corrosion that has affected the wheel’s structural integrity or finish.
- Fractures or cracks: Any visible cracks in the alloy rim necessitate professional repair or replacement.
- Diamond-cut finishes: Wheels with a diamond-cut finish require specialized machinery and expertise to restore their unique appearance.
Professional alloy wheel refurbishment companies employ processes that go beyond DIY capabilities. This often includes:
- Chemical stripping: Removing old paint and coatings in a chemical bath to expose the bare alloy.
- Damage assessment and repair: Checking for structural damage, cracks, and imperfections, and carrying out necessary repairs like welding or straightening.
- Powder coating or painting: Applying new coatings for durability and aesthetics, often followed by baking for a factory-like finish.
- Lacquering and polishing: Adding a protective lacquer coat and polishing for a final shine.
Choosing professional alloy wheel repair ensures a high-quality, durable repair that restores your wheels to their original condition and safety standards.
Alloy Wheel Repair Costs: DIY vs. Professional
The cost of how to repair alloy car rims varies significantly between DIY and professional services.
DIY Alloy Wheel Repair Kit: A DIY alloy wheel repair kit typically costs between £20 and £30, offering a budget-friendly solution for minor cosmetic damage. This is a cost-effective option if you are comfortable with hands-on work and the damage is superficial.
Professional Alloy Wheel Repair Costs: Professional alloy wheel repair costs can range from £50 to £300 per wheel, depending on the extent of the damage, wheel size, and finish type. Diamond-cut finishes and more complex repairs will generally be at the higher end of the price range. While more expensive, professional repair provides a guaranteed, high-quality finish and addresses structural issues. Bringing the wheels to the repair shop yourself and opting for a standard service (rather than express) can sometimes reduce the cost.
Timeframe for Alloy Wheel Repair: DIY and Professional Options
The time required for how to repair alloy car rims also differs between DIY and professional methods.
DIY Alloy Wheel Repair Time: Repairing alloy wheels yourself typically requires a morning or afternoon, approximately 4-6 hours, depending on the damage severity and your experience level. This timeframe includes cleaning, sanding, filling, priming, painting, and drying time.
Professional Alloy Wheel Repair Time: Professional alloy wheel repair time varies depending on the company and the complexity of the repair. Some services offer same-day repair within 1-4 hours for minor damage. More extensive refurbishment, especially for bent or severely damaged wheels, may take one working day or longer.
Where to Find Alloy Wheel Repair Kits
Alloy wheel repair kits are widely available from various sources:
- Online retailers: Websites like Amazon and eBay offer a wide selection of alloy wheel repair kits from different brands and price points.
- Auto parts stores: Local auto parts stores such as Halfords and Euro Car Parts also stock alloy wheel repair kits and related supplies.
- Car maintenance stores: Stores specializing in car care products often carry alloy wheel repair kits.
Keeping Your Alloy Rims in Top Condition
Once you’ve successfully repaired your alloy rims, maintaining their condition is crucial to prevent future damage and keep them looking their best.
Cleaning Alloy Wheels Regularly
Regular cleaning is essential for preserving the appearance of your alloy wheels. Brake dust and road grime can accumulate and damage the wheel finish over time. Use a dedicated alloy wheel cleaner and a soft brush or sponge to clean your wheels regularly. Rinse thoroughly with water and dry with a microfiber cloth.
Avoiding Future Damage
Preventative measures can significantly reduce the likelihood of alloy wheel damage:
- Careful driving: Be mindful of kerbs when parking and maneuvering.
- Pothole awareness: Avoid potholes and road hazards whenever possible.
- Regular inspections: Check your wheels periodically for any signs of damage and address minor issues promptly.
Conclusion
Knowing how to repair alloy car rims empowers you to maintain your vehicle’s appearance and value. Whether you opt for a DIY repair for minor scratches or choose professional refurbishment for more significant damage, addressing alloy wheel issues promptly is essential. By following the steps outlined in this guide and taking preventative measures, you can keep your alloy rims looking their best for years to come.