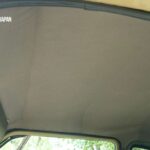
Vinyl tops add a classic touch to many vehicles, but they can become worn, loose, or damaged over time. Repairing a vinyl top at home is a manageable DIY project that can save you money and restore the look of your car. This guide will walk you through the process of repairing your car’s vinyl top, focusing on re-adhering loose sections and ensuring a professional finish.
Before you start, gather your materials. You’ll need vinyl top adhesive, masking tape, a clean cloth, a seam roller or a similar smoothing tool, and possibly a sharp knife or shears for trimming. Ensure your car is clean and dry, especially the vinyl top and surrounding areas. Protect your car’s paint, glass, and chrome surfaces from adhesive overspray by covering them with paper or sheets, securing them with masking tape.
Begin by inspecting the vinyl top to identify areas that need repair. Loose edges or bubbles are common issues. For loose sections, gently lift the vinyl to access the area underneath. Clean both the underside of the vinyl and the car roof where the adhesive will be applied. Use a clean cloth to remove any dirt or debris that could prevent proper adhesion.
Next, apply vinyl top adhesive to both surfaces – the underside of the vinyl and the car roof. It’s important to use an adhesive specifically designed for vinyl tops to ensure a strong and lasting bond. Apply the adhesive evenly and avoid applying too much at once to prevent drips and messes. Allow the adhesive to become tacky according to the manufacturer’s instructions, usually a few minutes.
Carefully reposition the vinyl top and press it firmly onto the roof. Start from the center and work your way outwards to avoid trapping air bubbles. Use a seam roller or a bondo spreader, as mentioned in the original guide, to smooth out the vinyl and ensure even contact with the adhesive. This step is crucial for a smooth, wrinkle-free finish. If there’s any excess vinyl or if you need to make precise cuts around windows or trim, use a sharp knife or shears. Work slowly and carefully to avoid damaging the vinyl or your car’s paint.
 vinyl top 2.jpg
After applying the adhesive and smoothing the vinyl, allow sufficient drying time, typically 24 hours, for the adhesive to fully cure. Avoid exposing the repaired area to moisture or extreme temperatures during this time. Once the adhesive is set, inspect your repair. If necessary, carefully trim any remaining excess adhesive or vinyl for a clean look. For maintaining your repaired vinyl top, regular cleaning with a vinyl cleaner and protectant will help extend its life and keep it looking its best. By following these steps, you can effectively repair minor issues with your vinyl top and maintain the classic appeal of your vehicle.

