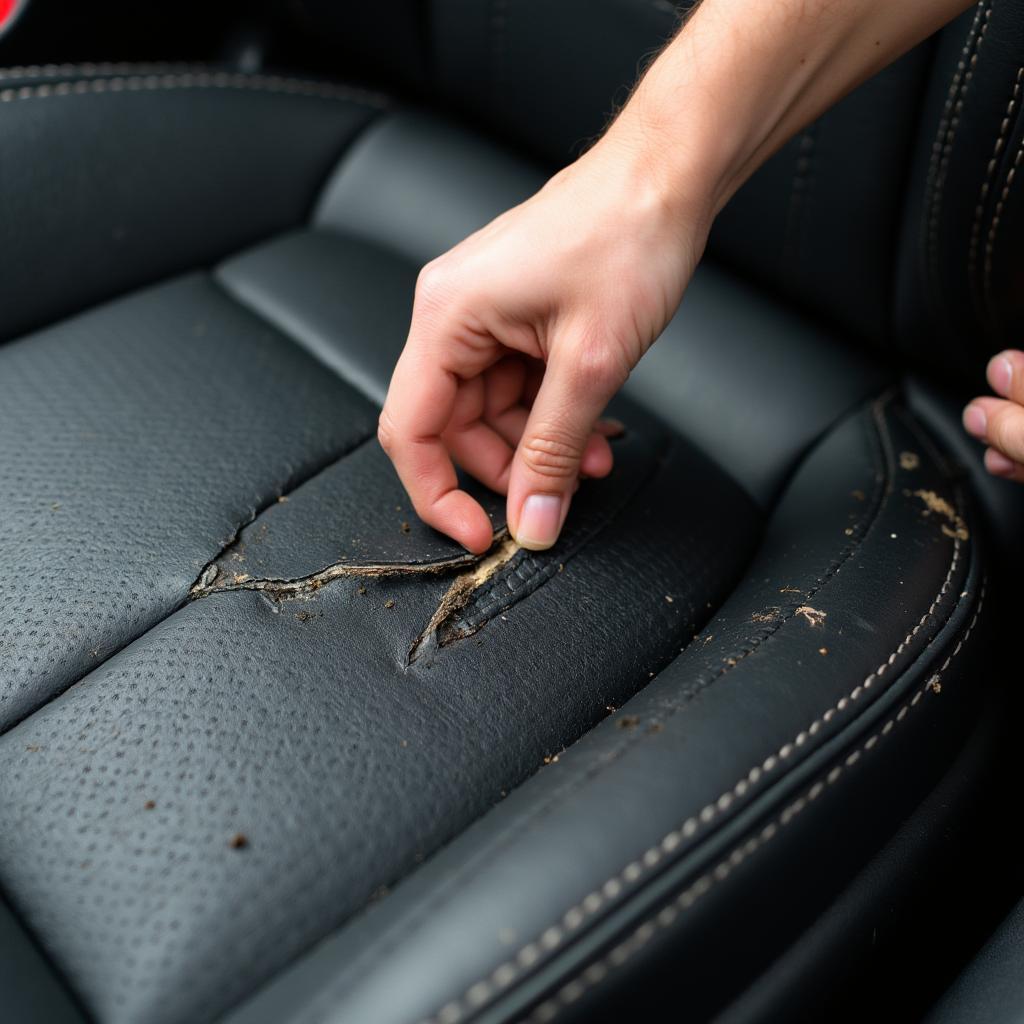
A torn leather car seat can be a real eyesore. But before you go shelling out hundreds of dollars for a professional repair or, even worse, a whole new seat, you might be surprised to learn that you can often fix it yourself. With a few simple tools and a little bit of patience, you can have your car seats looking as good as new in no time. In this comprehensive guide, we’ll walk you through the process of how to repair a torn leather car seat, covering everything from assessing the damage to achieving a professional-looking finish.
Assessing the Damage: A Crucial First Step
Before you jump into the repair process, it’s essential to take a step back and assess the damage to your leather car seat.
- Determine the Severity: Is it a minor scratch, a small tear, or a large gash? The extent of the damage will dictate the repair method and the materials you’ll need.
- Identify the Type of Tear: Is it a clean cut, a rip with frayed edges, or a puncture? Understanding the nature of the tear will help you choose the right repair technique for a seamless finish.
- Check for Underlying Issues: Sometimes, a torn car seat can indicate a deeper issue, such as a broken seat frame or worn-out padding. It’s crucial to address these problems before tackling the cosmetic repair.
Gathering Your Repair Arsenal: The Right Tools for the Job
Having the right tools on hand can make the difference between a botched repair job and a professional-looking result. Here’s a list of essential items you’ll need:
- Leather Repair Kit: These kits are readily available online or at auto parts stores and usually contain everything you need for a basic repair, such as a color-matched filler, adhesive, a palette knife, and various grain paper textures.
- Cleaning Supplies: Cleanliness is key for a successful repair. You’ll need leather cleaner, rubbing alcohol, and microfiber cloths to prep the area and ensure proper adhesion.
- Scissors: Sharp scissors will be your best friend for trimming loose threads and creating precise cuts when working with the repair patches.
- Heat Gun or Hair Dryer: A heat gun or hair dryer will help soften the leather and activate the adhesive, ensuring a strong and lasting bond.
- Leather Conditioner: Once the repair is complete, you’ll want to nourish and protect the leather with a high-quality conditioner.
Step-by-Step Guide: How to Repair a Torn Leather Car Seat
Now that you’ve assessed the damage and gathered your supplies, it’s time to roll up your sleeves and get to work. Follow these steps for a successful repair:
1. Prepare the Area:
- Thoroughly clean the torn area with leather cleaner and a microfiber cloth, removing any dirt, grime, or debris.
- Use rubbing alcohol to further clean the surface and remove any residue, ensuring proper adhesion for the repair materials.
2. Apply the Leather Filler:
- If the tear is significant, use a leather filler to fill in the gap and create a smooth surface for the patch. Apply the filler in thin layers, using a palette knife to spread it evenly and match the contour of the seat.
- Allow each layer to dry completely before applying the next. You can use a heat gun or hairdryer to speed up the drying process.
3. Cut and Apply the Repair Patch:
- For rips and tears, a repair patch is essential. Cut a piece of leather patch slightly larger than the damaged area, ensuring it covers the entire tear with some overlap.
- Apply a thin layer of leather adhesive to the back of the patch and carefully align it over the torn area. Press firmly and evenly to secure the patch in place.
4. Blend and Texturize:
- If using a leather repair kit, it may come with grain paper that mimics the texture of leather. Cut a piece of grain paper slightly larger than the repaired area.
- Place the grain paper over the patch, textured side down, and apply heat using a heat gun or hairdryer. The heat will transfer the texture onto the patch, creating a seamless blend.
5. Apply the Colorant (If Needed):
- If the repair kit includes a colorant, now’s the time to use it. Apply thin coats of the colorant to the repaired area, using a sponge or brush. Allow each coat to dry completely before applying the next.
- Blend the colorant outwards to create a seamless transition between the repaired area and the surrounding leather.
6. Condition and Protect:
- Once the repair is complete and the colorant is dry, apply a high-quality leather conditioner to the entire seat. This will help nourish the leather, restore its suppleness, and protect it from future damage.
Expert Insights:
“Many people think a torn leather car seat is the end of the road,” says John Smith, a seasoned automotive upholstery specialist with over 20 years of experience. “But the truth is, with the right approach and a little DIY spirit, you can achieve surprisingly professional-looking results at a fraction of the cost of replacing the entire seat.”
Preventing Future Tears: Proactive Care for Your Car Seats
Prevention is always better than cure. Here are some simple tips to keep your leather car seats looking their best and prevent future tears:
- Regular Cleaning: Make it a habit to clean your leather car seats regularly using a gentle leather cleaner and a soft cloth.
- Conditioning is Key: Leather needs to be moisturized to stay supple and prevent cracking. Use a high-quality leather conditioner every few months, or more often if your car is exposed to extreme temperatures.
- Avoid Sharp Objects: Be mindful of what you bring into your car. Sharp objects like keys, pens, and tools can easily scratch or puncture leather seats.
- Pet Protection: If you frequently travel with furry friends, consider investing in a seat cover to protect your leather seats from scratches and pet hair.
FAQs: Your Burning Questions Answered
Can I use super glue to repair a torn leather car seat?
While super glue might seem like a quick fix, it’s not recommended for leather car seat repairs. Super glue can dry stiff, making the repaired area prone to cracking, and it doesn’t bond well with leather, leading to a weak and short-lived repair.
How long does it take for a leather car seat repair to dry?
The drying time for a leather car seat repair will depend on the type of repair materials used and the environmental conditions. Generally, you should allow at least 24 hours for the repair to cure completely before using the seat.
Can I still repair a leather car seat if the tear is near the seam?
Repairing a tear near the seam can be tricky, but it’s not impossible. It requires more precision and might necessitate using a curved needle and a strong thread for hand-stitching the tear. If you’re unsure about tackling this type of repair yourself, it’s best to consult a professional.
Need More Help? We’re Just a Click Away!
Need more guidance on leather car seat repair or other car maintenance issues? Check out these helpful resources:
- How to Repair Leather Car Seats With Rips
- How to Repair a Torn Cloth Car Seat
- How to Repair Holes in Car Seats
- Can You Repair Ripped Leather Car Seats
- Seat Repair for Car
Still Feeling Stuck? Contact Our Experts!
Remember, while this guide provides a comprehensive overview of how to repair a torn leather car seat, every situation is unique. If you’re dealing with a particularly challenging tear or you’re not confident in your DIY skills, it’s always best to consult a professional.
For expert advice and top-notch car repair services, don’t hesitate to reach out to us. Our team of certified technicians is standing by to assist you with all your car care needs. Contact us via WhatsApp: +1(641)206-8880, Email: [email protected]. We’re here for you 24/7!


