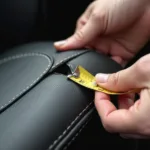
A tear in your vinyl car seat can be an eyesore and even impact the resale value of your vehicle. But don’t worry, a little DIY spirit and the right approach can have your car seat looking as good as new. This comprehensive guide will take you through the steps of how to repair a tear in a vinyl car seat, offering professional tips and tricks along the way.
 Close-up of a tear in a vinyl car seat
Assessing the Damage: Knowing Your Enemy
Before you grab your tools, it’s crucial to assess the extent of the damage. Is it a small nick, a deep gash, or a long tear? The size and depth of the tear will determine the best course of action and the type of repair kit you’ll need.
Gathering Your Arsenal: Essential Tools and Materials
Having the right tools and materials is half the battle. Here’s a list of essentials to assemble:
- Vinyl Repair Kit: Choose a high-quality kit that matches the color of your car seat. These kits typically include a patching material, adhesive, filler, and color matching compounds.
- Scissors: For precise cutting of the patching material.
- Cleaning Solution: Use a mild soap solution or a dedicated vinyl cleaner.
- Microfiber Cloth: For cleaning and drying the affected area.
- Rubbing Alcohol: To ensure a clean and grease-free surface for adhesion.
- Masking Tape: To protect the surrounding area while you work.
- Heat Gun or Hairdryer: (Optional) To aid in the adhesion process and for a smooth finish.
The Repair Process: A Step-by-Step Guide
Now that you’re prepped and ready, let’s get down to the actual repair:
- Clean the Area: Thoroughly clean the torn area with a mild soap solution or vinyl cleaner and a microfiber cloth. Ensure the surface is completely dry before proceeding.
- Prepare the Patch (If Necessary): Some tears might require a backing patch for added support. If your repair kit includes one, cut it to size, ensuring it’s slightly larger than the tear.
- Apply Adhesive: Carefully apply a thin layer of adhesive to the back of the patch (if using) and the area surrounding the tear on the car seat.
- Position the Patch: If using a backing patch, carefully position it over the tear, ensuring a smooth and wrinkle-free application.
- Apply Vinyl Filler: Using a palette knife or a similar tool, gently apply vinyl filler to the tear, filling it completely. Be careful not to overfill.
- Smooth the Surface: Allow the filler to dry slightly, then use your finger or a damp cloth to smooth the surface and create a level finish.
- Heat Treatment (Optional): If your repair kit recommends it, use a heat gun or hairdryer on a low setting to accelerate the drying process and enhance adhesion. Be careful not to overheat the vinyl.
- Color Matching: If your repair kit includes color-matching compounds, carefully follow the instructions to blend the repaired area with the surrounding vinyl. This step might involve layering different colors and textures to achieve a seamless look.
Pro Tips for a Flawless Finish
- Work in a well-ventilated area to avoid inhaling adhesive fumes.
- Avoid using harsh chemicals or abrasive cleaners on the vinyl.
- Patience is key! Allow ample drying time between each step for optimal results.
- For larger tears or if you’re uncomfortable with DIY repairs, consider consulting a professional automotive upholsterer.
“A stitch in time saves nine,” as the saying goes. Addressing a tear in your vinyl car seat promptly will prevent further damage and maintain the aesthetic appeal of your vehicle’s interior. Remember, a little care and attention can go a long way in preserving the longevity of your car’s upholstery.
FAQs: Addressing Common Concerns
Q: Can I use super glue to repair a tear in my vinyl car seat?
A: While super glue might seem like a quick fix, it’s not recommended for vinyl repair. Super glue can create a rigid bond that’s prone to cracking and doesn’t offer the flexibility required for a durable repair on a car seat.
Q: How long does it take for the vinyl filler to dry completely?
A: Drying times vary depending on the type of filler used and environmental factors like humidity. Always refer to your specific repair kit’s instructions for drying times. Generally, it’s best to allow at least 24 hours for complete curing before subjecting the repaired area to heavy use.
Q: My car seat has a small burn mark. Can I use a vinyl repair kit for that?
A: Vinyl repair kits are designed primarily for tears, cuts, and scratches. While they might help conceal minor burn marks, they might not be the ideal solution for severe burns.
Exploring More Car Upholstery Repair Solutions
Looking for guidance on repairing other types of car seat damage? We’ve got you covered:
- How to repair a fabric car seat seam
- How to repair a car seat seam
- Best leather car seat repair kit uk
- How to repair a car seat upholstery
- How to repair tear in vinyl car seat
Remember, maintaining the interior of your car is just as important as taking care of its mechanics. A well-maintained car not only looks good but also retains its value better. If you ever have any doubts or need expert assistance, don’t hesitate to reach out.
Need personalized guidance on your car repair journey? Our team of experts is just a message away!
WhatsApp: +1(641)206-8880
Email: [email protected]
We’re available 24/7 to assist you with all your car repair needs!


