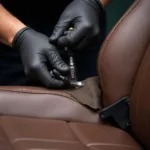
Discovering a tear in your brown leather car seat can be disheartening. Whether it’s from wear and tear or an unfortunate accident, this type of damage can detract from the overall appearance and value of your vehicle. Luckily, you don’t always need a professional to fix it. This guide will walk you through the steps to effectively repair a tear in your brown leather car seat yourself, saving you both money and the hassle.
Assessing the Damage
Before diving into the repair process, it’s important to evaluate the severity of the tear in your leather car seat.
- Small Tears and Cracks: Minor damage like small cracks or surface-level tears can often be addressed using simple leather repair kits.
- Large Tears: For larger tears that expose the padding underneath, a more involved repair process might be necessary, often requiring a leather repair patch and specialized adhesive.
Gathering Your Repair Materials
Depending on the size and severity of the tear in your brown leather car seat, you’ll need the appropriate materials:
- Leather Repair Kit: Choose a high-quality kit that closely matches the color of your car seat. These kits often come equipped with leather filler, adhesive, a colorant, and various tools.
- Leather Patch: For larger tears, select a strong leather patch in a matching color and texture.
- Scissors: Sharp fabric scissors will help you trim the leather patch and any loose threads.
- Tweezers: These come in handy for precise placement of the leather patch and removing debris from the tear.
- Alcohol Cleaning Pads: Use these to clean the area around the tear thoroughly.
- Grain Paper: This specialized paper helps to replicate the texture of the leather after the repair is complete.
Step-by-Step Repair Guide
Follow these steps to effectively repair a tear in your brown leather car seat:
- Clean the Area: Start by thoroughly cleaning the damaged area with alcohol cleaning pads. Allow the area to dry completely.
- Prepare the Tear: Using tweezers, gently push any loose fibers or padding back into place.
- Apply Leather Filler (if needed): For small tears and cracks, apply a small amount of leather filler to the damaged area using a palette knife. Allow the filler to dry completely.
- Cut and Position the Leather Patch (if using): If the tear is large, cut a leather patch slightly larger than the tear itself. Position it carefully under the tear, ensuring it aligns seamlessly with the existing leather.
- Apply Adhesive: Following the instructions on your chosen leather adhesive, carefully apply a thin, even layer to the underside of the tear or the leather patch.
- Bond the Surfaces: Press the torn edges together firmly, ensuring they bond securely with the adhesive or the patch. Use clamps or weights to maintain pressure while the adhesive dries.
- Apply Colorant: Once the adhesive is dry, use the colorant from your leather repair kit to blend the repaired area with the rest of the seat. Apply thin coats, allowing each layer to dry completely.
- Replicate Leather Texture (if needed): If the repair is noticeable, use grain paper to imprint a matching texture onto the repaired area. Heat the grain paper with a hair dryer and press it firmly onto the leather while it’s warm.
Tips for Best Results
- Test on a Hidden Area: Before applying any product to the visible area of your car seat, test it on a hidden area to ensure color matching and adhesion.
- Work in a Well-Ventilated Area: Many leather repair products contain strong fumes, so it’s crucial to work in a well-ventilated area.
- Be Patient: Leather repair takes time. Allow ample drying time for each stage of the process to achieve the best results.
Conclusion
Repairing a tear in your brown leather car seat might seem daunting at first, but by following these steps and exercising patience, you can restore your car’s interior to its former glory. By addressing the tear promptly and using the right techniques and materials, you can maintain the value and appearance of your vehicle for years to come. Remember, a well-maintained car interior not only looks good but also contributes to a more enjoyable driving experience.


