
Sunroofs are a fantastic feature in any vehicle, offering natural light and fresh air. However, a leaky sunroof can quickly turn this enjoyable feature into a headache, leading to water damage and musty interiors. If you’re experiencing drips and dampness inside your car after rain, you might be dealing with a sunroof leak. Understanding how to repair a sunroof leak on your car is crucial to prevent further damage and maintain your vehicle’s condition.
This comprehensive guide will walk you through the common causes of sunroof leaks and provide a detailed, step-by-step process to address them. Whether it’s a simple cleaning task or a weatherstrip replacement, we’ll equip you with the knowledge and steps to tackle this issue effectively.
Understanding Common Causes of Sunroof Leaks
While a sunroof appears to be a straightforward design – a glass panel sealing against the car’s roof – the system is actually quite intricate. It involves curved glass, a curved roof, and necessary movement for opening and closing. Sunroofs operate on tracks, either tilting and sliding back or retracting into the roof. A weatherstrip is designed to create a watertight seal when the sunroof is closed. Additionally, drain tubes are integrated into the system to channel away any water that manages to bypass the primary seal.
A sunroof leak can occur when any component within this system malfunctions. Identifying the root cause is the first step in knowing how to fix a sunroof leak effectively. Common culprits include:
- Dried or Dirty Weatherstrip: Exposure to sun and weather can cause the rubber weatherstrip to dry out, harden, or crack over time. Even a small accumulation of dirt, leaves, or debris on the weatherstrip can compromise its ability to create a tight seal, allowing water to seep through.
- Damaged Sunroof Seal: If the weatherstrip is visibly damaged – cracked, torn, split, or shrunk – it will no longer effectively block water from entering your vehicle. Physical damage necessitates replacement to restore the seal.
- Clogged Drain Tubes: Drain tubes are essential for removing water that gets past the weatherstrip. However, these tubes can become clogged with dirt, leaves, pollen, and other debris. When blocked, water backs up within the sunroof assembly and overflows into the car’s interior, leading to noticeable leaks.
- Sunroof Glass Misalignment: For the weatherstrip to function correctly, the sunroof glass must be properly aligned and make consistent, firm contact with the surrounding roof. If the glass is misaligned, gaps can form, allowing water to penetrate the seal.
- Corrosion: In some cases, corrosion can develop around the area where the weatherstrip attaches to the car’s roof. Rust or corrosion can create uneven surfaces and gaps, breaking the seal and potentially requiring more extensive bodywork to repair.
[ WeatherTech Sunroof Wind Deflector installed on a car roof, reducing wind noise and potential water ingress. ]
Tools and Materials Needed
Before you begin troubleshooting and repairing your sunroof leak, gather the necessary tools and materials. Having everything on hand will make the repair process smoother and more efficient. Depending on the cause of your leak, you may need some or all of the following:
- Screwdriver Set: A set of screwdrivers, including both Phillips head and flat head, will be essential for removing trim pieces, accessing drain tubes, and potentially adjusting the sunroof glass.
- Soap and Water Cleaning Solution: A mild mixture of soap and water is perfect for cleaning the weatherstrip and sunroof tracks without damaging materials.
- Microfiber Cloths: Soft microfiber cloths are ideal for cleaning and drying surfaces without scratching. Keep several on hand.
- Soft-Bristled Brush: A soft-bristled brush, like an old toothbrush or detailing brush, will help loosen and remove debris from the sunroof tracks and weatherstrip.
- Silicone Sealant or Lubricant: A silicone-based sealant or lubricant designed for weatherstripping can help restore flexibility and improve the seal. Ensure it’s compatible with rubber and automotive applications.
- Water Hose: A garden hose with a gentle spray nozzle will be needed to test for leaks and flush out drain tubes.
- Thin Flexible Wire: A length of thin, flexible wire, such as a speedometer cable or stiff wire, is crucial for unclogging drain tubes. Avoid anything too sharp that could damage the tubes.
- Permatex Black Super Weatherstrip Adhesive (Optional): If your weatherstrip is damaged and needs replacement, a specialized weatherstrip adhesive will ensure a secure and waterproof bond.
- Chemical Guys VRP Vinyl, Rubber, Plastic Shine and Protectant (Optional): For maintaining weatherstrip health after repair, a protectant can help prevent drying and cracking.
[ Permatex Black Super Weatherstrip Adhesive tube, essential for securely bonding replacement weatherstripping on cars. ]
[ Chemical Guys VRP Vinyl, Rubber, Plastic Shine and Protectant bottle, for maintaining and protecting car interiors. ]
Step-by-Step Guide to Fixing a Leaky Sunroof
Repairing a sunroof leak often involves a process of elimination. Start with the simplest and most common causes, progressing to more complex solutions if necessary. Follow these steps systematically to diagnose and fix your sunroof leak.
Step 1: Confirm and Locate the Leak
Before you start any repairs, it’s essential to accurately confirm the leak and pinpoint its source.
- Interior Inspection: Examine the inside of your car, particularly around the sunroof and headliner, for water stains, dampness, or dripping.
- Water Test: With a helper inside the vehicle, gently spray water over the closed sunroof using a garden hose. Focus on the edges and weatherstrip area.
- Observe: Have your helper inside carefully watch for water entry points around the sunroof edges. Note the location where water is seeping into the cabin. A few isolated drops might be normal, but a consistent drip or stream indicates a leak that needs attention.
Step 2: Clean and Unclog Sunroof Drain Tubes
Clogged drain tubes are a very common cause of sunroof leaks and are often the easiest to fix.
- Locate Drain Tube Openings: Open your sunroof fully or tilt it to its vent position. Look for small openings or holes, typically located in the front corners of the sunroof track assembly. Sometimes, rear drains are also present. Consult your vehicle’s repair manual if you’re unsure of their location.
- Initial Cleaning: Use a soft-bristled brush to gently remove any visible debris, dirt, or leaves from around the drain openings and within the sunroof tracks.
- Unclog with Wire: Carefully insert a thin, flexible wire into each drain tube opening. Gently probe and twist the wire to break up any clogs. Avoid forcing the wire or using excessive force, as you could damage the drain tube. Work the wire in and out a few times to clear the blockage.
- Flush with Water: Using a water hose with a gentle stream, carefully pour a small amount of water into each drain tube opening. Observe if the water drains freely from underneath the car. The drain outlets are usually located near the front and rear wheels or along the rocker panels. If water backs up or drains slowly, repeat the wire unclogging and flushing process. Continue until water drains quickly and freely from all drain tubes.
Step 3: Clean and Lubricate the Sunroof Weatherstrip
A dirty or dry weatherstrip can lose its sealing ability. Cleaning and lubricating it can often resolve minor leaks.
- Clean Weatherstrip and Contact Surfaces: Open the sunroof to access the entire weatherstrip. Prepare a solution of mild soap and water. Dip a microfiber cloth into the soapy water and thoroughly clean the entire circumference of the weatherstrip, removing dirt, grime, and debris. Also, clean the surfaces on the car roof that the weatherstrip contacts when the sunroof is closed.
- Dry Thoroughly: Use a clean, dry microfiber cloth to completely dry the weatherstrip and surrounding surfaces. Ensure no moisture remains.
- Apply Silicone Lubricant: Apply a thin, even layer of silicone lubricant or weatherstrip conditioner to the entire weatherstrip. This will help restore its flexibility, prevent drying and cracking, and enhance its sealing properties. Follow the product instructions for application.
Step 4: Adjust Sunroof Glass Alignment (If Necessary)
If cleaning and lubricating the weatherstrip doesn’t stop the leak, or if you suspect misalignment, check the sunroof glass alignment. This step can be more complex and may require a helper.
- Locate Adjustment Screws: Adjustment screws for the sunroof glass are usually located around the perimeter of the sunroof frame, often concealed by trim pieces or accessed when the sunroof is partially open. Consult your vehicle’s repair manual for the exact location of these screws.
- Loosen Screws Slightly: Using the appropriate screwdriver, carefully loosen the adjustment screws. Do not remove them completely. Just loosen them enough to allow for minor glass movement.
- Adjust Glass Position: With your helper, gently push or lift the sunroof glass to improve its alignment with the roof and ensure even contact with the weatherstrip all around. Aim for a flush and even fit.
- Tighten Screws Gradually: Once you’ve achieved the desired alignment, gradually tighten the adjustment screws in a crisscross pattern to evenly distribute pressure. Avoid overtightening, which could crack the glass or strip the screw threads.
- Test Alignment: Close the sunroof and visually inspect the alignment from both inside and outside the vehicle. Ensure the glass sits flush and makes good contact with the weatherstrip across its entire perimeter. Repeat water test (Step 1) to check if the leak is resolved. Minor adjustments may be needed, so iterate this process carefully.
Step 5: Replace Damaged Sunroof Weatherstrip (If Necessary)
If the weatherstrip is visibly damaged – cracked, torn, split, or significantly deteriorated – replacement is necessary.
- Remove Old Weatherstrip: Carefully detach the old weatherstrip. It’s usually held in place by a press-fit design or adhesive. Gently pull or peel away the old weatherstrip from the sunroof frame. Clean the channel where the old weatherstrip was seated, removing any residual adhesive or debris.
- Install New Weatherstrip: Purchase a replacement weatherstrip specifically designed for your vehicle’s sunroof. Ensure it’s the correct type and size. Starting at one point, press the new weatherstrip firmly into the channel around the sunroof frame. Work your way around the entire perimeter, ensuring the weatherstrip is seated evenly and securely. If using adhesive-backed weatherstrip, peel off the backing as you go and press firmly. For non-adhesive types, you may need to apply weatherstrip adhesive sparingly to ensure a secure bond.
- Allow Adhesive to Cure (If Applicable): If you used weatherstrip adhesive, allow it to cure completely according to the manufacturer’s instructions before testing for leaks.
Step 6: Re-test for Leaks
After each repair step, and especially after completing all steps, re-test for leaks using the water hose method (Step 1). Have your helper inside the car observe for any water entry. If the leak persists after trying all these steps, it may indicate a more complex issue, such as corrosion or structural damage, requiring professional diagnosis and repair.
Preventative Maintenance Tips
Preventing sunroof leaks is always better than dealing with repairs. Regular maintenance will help keep your sunroof in good condition and prevent leaks from developing in the first place.
- Regular Cleaning: Make it a habit to clean your sunroof weatherstrip and tracks regularly, ideally every few months or whenever you wash your car. Remove dirt, leaves, and debris that can accumulate and compromise the seal and drainage.
- Inspect Weatherstrip Regularly: Periodically inspect your sunroof weatherstrip for signs of damage, such as cracks, tears, or drying. Address minor issues promptly before they worsen and cause leaks.
- Maintain Drain Tubes: At least twice a year (or more frequently if you park under trees), check and clear your sunroof drain tubes to ensure they remain unobstructed.
- Apply Weatherstrip Protectant: Twice a year, apply a silicone-based weatherstrip protectant to keep the rubber supple and prevent drying and cracking. This will prolong the life of your weatherstrip and maintain a good seal.
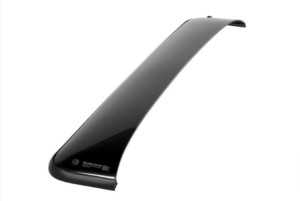
- Consider a Sunroof Deflector: Installing a sunroof wind deflector can help reduce wind noise and also deflect some water and debris away from the sunroof seal, potentially minimizing wear and tear on the weatherstrip.
By following these preventative maintenance tips, you can significantly reduce the likelihood of sunroof leaks and enjoy your sunroof worry-free.
FAQ/People Also Ask
How do I know if my sunroof is leaking?
Perform a water test by spraying water on the closed sunroof with a hose while someone inside the car observes for water entry around the edges.
Can I use regular sealant to fix a sunroof leak?
No. Only use sealants and lubricants specifically designed for rubber and weatherstripping. Regular sealants can damage rubber or become brittle, worsening the problem.
How often should I clean my sunroof drainage tubes?
Ideally, clean sunroof drain tubes every month. However, cleaning them at least twice a year, as part of routine car maintenance, is usually sufficient. Increase frequency if you park under trees or in dusty environments.
Are there specific products recommended for sunroof leak repairs?
Yes. Use silicone-based weatherstrip lubricants and protectants, and specialized weatherstrip adhesives if replacement is necessary. Ensure products are compatible with automotive rubber, vinyl, and glass. Brands like Permatex and Chemical Guys offer suitable products.
What should I do if my sunroof continues to leak after trying these fixes?
If you’ve tried cleaning, lubricating, adjusting, and even replacing the weatherstrip and the leak persists, it’s best to consult a qualified mechanic or sunroof specialist. There may be underlying issues like structural damage, corrosion, or complex alignment problems that require professional expertise and tools.