A sagging headliner is a common car problem that can detract from your vehicle’s interior appearance and even become a distraction while driving. The headliner, the fabric on your car’s roof interior, is prone to drooping over time as the adhesive backing weakens, especially in older vehicles or those exposed to heat and humidity. While professional repair is always an option, many car owners look for cost-effective and quick solutions to tackle this issue themselves. This guide explores several DIY methods on how to repair a sagging headliner in a car, ranging from temporary fixes to more involved approaches, helping you restore your car’s interior without breaking the bank.
Understanding Why Headliners Sag
Before diving into repair methods, it’s helpful to understand why headliners sag in the first place. The fabric headliner is attached to a rigid backing board with adhesive. Over years of temperature fluctuations, especially intense heat, the adhesive starts to break down and lose its bonding strength. Moisture can also accelerate this process, causing the fabric to detach and sag. Ignoring a sagging headliner can lead to further detachment and potentially more costly repairs down the line.
DIY Hacks to Repair Your Sagging Headliner
While a professional upholstery shop can offer a permanent fix by replacing the headliner fabric entirely, several DIY hacks can provide temporary or even semi-permanent solutions to a sagging headliner repair. These methods vary in complexity, cost, and longevity, so choosing the right one depends on your budget, skill level, and how long you want the repair to last.
1. Re-gluing with Headliner Adhesive Spray
For minor sagging, particularly around the edges or in small sections, re-gluing can be an effective first step in how to repair a sagging headliner in a car. This method involves using a specialized headliner adhesive spray, designed to bond fabric to the headliner board without soaking through or damaging the material.
How to:
- Preparation: Gently peel back the sagging fabric to access the detached area. Clean both the fabric and the backing board to remove any loose debris or old adhesive. A soft brush or vacuum cleaner can be useful here.
- Adhesive Application: Spray an even coat of headliner adhesive onto both the back of the fabric and the headliner board. Follow the adhesive manufacturer’s instructions regarding drying time – typically, you’ll need to let it become tacky for a few minutes.
- Re-attachment: Carefully align the fabric and press it firmly back onto the backing board. Use your hands or a clean roller to smooth out any wrinkles and ensure a strong bond. Work from the center outwards to avoid trapping air bubbles.
- Curing: Allow the adhesive to cure completely, usually a few hours, before exposing it to extreme temperatures or stress.
Pros: Relatively inexpensive, good for minor sagging, can be done with basic tools.
Cons: May not be effective for severely sagged headliners, adhesive may fail again over time, requires careful application to avoid visible glue lines.
2. Using Headliner Pins or Twist Pins
For a quick and very inexpensive temporary fix, headliner pins or twist pins are a popular choice for sagging headliner repair. These pins, often with clear or decorative heads, are inserted through the sagging fabric and into the headliner board, holding the fabric in place.
How to:
- Pin Selection: Choose headliner pins designed for this purpose. They typically have a corkscrew or twist design to grip the fabric and board securely.
- Pin Placement: Gently push the sagging fabric back up to the headliner board. Insert the pins through the fabric and twist or push them into the board, spacing them evenly across the saggy area. Start from the highest point of the sag and work downwards.
- Distribution: Use enough pins to hold the fabric taut and eliminate the sag. Consider placing pins along seams or less visible areas to minimize their appearance.
Pros: Extremely cheap and easy, instant results, requires no special tools.
Cons: Purely a temporary cosmetic fix, pins are visible and may not be aesthetically pleasing, pins can potentially damage the headliner board over time, not a long-term solution.
3. The Staples and Hairspray “Hack”
This unconventional method for how to repair a sagging headliner in a car is a more unusual DIY approach. It involves using staples to temporarily hold the fabric and hairspray as a mild adhesive.
How to (Use with Caution):
- Stapling (Carefully): Using a staple gun (not a regular paper stapler), carefully staple the sagging fabric back to the headliner board in inconspicuous areas, like along edges or seams. Be extremely cautious not to staple through wiring or other components hidden behind the headliner.
- Hairspray Application: Spray hairspray liberally over the stapled area. The idea is that the hairspray will act as a mild adhesive when it dries, further securing the fabric.
- Staple Removal (Optional): Once the hairspray is completely dry, some proponents of this method suggest removing the staples, relying solely on the hairspray’s adhesive properties. However, leaving the staples in place is often more secure.
Pros: Very cheap and accessible materials, potentially semi-permanent if hairspray provides some adhesion.
Cons: Highly unconventional, effectiveness is questionable and not guaranteed, staples can be visible and damage the headliner, hairspray may attract dirt and not provide lasting adhesion, risk of damaging car components with staples if not careful. Use this method at your own risk.
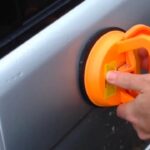
4. Steam Cleaning and Rolling
Another DIY method for sagging headliner repair involves using a steam cleaner to reactivate the old adhesive and a paint roller to smooth the fabric back into place.
How to:
- Steaming: Use a handheld steam cleaner to gently steam the sagging headliner fabric. Apply steam in sections, moving slowly and evenly over the affected area. The steam’s heat and moisture are intended to soften the old adhesive. Be careful not to oversaturate the fabric, as excessive moisture can further damage the headliner board.
- Rolling: Immediately after steaming each section, use a clean, soft paint roller to gently roll the fabric back against the headliner board. Apply even pressure to smooth out wrinkles and re-establish contact with the adhesive.
- Drying: Allow the headliner to dry completely. Ensure the car interior is well-ventilated to prevent moisture buildup.
Pros: Potentially reactivates existing adhesive, avoids using new chemicals, can be effective for moderate sagging.
Cons: Risk of damaging headliner with excessive steam, may not work if the original adhesive is completely deteriorated, requires a steam cleaner, effectiveness can be inconsistent.
5. Double-Sided Tape for Edge Repairs
Double-sided tape can be useful for reattaching headliner fabric that is sagging primarily around the edges, particularly around windows, sunroofs, or rearview mirror mounts, offering a simple solution for how to repair a sagging headliner in a car in these localized areas.
How to:
- Preparation: Clean both the back of the fabric and the trim or surface where you will apply the tape. Ensure surfaces are dry and free of debris.
- Tape Application: Apply strips of strong, thin double-sided tape to the edge of the headliner board or the trim where the fabric is detaching.
- Re-attachment: Carefully align the fabric edge and press it firmly onto the double-sided tape. Ensure good contact along the entire length of the tape.
Pros: Easy to apply, relatively inexpensive, good for edge repairs, provides a clean finish if applied neatly.
Cons: Not suitable for large sagging areas, tape may lose adhesion over time, may be visible if not applied carefully, tape residue can be difficult to remove.
When to Consider Professional Headliner Repair
While these DIY hacks can offer temporary relief or solutions for minor sagging, they are not always a long-term fix. For severely sagging headliners, extensive damage, or if you prefer a permanent and professional-looking repair, seeking professional headliner replacement is recommended.
Reasons to go professional:
- Extensive Sagging: If the headliner is sagging across a large area or is significantly detached.
- Damaged Headliner Board: If the backing board is damaged or warped, simply reattaching the fabric won’t solve the underlying issue.
- Desire for a Permanent Fix: DIY methods are often temporary; professional replacement offers a new headliner and adhesive, ensuring longevity.
- Vehicle Value: For newer or higher-value vehicles, professional repair maintains the car’s interior quality and resale value.
- No Time or Inclination for DIY: If you lack the time, tools, or confidence to perform DIY repairs, professional service is a hassle-free option.
“Sagging headliners can be a nightmare, but there are a few hacks you can try to fix them quickly and cheaply,” says Scott Greensmith, a certified technician, ClickMechanic. “However, it’s best to take your headlining panel out of your car completely and use specialist headlining adhesive to glue the headliner back in place. If you’re not sure how to tackle the problem, it’s probably best to find an upholsterer or just get a new headliner,” Scott advises.
Book your car repair now
If you ever need a car repair or service, we can help! You get a fair price in seconds, with mechanics you can trust and next-day service at your door. Book now