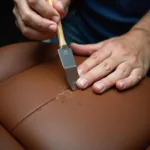
A ripped leather car seat seam might not seem like a big deal at first, but if left unattended, it can quickly escalate into a costly repair. The good news is, you can often fix it yourself with the right tools and a little patience. This comprehensive guide will walk you through the entire process, providing expert tips and tricks to help you achieve professional-quality results.
Understanding the Anatomy of a Car Seat Seam
Before diving into the repair process, it’s helpful to understand the basic structure of a car seat seam. Most leather car seats are stitched together using a specific type of thread designed for durability and longevity. Over time, however, wear and tear can cause the thread to weaken and eventually break, resulting in a ripped seam.
Gathering Your Tools and Materials
To effectively repair a ripped leather car seat seam, you’ll need the right tools and materials. Here’s a checklist:
- Leather Repair Kit: Choose a high-quality kit that includes a color-matched repair compound, adhesive, and various applicators.
- Leather Sewing Needle: Opt for a curved needle specifically designed for leatherwork.
- Heavy-Duty Thread: Select a thread that closely matches the color and thickness of the existing stitching.
- Scissors: Use sharp fabric scissors for clean cuts.
- Pliers: These come in handy for pulling the needle through the leather.
- Masking Tape: Used to temporarily hold the ripped seam together while you work.
- Leather Cleaner and Conditioner: Essential for prepping the area and restoring the leather’s suppleness.
Step-by-Step Guide to Repairing the Seam
Now, let’s get down to the actual repair process:
- Clean the Area: Thoroughly clean the ripped seam and the surrounding area using a suitable leather cleaner. This removes dirt, grime, and any residues that might hinder adhesion.
- Assess the Damage: Carefully examine the extent of the rip. If it’s a minor tear, you might be able to simply sew it back together. However, larger rips might require additional patching.
- Securing the Seam: Use masking tape to carefully align the edges of the ripped seam. Make sure the tape doesn’t stick to the visible part of the leather.
- Sewing the Seam: Thread your leather sewing needle with a length of heavy-duty thread. Start from the inside of the seam, pushing the needle through to the outside. Continue stitching along the entire length of the rip, keeping your stitches evenly spaced and tight.
- Reinforcing the Seam (Optional): For added durability, you can reinforce the seam by applying a thin layer of leather adhesive to the back of the stitched area.
- Finishing Touches: Once the adhesive is dry, remove the masking tape. Clean the area again to remove any excess adhesive or thread clippings.
- Conditioning the Leather: Apply a high-quality leather conditioner to the repaired area and the surrounding leather. This helps to moisturize the leather and prevent future cracking.
Expert Tips for a Seamless Repair
- Practice Makes Perfect: If you’re new to leatherwork, consider practicing on a scrap piece of leather before tackling your car seat.
- Patience is Key: Take your time with each step of the process, ensuring accuracy and precision.
- Seek Professional Help When Needed: For extensive damage or if you’re uncomfortable with DIY repairs, it’s best to consult a professional automotive upholsterer.
Conclusion
Repairing a ripped leather car seat seam doesn’t have to be a daunting task. By following this comprehensive guide and arming yourself with the right tools and techniques, you can restore your car’s interior to its former glory and prevent further damage. Remember, timely action and a little DIY spirit can save you a significant amount of money and extend the lifespan of your leather car seats.
FAQs
Q: Can I use super glue to repair a ripped leather car seat seam?
A: It’s not recommended to use super glue as it can damage the leather and create a stiff, inflexible bond that might crack over time.
Q: How do I choose the right color thread for my car seat repair?
A: Look for a thread that closely matches the existing stitching. You can often find color-matched thread at automotive upholstery stores or online.
Q: What can I do to prevent my car seats from ripping again?
A: Regularly cleaning and conditioning your leather car seats can help keep the leather supple and prevent drying and cracking, which can lead to rips and tears.
If you need further assistance, you can always reach out to us through WhatsApp: +1(641)206-8880, or Email: cardiagtechworkshop@gmail.com. Our dedicated team of automotive experts is available 24/7 to answer your queries and provide personalized guidance. For a more in-depth look at repairing ripped leather car seats, you can check out our detailed guide: how to repair ripped leather car seats. We also have specific guides tailored to different car models and repair types, such as Audi A5 leather car seat seam repair or information on car leather seat repair dye. If you’re dealing with a tear in leather car seat or wondering how to repair vinyl seats in car, we’ve got you covered. Your car’s interior deserves the best care, and we’re here to help you every step of the way!


