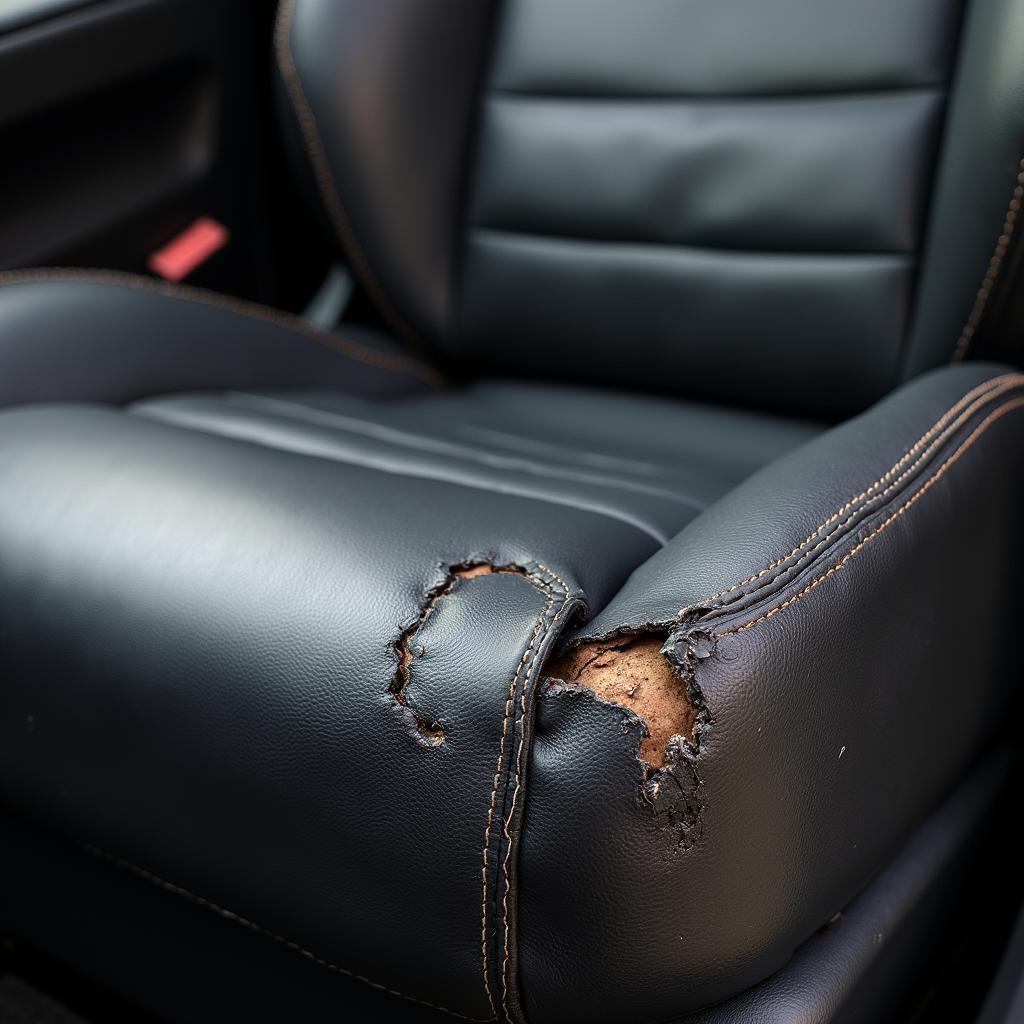
A ripped leather car seat can be a real eyesore, not to mention a potential safety hazard. But before you rush off to an expensive upholstery shop, consider this: repairing a ripped leather car seat can be a surprisingly manageable DIY project with the right guidance and materials. This comprehensive guide will walk you through everything you need to know, from assessing the damage to achieving a professional-looking repair.
Assessing the Damage: How Bad is the Rip?
Before you dive into the repair process, it’s crucial to assess the severity of the damage. A small tear is relatively straightforward to fix, while a large gash or extensive damage might require professional intervention.
Here’s a quick guide to help you determine the best course of action:
- Minor Tears and Punctures: These are typically less than an inch long and haven’t significantly damaged the surrounding leather. These are ideal for DIY repair using leather filler and adhesive.
- Medium Tears: Tears between one to three inches long might require a combination of techniques, including patching with a leather repair kit.
- Large Tears and Extensive Damage: Tears exceeding three inches, rips involving seams, or significant damage to the leather’s structural integrity are best left to professional upholsterers.
Gathering Your Repair Arsenal: The Right Tools for the Job
Once you’ve determined the extent of the damage, it’s time to gather your repair supplies. Here’s a list of essential tools and materials you’ll need:
- Leather Repair Kit: A good quality kit will include leather filler, adhesive, a color-matching guide, and various application tools.
- Clean Cloth: Microfiber cloths are ideal for cleaning the leather surface without causing scratches.
- Rubbing Alcohol: This helps to remove dirt, grime, and any residue before applying repair products.
- Scissors: For trimming patches or excess material.
- Tweezers: Useful for handling small patches and manipulating the leather during the repair.
- Hair Dryer (Optional): Accelerates the drying time of leather filler and adhesive.
The Step-by-Step Repair Process: Bringing Your Seat Back to Life
Now, let’s delve into the heart of the repair process. Remember, patience and attention to detail are key to achieving a seamless and long-lasting repair.
1. Preparation is Key:
- Start by thoroughly cleaning the damaged area and the surrounding leather with rubbing alcohol and a clean cloth. This removes any dirt or debris that could interfere with the adhesion of the repair products.
- If the tear has frayed edges, carefully trim them with scissors to create a clean surface for patching.
2. Patching the Tear (if necessary):
- For medium-sized tears, use a leather patch from your repair kit. Cut the patch to a size slightly larger than the tear, ensuring it covers the entire damaged area.
- Apply a thin layer of leather adhesive to the back of the patch and carefully position it over the tear, pressing firmly to secure it in place.
3. Applying the Leather Filler:
- Using a palette knife or the application tool provided in your kit, carefully fill the tear with leather filler. Ensure the filler is evenly distributed and flush with the surrounding leather surface.
- Allow the filler to dry completely. This may take several hours, depending on the product and ambient temperature. You can use a hair dryer on a low setting to speed up the drying process.
4. Blending and Texturing:
- Once the filler is dry, use a fine-grit sandpaper (400-600 grit) to gently sand down any excess filler and create a smooth, even surface.
- To replicate the texture of the surrounding leather, use a texturing tool (often included in repair kits) or a damp sponge.
5. Color Matching and Finishing:
- Select a leather dye that closely matches the color of your car seat. Test the dye on an inconspicuous area first to ensure a perfect match.
- Apply the dye in thin, even coats, using a sponge or applicator. Allow each coat to dry completely before applying the next.
- Once the dye is dry, apply a leather conditioner to protect the repaired area and restore the leather’s natural sheen.
Expert Insights: Tips from the Pros
We asked John Miller, a seasoned automotive upholsterer with over 20 years of experience, for his top tips on repairing ripped leather car seats:
“The key to a successful repair is patience and attention to detail,” says John. “Take your time, use high-quality materials, and don’t be afraid to practice on a hidden area before tackling the main repair. And remember, if you’re ever unsure about a step, consult a professional.”
Preventing Future Rips: Proactive Care for Your Leather Seats
Now that you’ve mastered the art of leather repair, let’s discuss how to prevent future rips and keep your car seats looking their best:
- Regular Cleaning: Wipe down your leather seats with a damp cloth and mild leather cleaner at least once a month to remove dirt and grime.
- Conditioning: Apply a high-quality leather conditioner every three to six months to keep the leather supple and prevent drying and cracking.
- Avoid Sharp Objects: Be mindful of sharp objects like keys, pens, and tools that could potentially scratch or puncture the leather.
- Sun Protection: Prolonged exposure to sunlight can fade and damage leather. Use a sunshade or park your car in the shade whenever possible.
Conclusion: Restore Your Car’s Interior With Confidence
Repairing a ripped leather car seat doesn’t have to be a daunting task. By following this guide and using the right techniques, you can restore your car’s interior to its former glory and save yourself a significant amount of money in the process. So, gather your tools, channel your inner DIY spirit, and give your car seats the TLC they deserve!
Frequently Asked Questions (FAQs)
1. Can I use superglue to repair a ripped leather car seat?
While superglue might seem like a quick fix, it’s not recommended for leather repair. It can create a rigid bond that’s prone to cracking and can damage the surrounding leather.
2. How long does a leather seat repair last?
A well-executed repair using quality materials can last for several years. However, factors like usage, exposure to sunlight, and care routine can impact its longevity.
3. Can I repair a rip in the seam of my leather car seat?
Repairing seam rips often requires specialized sewing techniques and is best left to professional upholsterers.
4. What type of leather dye is best for car seats?
Leather dyes specifically formulated for automotive use are recommended. They offer better adhesion, durability, and colorfastness.
5. How can I prevent my leather car seats from getting too hot in the summer?
Using a sunshade, parking in the shade, and opting for lighter-colored leather interiors can help minimize heat absorption.
Common Scenarios: When to Seek Professional Help
While minor rips and tears can be successfully addressed with DIY methods, certain situations warrant the expertise of a professional upholsterer:
- Extensive Damage: If the tear is very large, involves the seams, or extends to the seat’s structural components, professional repair is recommended.
- Airbag Deployment: If the rip occurred due to airbag deployment, it’s crucial to have the seat inspected and repaired by a qualified technician to ensure airbag functionality.
- Valuable Leather: For classic cars or vehicles with high-end leather interiors, seeking professional repair can help preserve the value and integrity of the original upholstery.
Need Further Assistance?
For personalized advice or assistance with your car repair needs, feel free to reach out to our team of experts:
WhatsApp: +1(641)206-8880
Email: [email protected]
Our dedicated customer support team is available 24/7 to assist you with any queries you may have.


