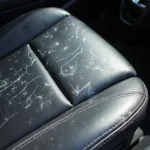
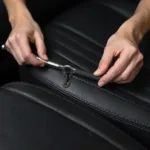
Discovering a rip or tear in your leather car seat can be a frustrating experience. But before you despair, know that repairing it yourself is often possible and can save you a significant amount of money compared to reupholstering or visiting a professional. This guide will walk you through the steps to effectively repair a rip in your leather car seat, restoring its appearance and extending its lifespan.
Assessing the Damage
Before diving into the repair process, it’s crucial to assess the severity of the damage. A small, clean tear will be much easier to fix than a large gash or one with frayed edges. Factors like the size, location, and type of rip will influence the repair method you choose.
Gathering Your Materials
Having the right materials is key to a successful repair. Here’s what you’ll typically need:
- Leather Repair Kit: These kits are readily available online or at auto parts stores and contain essential items like a color-matched leather filler, adhesive, a palette knife, and various grain papers.
- Clean Cloth: Use a lint-free cloth for cleaning the area and applying solutions.
- Rubbing Alcohol: Used for degreasing and cleaning the leather surface.
- Scissors: For trimming any loose threads or excess materials.
- Hair Dryer: Useful for speeding up the drying process of leather filler and adhesives.
Step-by-Step Repair Guide
1. Clean the Area: Thoroughly clean the ripped area with rubbing alcohol and a clean cloth. This removes dirt, oils, and debris that can interfere with adhesion.
2. Trim Loose Threads: If there are any loose threads around the rip, carefully trim them with scissors. Avoid pulling on the threads, as this can worsen the damage.
3. Apply Leather Filler (if needed): For larger rips or holes, use a leather filler to fill the gap. Apply the filler with a palette knife, ensuring it’s level with the surrounding surface. Allow it to dry completely according to the manufacturer’s instructions. You may need to apply multiple thin layers for best results.
4. Apply Leather Adhesive: Apply a thin layer of leather adhesive to the underside of the torn edges. Be careful not to overuse the adhesive, as it can seep out and create a messy finish.
5. Press and Secure: Carefully align the torn edges and press them firmly together. Hold the edges in place for a few minutes to ensure a strong bond.
6. Apply Heat (Optional): Use a hairdryer on a low setting to heat the repaired area for a few seconds. Heat can help activate the adhesive and create a more durable bond.
7. Apply Grain Paper (if using): If your leather repair kit includes grain paper, select a paper that matches the texture of your car seat. Place the grain paper over the repaired area and apply heat with a hairdryer for a few seconds. The heat will transfer the texture from the paper to the filler, creating a seamless look.
8. Apply Leather Colorant (if needed): If the repair is noticeable, use a color-matched leather dye or colorant from your repair kit to blend the area. Apply thin layers, allowing each layer to dry completely before applying the next.
Tips for Best Results:
- Practice Makes Perfect: If possible, practice the repair technique on a hidden area of the leather or a similar piece of scrap leather before tackling the visible rip.
- Patience is Key: Don’t rush the drying process of the leather filler, adhesive, or colorant. Allow ample drying time for a professional-looking finish.
- Match the Grain: If your car seat has a distinct grain pattern, pay attention to aligning the grain paper correctly for a seamless repair.
Conclusion
Repairing a rip in your leather car seat is an achievable DIY project that can save you money and restore your car’s interior. By following these steps and using the right materials, you can achieve a long-lasting and visually appealing repair. Remember, patience and attention to detail are key to a successful outcome.


