Leather car seats are a luxurious addition to any vehicle, exuding a sense of sophistication and comfort. However, over time, leather can become susceptible to wear and tear, with cracks being a common issue. These cracks not only detract from the aesthetic appeal but can also worsen if left unattended, potentially compromising the structural integrity of the seat.
Fortunately, repairing cracks in leather car seats is achievable, often without the need for costly professional intervention. With the right tools, materials, and a bit of patience, you can restore your leather seats to their former glory.
Understanding the Enemy: Why Do Leather Car Seats Crack?
Before diving into the repair process, it’s essential to understand the common culprits behind those unsightly cracks. This knowledge can help you take preventative measures and ensure the longevity of your repair.
-
Sun Damage: Prolonged exposure to the sun’s harmful UV rays is a primary cause of leather deterioration. UV radiation dries out the natural oils in the leather, making it brittle and prone to cracking.
-
Heat: Similar to sun damage, excessive heat can also dehydrate leather. Leaving your car parked in direct sunlight, especially during hot summer months, can accelerate the cracking process.
-
Lack of Maintenance: Regular cleaning and conditioning are crucial for maintaining the suppleness and durability of leather. Neglecting these practices can lead to dryness, making the leather more susceptible to cracking.
-
Wear and Tear: Frequent use, especially getting in and out of the car, puts stress on the leather, particularly in high-traffic areas like the driver’s seat. Over time, this constant friction can lead to cracks.
Essential Tools and Materials for Leather Repair
Gathering the necessary tools and materials beforehand will streamline the repair process. Here’s what you’ll need:
-
Leather Cleaner: A dedicated leather cleaner will effectively remove dirt, grime, and any residues that might hinder the repair process.
-
Leather Repair Kit: These kits are widely available and typically include a color-matched filler compound, a backing fabric, an applicator tool, and instructions.
-
Rubbing Alcohol: Used for cleaning the affected area and ensuring proper adhesion of the repair compound.
-
Fine-grit Sandpaper: Essential for smoothing out the repaired area and blending it seamlessly with the surrounding leather.
-
Leather Conditioner: After the repair, a good leather conditioner will rehydrate the leather and help prevent future cracking.
-
Microfiber Cloths: Soft and lint-free, microfiber cloths are ideal for applying cleaners, conditioners, and for buffing the repaired area.
A Step-by-Step Guide to Repairing Cracks in Leather Car Seats
Now that you have your tools and materials ready, let’s get down to the actual repair process:
-
Clean the Area: Begin by thoroughly cleaning the cracked area with a leather cleaner and a microfiber cloth. This will remove any dirt or debris that might interfere with the repair compound’s adhesion.
-
Prepare the Crack: Using a piece of fine-grit sandpaper, gently sand the cracked area. The goal is to create a smooth surface for the repair compound to bond to. Be careful not to sand too aggressively, as this can damage the surrounding leather.
-
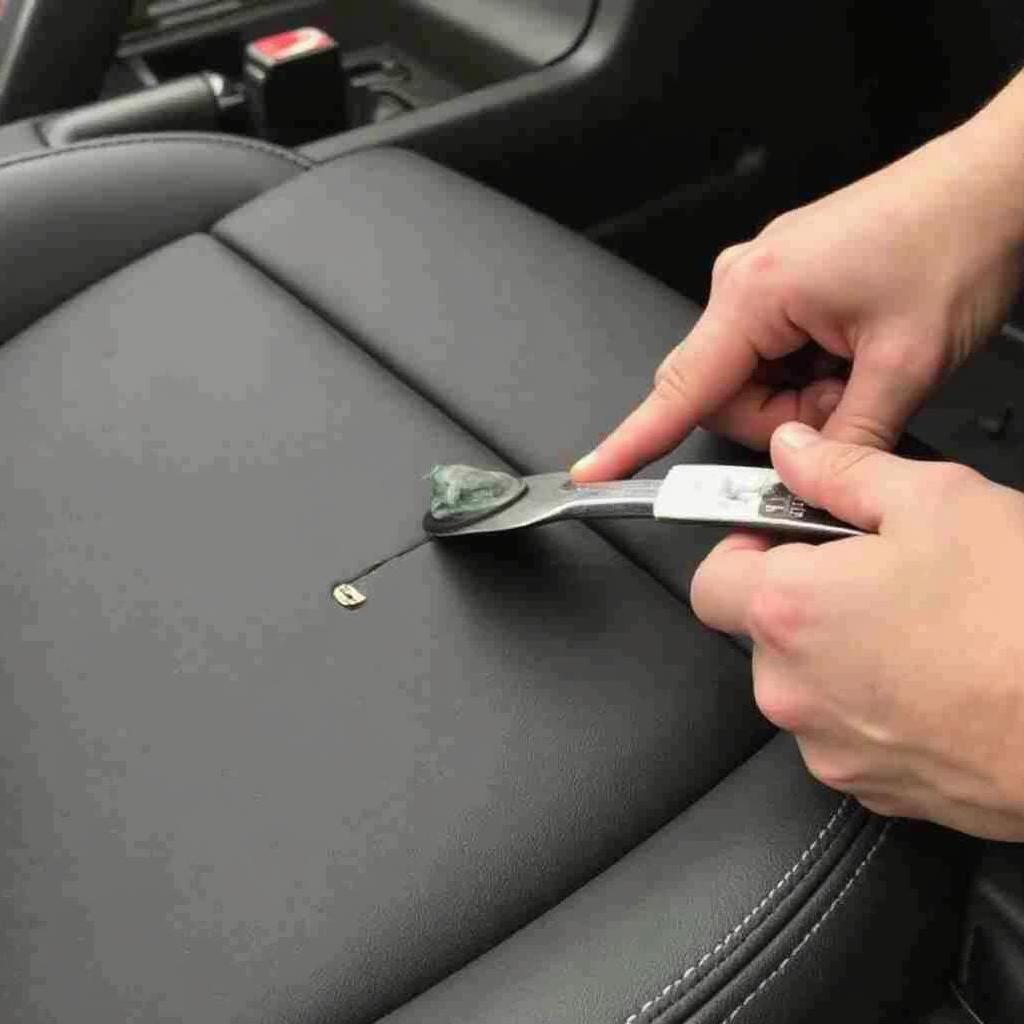
Apply the Repair Compound: Following the instructions provided with your leather repair kit, carefully apply the filler compound to the crack. Use the applicator tool to press the compound into the crack, ensuring it fills the gap completely.
-
Apply the Backing Fabric (if applicable): Some repair kits come with a backing fabric that adds extra strength and support to the repaired area. If your kit includes one, cut a piece slightly larger than the crack and place it over the wet filler compound. Use the applicator tool to press the fabric firmly into the compound.
-
Let it Dry: Allow the repair compound to dry completely. Drying times may vary depending on the specific product used, so refer to the manufacturer’s instructions.
 Applying Leather Repair Compound
-
Sand and Smooth: Once dry, use fine-grit sandpaper to carefully sand down any excess repair compound and create a smooth, even surface. Be gentle to avoid damaging the surrounding leather.
-
Apply Leather Conditioner: After sanding, apply a high-quality leather conditioner to the entire seat, including the repaired area. This will help rehydrate the leather, restore its suppleness, and prevent future cracking.
-
Buff to a Shine: Using a clean microfiber cloth, buff the repaired area to a shine. This will help blend the repair seamlessly with the surrounding leather.
How Can I Prevent Future Cracks in My Leather Car Seats?
Repairing a crack is just one part of the equation. Preventing future damage is equally crucial for maintaining the pristine condition of your leather car seats.
-
Regular Cleaning: Make it a habit to clean your leather seats regularly, ideally every few weeks, using a dedicated leather cleaner. This will remove dirt, dust, and grime that can accumulate over time and contribute to wear and tear.
-
Conditioning is Key: Leather, like our skin, needs hydration. Applying a high-quality leather conditioner after cleaning will replenish the natural oils that keep the leather supple and prevent drying and cracking.
-
Park Smart: Whenever possible, park your car in a shaded area or use a sunshade to protect the interior from direct sunlight. This simple step can significantly reduce UV damage and heat exposure.
-
Address Spills Immediately: Accidental spills are inevitable, but it’s essential to address them promptly. Liquids can penetrate the leather and cause staining or even damage if left unattended. Blot the spill gently with a clean cloth, and if necessary, use a mild leather cleaner for thorough removal.
How Much Does it Cost to Repair Cracked Leather Car Seats Professionally?
While DIY repairs can be cost-effective, some car owners prefer to entrust the task to professionals, especially for extensive damage or if they lack the time or confidence to tackle the repair themselves.
The cost of professional leather car seat repair can vary depending on several factors, including the severity of the damage, the size of the area requiring repair, the type of leather, and the location of the repair shop. On average, you can expect to pay anywhere from $100 to $500 per seat for professional crack repair.
Seeking Professional Help: When DIY Isn’t Enough
While the DIY approach is often suitable for minor cracks, certain situations warrant professional intervention:
-
Extensive Damage: If the cracks are deep, widespread, or accompanied by tears or holes, it’s best to seek professional help.
-
High-End Leather: Luxury vehicles often feature delicate or exotic leather types that require specialized care and repair techniques.
-
Lack of Confidence: If you’re unsure about your DIY skills or uncomfortable working with leather, it’s always wise to consult a professional.
Keep Your Leather Seats Looking Their Best
Cracks in leather car seats are a common problem, but with a little effort and the right approach, you can restore their appearance and prolong their lifespan. By understanding the causes of cracking, practicing preventive measures, and employing effective repair techniques, you can keep your leather seats looking their best for years to come.
Remember, whether you opt for a DIY repair or seek professional assistance, maintaining your leather car seats is an investment that will pay off in the long run, preserving both the beauty and value of your vehicle.


