It’s a frustrating moment for any car enthusiast or home mechanic: your trusty floor jack, the one you’ve relied on for years for everything from tire rotations to brake jobs, starts to fail. Instead of smoothly lifting your vehicle, it struggles, groans, or worse, refuses to raise it at all. Before you rush out to buy a new jack, consider this: repairing your car jack might be easier and more cost-effective than you think.
Many car jacks, especially older, heavier-duty models, are built to be rebuilt. Like any hydraulic tool, the common culprit for a failing car jack is often worn or leaking seals. Hydraulic fluid leaks can lead to a loss of pressure, making it difficult, if not impossible, for the jack to lift and hold weight. You might notice a puddle of oil under your jack, or see a wet sheen on the piston.
Rebuild vs. Replace: Making the Smart Choice
Faced with a malfunctioning car jack, the immediate question is: should you attempt a repair, or is it time to simply buy a new one? While shiny new tools are always tempting, rebuilding your existing jack offers several advantages:
- Cost Savings: A seal repair kit is significantly cheaper than a brand new floor jack, especially if you’re looking at a quality replacement.
- Environmental Responsibility: Repairing and reusing tools reduces waste and is a more sustainable approach than discarding and replacing.
- Familiarity: You’re already familiar with your current jack’s operation and capacity. Rebuilding it means you can continue working with a tool you trust.
- DIY Satisfaction: There’s a genuine sense of accomplishment in bringing a tool back to life with your own hands.
Of course, there are situations where replacement might be the more practical option. If your jack is severely damaged (bent frame, cracked components), or if it’s a very low-quality, disposable model, repair might not be feasible or worthwhile. However, for most standard floor jacks experiencing hydraulic issues, rebuilding is a viable and often preferable solution.
Gathering Your Supplies for Car Jack Repair
Before you begin, you’ll need to gather the necessary tools and parts. The specifics may vary slightly depending on your jack model, but generally, you’ll need:
- Seal Repair Kit: The most crucial part. Companies like Lazzars Floor Jack Repair specialize in seal kits and can often help you identify the correct kit for your jack, even if the brand is unknown. If a pre-made kit isn’t available, they can guide you on measuring your old seals to order replacements.
- Hydraulic Jack Oil: Purchase the correct type of hydraulic oil recommended for your jack. Using the wrong fluid can damage the seals and affect performance.
- Wrench Set and Socket Set: Standard tools for disassembling and reassembling components.
- Screwdrivers (Phillips and Flathead): For removing various screws and pins.
- Seal Pick or Small Hook Tool: Essential for carefully removing old seals without damaging the surrounding components.
- Clean Rags or Shop Towels: For wiping up spilled oil and keeping your workspace clean.
- Drain Pan: To catch the old hydraulic fluid.
- Work Gloves: To protect your hands from oil and grime.
Step-by-Step Guide to Repairing Your Car Jack
While specific steps might vary slightly based on your jack’s design, here’s a general guide to repairing a common floor jack:
-
Drain the Hydraulic Fluid: Locate the fill plug on your jack’s reservoir. Carefully loosen and remove the plug, then tilt the jack over a drain pan to allow the old hydraulic fluid to drain completely. Dispose of the used fluid responsibly according to local regulations.
-
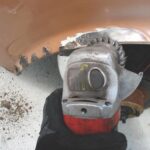
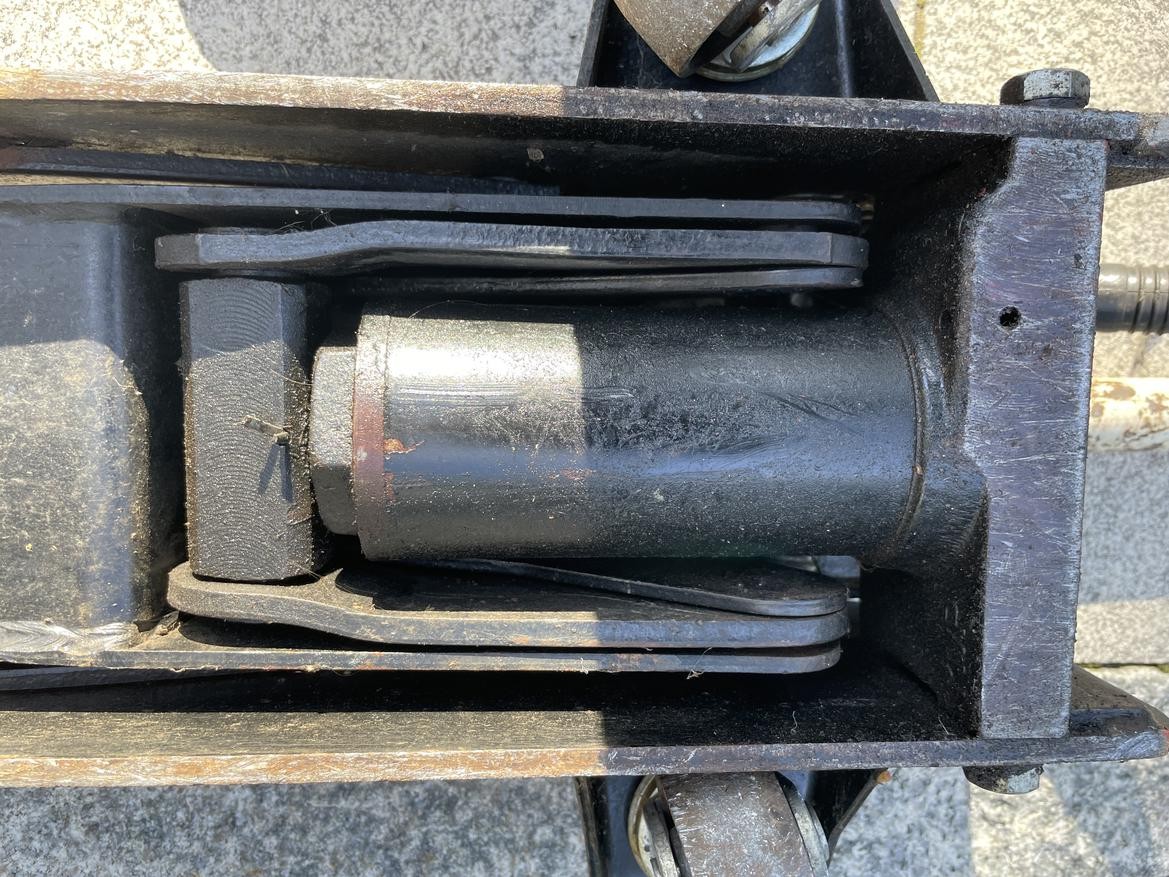
Disassemble the Jack: Begin disassembling the jack, taking photos as you go to remember the order of parts. Focus on accessing the hydraulic cylinder and piston assembly, where the seals are located. This usually involves removing pins, clips, and bolts. Pay attention to how the components fit together and lay them out in an organized manner.
-
Remove and Replace the Seals: Once you have access to the piston and cylinder, carefully use your seal pick to remove the old, worn seals. Clean the seal grooves thoroughly. Lubricate the new seals with a bit of hydraulic fluid and carefully install them in their correct positions. Ensure they are seated properly and not twisted or damaged during installation.
-
Reassemble the Jack: Following your photos and notes, reassemble the jack in reverse order. Ensure all components are correctly aligned and securely fastened. This step can sometimes be a bit fiddly, especially when reinserting the piston into the cylinder or dealing with end caps, as mentioned by some users who have rebuilt their jacks. Patience is key.
-
Refill with Hydraulic Fluid and Bleed Air: Once reassembled, refill the hydraulic fluid reservoir to the recommended level with fresh hydraulic jack oil. You’ll likely need to bleed air from the system to ensure proper operation. This typically involves opening a bleed valve (if present) or carefully pumping the jack handle while observing for air bubbles in the fluid reservoir. Refer to your jack’s manual or online resources for specific bleeding instructions.
-
Test Your Repair: After refilling and bleeding, test your jack thoroughly before using it to lift a vehicle. Pump the handle to raise the jack to its full height and check for smooth operation and any leaks. Lower the jack slowly and smoothly. If it operates correctly and holds pressure, your repair is successful!
Maintaining Your Rebuilt Car Jack
To prolong the life of your repaired car jack and prevent future seal failures, consider these maintenance tips:
- Use the Correct Hydraulic Fluid: Always use the type of hydraulic fluid recommended by the manufacturer.
- Regularly Check Fluid Level: Periodically check the hydraulic fluid level and top it off as needed.
- Store Properly: Store your jack in a clean, dry place, preferably in an upright position to prevent seal distortion.
- Avoid Overloading: Never exceed the jack’s rated lifting capacity.
- Annual Inspection: Inspect your jack annually for any signs of leaks, damage, or wear and tear.
By taking the time to repair your car jack, you can save money, reduce waste, and gain a deeper understanding of how your tools work. With a little effort and the right parts, you can bring your trusty jack back to its former glory and keep it serving you reliably for many more years in your garage.