Working headlights are crucial for safe driving, ensuring visibility at night and in adverse weather conditions. When a headlight fails, it’s not just inconvenient; it’s a safety hazard. Fortunately, in many cases, repairing a car headlight, specifically replacing a burnt-out bulb, is a straightforward DIY task you can handle at home. This guide will walk you through the process of how to repair a car headlight, focusing on bulb replacement and basic troubleshooting.
Is it Just the Headlight Bulb? Quick Checks
Before diving into repairs, it’s essential to diagnose the problem correctly. The most common reason for a headlight malfunction is a burnt-out bulb. Here’s how to check:
First, turn on your headlights and observe. Is it just one headlight that’s out? If so, the bulb is the likely culprit in about 90% of cases. As automotive technician Emilio Zullo explains, replacing the bulb often resolves the issue immediately.
If you’re on the road and notice a headlight issue, a temporary trick you can try is to gently tap the headlight housing with your fist.
“If it goes on, that means the filament is burnt out,” Zullo notes. “When you hit it, you’re shaking the filament and, if this makes contact, it actually lights up.” This isn’t a permanent fix, but it might provide enough light to get you to a safer location or home where you can perform a proper repair.
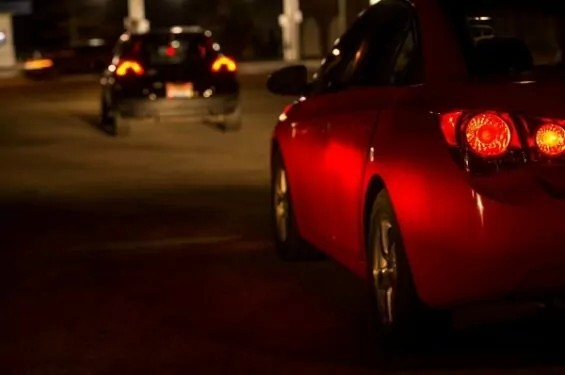 Driver-side brake light on a red 2-door car.
Alt text: Close-up of a car’s rear driver-side brake light, illustrating vehicle lighting components.
5 Steps to Change a Headlight Bulb Yourself
For most vehicles, changing a headlight bulb is a manageable task. However, always consult your car’s owner’s manual for specific instructions and the correct bulb type for your make and model. Here’s a general step-by-step guide on how to repair a car headlight by replacing the bulb:
Step 1: Turn Off Your Vehicle
Safety first! Ensure your car is completely turned off and the ignition keys are removed. This prevents any electrical accidents during the repair process.
Step 2: Access the Engine Compartment and Headlight Housing
Open your car’s hood and locate the headlight assembly from behind. It’s usually positioned near the front of the vehicle, behind the headlight lens.
Step 3: Disconnect the Power Wires
At the back of the headlight bulb housing, you’ll typically find electrical connectors. These are usually attached with clips or caps. Carefully disconnect these wires from the bulb. Take note of how they are connected for easy reassembly later.
Step 4: Remove the Old Headlight Bulb
The method for removing the old bulb varies between car models. Zullo emphasizes, “Some cars you can get right to the bulb, but with some cars you can’t.” Obstructions like the battery or air filter housing might be in the way, and in some cases, accessing the bulb might require removing the inner fender.
If you can directly access the bulb, you’ll need to identify how it’s secured. It might be held in place by a wire clip, a rotating collar, or bayonet-style fittings. Carefully unlock and remove the old bulb. Be gentle to avoid breaking any clips or damaging the headlight assembly. If clips break, you might need to remove the entire headlight unit, which is a more complex repair.
Remember not to touch the glass part of the bulb with your bare fingers.
Step 5: Install the New Headlight Bulb
Carefully insert the new headlight bulb, aligning it correctly with the housing. Secure it in place using the same method the old bulb was removed – whether it’s clips, a collar, or bayonet fittings. Ensure it’s firmly seated.
Reconnect the power wires, making sure they are securely attached. Close the hood of your car.
Now, test your headlights. Turn them on to confirm the new bulb is working correctly. If it is, you’ve successfully repaired your car headlight and restored your nighttime visibility.
For other straightforward car maintenance tasks, explore resources on DIY car maintenance projects.
When a New Bulb Doesn’t Fix the Problem: Troubleshooting Further
If you’ve replaced the bulb and the headlight still isn’t working, the issue lies elsewhere. Further troubleshooting is needed.
The next step is to check the fuses and wiring. “If you have power going to the fuses and no power going to your light, you’re having a wiring problem,” Zullo explains. A broken, pinched, or corroded wire can interrupt the electrical flow to the headlight.
Another potential issue, especially if you recently replaced a halogen bulb, is compatibility. Some aftermarket bulbs, while marketed as brighter, operate at higher wattages than the original equipment manufacturer (OEM) bulbs. Zullo cautions that “stock OEM plug that the car came with from the factory…can’t handle this extra wattage.” This can lead to overheating and melting of the headlight socket, resulting in a poor connection and headlight failure. In such cases, you may need to replace the entire light socket, not just the bulb.
Common Causes of Car Headlight Failure
Understanding why headlights fail can help with preventative maintenance and recognizing potential issues early. Here are the primary culprits:
1. Normal Wear and Tear – Old Age
The most frequent cause of headlight burnout is simply age. Like any light bulb, headlight bulbs have a limited lifespan. As Zullo points out, “You could be driving and not notice that one of your headlights is out, and then, since the other one is the same age, within weeks that one might just go bad, too.” It’s often advisable to replace both headlight bulbs at the same time to ensure consistent brightness and avoid future failures.
2. Temperature Extremes – Cold and Heat
Extreme temperature fluctuations, both hot and cold, can stress the delicate filament inside a headlight bulb, leading to premature burnout. The rapid changes in temperature can weaken the filament over time.
3. Oxidation of Headlight Housing
In modern cars with plastic headlight housings, oxidation can cause the plastic to become cloudy or yellowish. This oxidation diminishes headlight brightness, even if the bulbs are functioning correctly. Zullo notes that oxidation “diminishes the beam of light.” In such cases, cleaning or replacing the entire headlight assembly might be necessary to restore optimal light output.
4. Cracks and Moisture Damage
Cracks in the headlight housing allow moisture to enter. Halogen bulbs are particularly sensitive to moisture. “So you could put a new bulb in there and within a day or two it will blow out because of the humidity and the wetness,” Zullo warns. Moisture can cause bulbs to short circuit and fail quickly. Additionally, handling halogen bulbs with bare hands can also shorten their lifespan. Oil and contaminants from your fingers can create hot spots on the bulb’s glass, causing it to overheat and burn out prematurely. Always use gloves or a clean cloth when handling halogen bulbs.
In conclusion, knowing how to repair a car headlight, mainly by replacing the bulb, is a valuable skill for any car owner. By following these steps and understanding common causes of headlight failure, you can maintain your vehicle’s lighting system and ensure safer driving. Remember to always prioritize safety and consult your vehicle’s manual for specific instructions. And always practice safe driving, especially when dealing with any car maintenance issues.