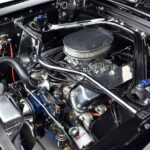
Maintaining your vehicle’s fuel system is crucial for optimal engine performance and longevity. A key component of this system is the fuel filter, responsible for preventing contaminants from reaching your engine. Over time, the fuel filter can become clogged, leading to reduced fuel efficiency and potential engine issues. Learning how to repair a car fuel filter, or more accurately, how to replace it, is a valuable skill for any car owner. This guide provides a detailed, step-by-step process for safely and effectively replacing your car’s fuel filter, ensuring your engine receives clean fuel for miles to come.
Before you begin, gather the necessary tools and materials:
- Replacement fuel filter (ensure it’s the correct type for your vehicle – check your car’s manual or an auto parts store)
- Flathead screwdriver or wrench set (size will depend on your vehicle)
- Paper towels or rags
- Pliers (helpful for stubborn fuel lines)
- Fluid catch container (to minimize fuel spillage)
- Safety glasses and gloves (recommended for personal protection)
- Floor jack and jack stands or vehicle ramps (if the filter is located underneath the car)
Always prioritize safety. Ensure your vehicle is parked on a level surface, in a well-ventilated area, and the engine is cool before starting any fuel system work.
Step 1: Fuel System Depressurization (Recommended)
While optional, depressurizing the fuel system minimizes fuel spillage when disconnecting the old filter. Locate your vehicle’s fuel pump relay or fuse, usually found in the fuse box (consult your owner’s manual for the exact location). Remove the relay or fuse. Start your engine and let it run until it stalls. This process relieves pressure in the fuel lines. Once the engine stalls, turn off the ignition and replace the fuel pump relay or fuse.
Step 2: Locating Your Car’s Fuel Filter
The location of the fuel filter varies depending on your vehicle’s make and model. Common locations include:
- Underneath the vehicle, near the fuel tank, often along the fuel line running to the engine.
- In the engine compartment, sometimes mounted on the firewall or near the intake manifold.
Refer to your vehicle’s service manual for the precise location of your fuel filter. If it’s underneath the car, you’ll likely need to safely elevate the vehicle using jack stands or ramps to gain access. Ensure the vehicle is securely supported before proceeding.
Step 3: Removing the Old Fuel Filter
Once you’ve located the fuel filter and have easy access, carefully examine its orientation. Most fuel filters have an arrow indicating the direction of fuel flow. Note this arrow to ensure correct installation of the new filter.
Position a fluid catch container underneath the fuel filter to catch any spilled fuel. Using a flathead screwdriver or wrench, loosen the hose clamps or fittings securing the fuel lines to the filter. Gently disconnect the fuel lines from the old filter. Expect some fuel spillage, even if you depressurized the system. Use paper towels or rags to absorb any fuel.
If the fuel lines are difficult to remove, use pliers to gently twist and pull them off. Be extremely cautious not to damage the fuel lines during this process. Damaged fuel lines can lead to leaks and further complications.
Step 4: Installing the New Fuel Filter
Take your new fuel filter and orient it in the same direction as the old one, matching the fuel flow arrow. Connect the fuel lines to the new filter, ensuring they are securely seated. Tighten the hose clamps or fittings to the manufacturer’s recommended torque specification, if available. If not, tighten them snugly but avoid overtightening, which could damage the fuel lines or filter housing.
Step 5: Starting the Engine and Leak Inspection
With the new fuel filter installed and all connections tightened, it’s time to start your vehicle. Turn the ignition key and start the engine. It might take a few extra seconds for the engine to start as the fuel system repressurizes and fuel reaches the engine.
Once the engine is running, carefully inspect the fuel filter and fuel line connections for any leaks. Pay close attention to where the fuel lines connect to the filter. If you detect any fuel leaks, immediately shut off the engine and re-tighten the connections. Double-check that the fuel lines are properly seated and the clamps are secure. Restart the engine and re-inspect for leaks. If leaks persist, consult a professional mechanic.
Step 6: Final Check and Road Test
After confirming there are no fuel leaks, and the engine is running smoothly, clean up your tools and any spilled fuel. Dispose of the old fuel filter and used rags properly, following local regulations for hazardous waste disposal.
Take your vehicle for a short test drive to ensure everything is functioning correctly. Listen for any unusual noises and check for any fuel smells. Replacing your fuel filter is a vital part of car maintenance. By following these steps, you can confidently perform this task and contribute to the health and efficiency of your vehicle’s engine. Regular fuel filter replacement, as recommended by your vehicle manufacturer, will help maintain optimal fuel delivery and prevent potential engine problems down the road.
Disclaimer: This guide is for informational purposes only and should not be considered a substitute for professional advice. Car repair can be complex and requires caution. If you are uncomfortable performing this procedure, or if you encounter any issues, consult a certified mechanic. Always prioritize safety and refer to your vehicle’s service manual for specific instructions.

