
You’re intimately familiar with your car. You drive it every day and instinctively know how it should look, sound, and even smell. But when something feels off, like that check engine light illuminating on your dashboard or an unusual noise emanating from under the hood, your car can suddenly feel foreign and perplexing. This is precisely when understanding how to give your car a diagnostic test becomes incredibly valuable.
Especially in times when getting to a mechanic might be challenging, knowing how to perform a car diagnostic test at home can be a game-changer. This comprehensive guide will answer your most pressing questions about car diagnostic tests and empower you to confidently perform one yourself.
Understanding Car Diagnostic Tests
A car diagnostic test is a process that assesses your vehicle’s systems – from the engine and exhaust to the transmission, ignition coils, oil tank, throttle, and beyond – to pinpoint potential issues.
Traditionally, car diagnostic tests are conducted at dealerships and auto repair shops. However, with the right tools and knowledge, you can effectively perform a diagnostic test in the comfort of your own home. Despite sounding complex, a basic car diagnostic test can be surprisingly quick and cost-effective when done yourself.
Alt text: Car diagnostic test process displayed on a digital tablet, showing various car components being analyzed.
Why Regular Car Diagnostic Tests are Important
Often, car owners only bring their vehicles in for diagnostics when a major malfunction or breakdown occurs. This reactive approach is often due to the perceived inconvenience and expense of professional diagnostic services. (Have you ever ignored a check engine light hoping it would just disappear before your next inspection?)
Learning how to conduct a simple car diagnostic test yourself allows for proactive vehicle maintenance. Regular testing can help you catch minor issues early, enabling simple repairs before they escalate into major, costly problems. This preventative strategy is undeniably a more efficient and cost-effective approach than waiting for a breakdown to necessitate a mechanic visit.
How Long Does a Car Diagnostic Test Typically Take?
A standard car diagnostic test is generally a swift procedure, often completed in just a few minutes. The initial step, check engine light code reading, also known as OBD2 code reading, is particularly quick. Mechanics use a car diagnostic scanner to retrieve trouble codes, which serve as indicators of potential problem areas.
After obtaining the Diagnostic Trouble Codes (DTCs), mechanics may conduct further investigation to gain a clearer understanding of the malfunction and determine the most effective repair strategy based on the specific error codes.
If you opt for a professional diagnostic test at an auto shop, be prepared for a slightly longer process. Wait times before the test and subsequent discussions about findings and solutions can add to the overall duration. Allocating at least an hour for a professional car diagnostic test is advisable, and a 2-3 hour window is a reasonable estimate to account for potential wait times and consultations.
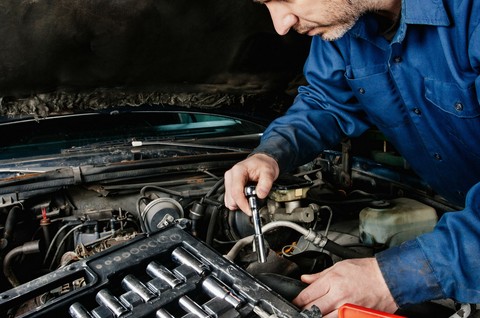
Alt text: Mechanic expertly using a professional car diagnostic tool in a garage setting, highlighting automotive repair expertise.
Understanding the Cost of a Car Diagnostic Test
The expense associated with a car diagnostic test can fluctuate significantly based on factors such as your vehicle’s model, make, and the nature of the potential issue. Industry experts suggest that you can anticipate a cost ranging from $40 to $400 for a diagnostic test at a dealership or repair shop – and this is before any actual repairs are performed.
While some establishments advertise “free car diagnostic services,” these offers often come with hidden costs. Upon closer inspection of such services, you’ll often find that only the initial “Engine Light Code Pull Service” is provided without charge. Subsequent in-depth investigations based on the retrieved codes typically incur labor fees, potentially ranging from $40 to $400. Furthermore, if you visit an auto parts store like Autozone for a free code pull, they will likely recommend purchasing a scanner directly from them.
If you suspect a significant vehicle problem and are considering a professional auto shop visit, these tips can help you find a reputable mechanic:
Related Reading: 5 Tips to Find a Good Mechanic and Avoid Scams
However, given the simplicity and accessibility of code pulling, performing this initial step at home is highly recommended. The following section provides a detailed guide on how to conduct a car diagnostic test at home.
Alt text: Individual confidently performing car diagnostics at home using a handheld OBD2 scanner connected to their car’s port.
Step-by-Step Guide: How to Perform a Car Diagnostic Test at Home
While the term “car diagnostics” might conjure images of complex procedures, the reality is quite straightforward. It doesn’t involve meticulously examining every car part and magically identifying faults. In essence, an at-home car diagnostic test comprises two key steps, achievable without specialized automotive knowledge: reading OBD2 Codes and interpreting them.
Step 1: Reading Diagnostic Trouble Codes (DTCs)
Every car diagnostic test begins with reading Diagnostic Trouble Codes, also known as Onboard Diagnostic Codes (OBD Codes). The Onboard Diagnostic system became a standard feature, mandated for all vehicles sold in the United States from 1996 onwards. This standardization included a comprehensive trouble code manual for all self-diagnostic results. Consequently, for all post-1996 vehicles, a standard OBD2 scanner or reader can be used for car diagnostic tests. For a deeper understanding of OBD2 Codes, explore our dedicated blog post:
Related Reading: All You Need To Know About OBD2 Codes
Using an OBD2 Scanner, you can retrieve diagnostic trouble codes or check engine light codes directly from your car’s computer. These codes provide a list indicating potential areas of concern. While they don’t pinpoint the exact problem, they offer valuable insights into the nature of the issue and guide further diagnosis and repair.
The market offers a wide array of OBD2 scanners and car code readers. To navigate this selection, we’ve compiled a comprehensive buying guide to OBD2 scanners, covering major types, selection criteria, and usage instructions. And for a limited time, we’re offering a FREE GIVEAWAY campaign for our smart Bluetooth OBD2 scanner. You can claim yours HERE with a minimal shipping fee. We believe this tool empowers you to understand your car better and proactively prevent major issues with its user-friendly design and simple installation.
Related Reading: Best OBD2 Scanner & Code Reader: Complete Buying Guide
Alt text: Wireless Bluetooth car diagnostic scanner device, emphasizing portability and ease of use for modern car diagnostics.
Step 2: Interpreting Codes and Further Investigation
Once you have the list of diagnostic codes, the next step is to understand their meaning and diagnose the potential problem.
For example, a code P0442 indicates “Evaporative Emission Control System Leak Detected (Small Leak).” This code comes with potential symptoms, possible causes, and straightforward diagnostic steps you can perform yourself. The code could be triggered by something as simple as a loose gas cap or a more complex issue like a broken EVAP line, with repair costs ranging from $20 to $100 for a replacement. The appropriate actions vary depending on the specific code, other codes present, and the car’s make and model.
Alt text: Visual representation of OBD2 codes explanation, illustrating the process of understanding diagnostic trouble codes for car repair.
Certain Bluetooth OBD2 Scanners come with companion apps that provide code explanations directly on your smartphone. Alternatively, if you use a traditional ELM327 scanner or a wired tool that doesn’t offer code explanations, you can easily search for code definitions on Google.
For your convenience, we’ve developed a website dedicated to diagnostic trouble codes and their explanations. This resource includes potential symptoms, possible causes, and often detailed step-by-step diagnostic methods and simple fixes. If you have a list of codes from your OBD2 reader and need clarification, visit our website for comprehensive information!
Related Resource: Search for the Diagnostic Trouble Codes you Got
Step 3: Utilizing Video Tutorials for DIY Car Repairs
With nonda’s Smart Vehicle Health Monitor and the ZUS app, you gain access to complete code diagnostics and short, instructional videos guiding you through at-home fixes. Watch the video below to see how this system can help you potentially save thousands on car repair expenses:
How to Fix P0420 Engine Code in 3 Minutes [3 DIY Methods / Only $4.97]
Explore more DTC troubleshooting videos:
P0171 – System Too Lean (Bank 1)
P0456 – EVAP Control System Leak Detected (Very Small Leak)
P0300 – Cylinder Misfire Detected, Random/Multiple Cylinder
P0400 – Exhaust Gas Recirculation (EGR) Flow Malfunction
P0128 – Coolant Thermostat Malfunction
All videos are produced by nonda Auto DIY Center. Visit their YouTube channel for more DTC code insights.
DIY Car Diagnostics are Accessible to Everyone
As illustrated, car diagnostic tests are demystified and entirely manageable for anyone to perform at home. You don’t need prior mechanic experience to begin checking your vehicle. Starting with minimal knowledge can lead to significant time and cost savings.
Based on the diagnostic codes, you can often perform simple fixes yourself, avoiding expensive repairs in many common scenarios. If the codes indicate a part replacement or more complex diagnostics are needed, you can confidently take your car to a mechanic equipped with initial knowledge, minimizing the risk of unnecessary charges and scams.
Conclusion: Empowering Car Owners with DIY Diagnostics
Car diagnostic tests are essential for maintaining vehicle health, and regular testing is highly recommended to prevent minor issues from escalating into major problems. While professional mechanic services offer convenience, performing tests at home can save considerable money, especially when no immediately obvious or severe issues are present. Even if you can’t resolve the problem yourself, having preliminary diagnostic knowledge empowers you when you do consult a mechanic, protecting you from potential overcharges and dishonest practices.
Take the First Step: Try the ZUS Smart Vehicle Health Monitor for FREE
Car diagnostic tests are more than just clearing check engine lights; they are about proactively understanding and maintaining your vehicle’s condition. The ZUS Smart Vehicle Health Monitor is designed to empower drivers with enhanced vehicle awareness.
Key benefits:
- Real-time vehicle health monitoring
- Automatic vehicle health checks upon every startup
- User-friendly installation and operation
- Instant alerts and code explanations when OBD2 codes are detected
- Comprehensive history of recorded OBD2 codes
- FREE device and FREE companion app for both Android and iOS!
We’re currently running a FREE GIVEAWAY campaign for the ZUS Smart Vehicle Health Monitor to promote driver safety and vehicle awareness. Don’t miss this opportunity – explore the offer and claim yours today!
Alt text: ZUS Smart Vehicle Health Monitor device plugged into a car’s OBD2 port, showcasing a user-friendly solution for vehicle diagnostics.
We encourage you to share your thoughts and questions in the comments section below. Your feedback helps us enhance our content and better serve our readers.