
**
You’re intimately familiar with your car. You drive it every day, you know its quirks, its usual sounds, and even its typical smells. But when something feels off – perhaps the check engine light illuminates, or an unfamiliar noise emerges from under the hood – that familiar comfort can quickly turn into confusion. This is precisely when understanding how to do a car diagnostic test yourself becomes invaluable.
In today’s world, being self-reliant is more important than ever. Performing a car diagnostic test at home empowers you, especially when dealership service bays are booked or you prefer to understand your vehicle better. This comprehensive guide will answer your most pressing questions about car diagnostic tests and equip you with the knowledge to confidently perform one yourself.
Understanding Car Diagnostic Tests
A car diagnostic test is a systematic process to pinpoint potential problems within your vehicle’s critical systems, including the engine, exhaust, transmission, ignition, fuel system, and more. Modern vehicles are equipped with sophisticated onboard computer systems that monitor these systems and record error codes when anomalies are detected. A diagnostic test accesses this information.
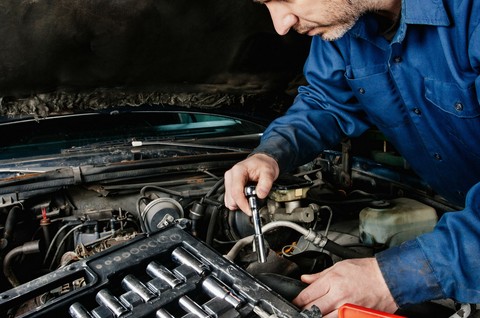
Traditionally, diagnostic tests are performed by mechanics and dealerships. However, with the right tools and a bit of know-how, you can easily conduct a car diagnostic test at home. While it might sound intimidating, the process is actually quite straightforward and can be completed quickly and affordably on your own.
Why Regularly Perform a Car Diagnostic Test?
Many car owners only consider a diagnostic test when a major issue arises, like a significant breakdown or when the dreaded check engine light stubbornly remains lit. This reactive approach often leads to more extensive damage and higher repair costs. Ignoring warning signs can be like neglecting a small health issue until it becomes a serious medical condition.
Learning how to perform a simple car diagnostic test empowers you to take a proactive approach to vehicle maintenance. Regular checks allow you to identify and address minor problems early on, preventing them from escalating into costly and complex repairs. This preventative strategy is not only more cost-effective but also ensures your vehicle remains in optimal condition, enhancing its longevity and reliability. Think of it as regular health check-ups for your car, ensuring minor issues are caught before they become major headaches.
How Long Does a Car Diagnostic Test Take?
The initial scan of your car’s computer system, which is the core of a diagnostic test, is typically very quick, often taking just a few minutes. This process begins with reading the check engine light codes, also known as OBD2 codes. Mechanics use a car diagnostic scanner to connect to your vehicle’s OBD-II port and retrieve these trouble codes, which act as indicators of potential issues.
After retrieving the Diagnostic Trouble Codes (DTCs), a mechanic might spend additional time investigating further, depending on the complexity of the codes and the potential issues they indicate. This deeper investigation aims to provide a more precise understanding of the malfunction and the best course of action for repair.
If you choose to take your car to a professional auto repair shop, factor in waiting time before the test and consultation time afterward to discuss the findings and recommended solutions. Realistically, you should expect to spend at least an hour at the shop for a diagnostic service, and it could easily extend to 2-3 hours depending on the shop’s workload and the complexity of the diagnosis.
What is the Cost of a Car Diagnostic Test?
The price of a car diagnostic test can fluctuate significantly based on factors such as your car’s make and model, the complexity of the potential problem, and where you choose to have the test performed. Industry experts estimate that you could pay anywhere from $40 to $400 for a diagnostic test at a dealership or repair shop, and this cost is solely for the diagnosis, not including any subsequent repairs.
While some auto parts stores or service centers advertise “free car diagnostic services,” it’s important to understand the fine print. Often, these “free” services are limited to a basic engine light code pull. In many cases, they will use the initial code reading as a basis for recommending further, paid diagnostic work. Additionally, some places offering free code pulls may encourage you to purchase a scanner or parts from their store.
If you’re considering taking your car to a shop because you suspect a serious problem, it’s wise to be informed. Learning how to do an initial diagnostic test yourself can give you valuable insight before you consult a mechanic.
Further Reading: 5 Essential Tips for Choosing a Reliable Mechanic and Avoiding Scams
However, given the simplicity of pulling the initial codes, and the availability of affordable and user-friendly OBD2 scanners, performing this initial diagnostic step at home is highly recommended. Let’s delve into how you can do just that.
Step-by-Step Guide: How to Perform a Car Diagnostic Test at Home
Contrary to popular belief, conducting a car diagnostic test isn’t about magically inspecting every component of your vehicle. It’s a structured process that primarily involves two key steps, both easily manageable at home without specialized automotive expertise. The core of the process is learning to read and interpret OBD2 codes.
Step 1: Reading Diagnostic Trouble Codes (DTCs)
Every car diagnostic test begins with reading the Diagnostic Trouble Codes, also known as On-Board Diagnostic Codes (OBD Codes). The implementation of On-Board Diagnostic systems became mandatory for all vehicles sold in the United States starting in 1996. This standardization included a comprehensive trouble code system to report self-diagnostic results. Therefore, for virtually all cars manufactured after 1996, you can use a standard OBD2 scanner or reader to perform a car diagnostic test. For a deeper understanding of OBD2 codes, refer to this resource:
Related Article: Comprehensive Guide to Understanding OBD2 Codes
An OBD2 scanner allows you to access and retrieve diagnostic trouble codes, or check engine light codes, directly from your car’s computer. These codes provide a list of potential problem areas. While they don’t pinpoint the exact fault, they offer valuable information about the nature of the issue, guiding you on how to further diagnose and potentially fix it.
The market offers a wide array of OBD2 scanners and car code readers. To help you choose the right tool, we’ve created a detailed buying guide covering the different types of OBD2 scanners, key selection criteria, and usage instructions. And for a limited time, we are offering a FREE GIVEAWAY of our smart Bluetooth OBD2 scanner (just pay shipping). We believe that a tool like this empowers you to understand your car better and proactively prevent major problems with its user-friendly design and easy installation.
Recommended Reading: The Ultimate OBD2 Scanner & Code Reader Buying Guide
Step 2: Interpreting the Codes and Investigating Further
Once you have a list of DTCs, the next step is to decipher their meaning and begin to understand the potential problems they indicate.
For example, a code like P0442 signals “Evaporative Emission Control System Leak Detected (Small Leak).” When you look up this code, you’ll find information on possible symptoms, potential causes, and basic diagnostic steps you can perform yourself. This particular code could be triggered by something as simple as a loose gas cap or a more significant issue like a damaged EVAP line, with repair costs ranging from $20 to $100. The appropriate course of action will vary depending on the specific code, other codes present, and your car’s make and model.
Certain Bluetooth OBD2 scanners come with companion apps that provide code definitions and explanations directly on your smartphone. If you are using a more basic ELM327 scanner or a wired tool that doesn’t offer code descriptions, you can easily search for the codes online using search engines like Google.
To simplify this process, we’ve developed a comprehensive online resource that provides detailed information on diagnostic trouble codes, including possible symptoms, common causes, and in some cases, step-by-step diagnostic procedures and simple fixes. If you’ve retrieved codes from your OBD2 reader and need to understand their meaning, this website is an invaluable tool!
Valuable Resource: Search Our Extensive Database of Diagnostic Trouble Codes
Step 3: Utilize Video Resources for DIY Car Repairs
For users of nonda’s Smart Vehicle Health Monitor and the ZUS app, you gain access to complete code diagnostics and, importantly, short, instructional videos demonstrating how to address common issues at home. Watch the example video below to see how these resources can potentially save you significant money on car repairs:
[Embedded YouTube Video about fixing P0420 Engine Code]
Here are more video resources for troubleshooting common DTC codes:
P0171 – System Too Lean (Bank 1) DIY Fix Video
P0456 – EVAP Control System Leak Detected (Very Small Leak) DIY Fix Video
P0300 – Cylinder Misfire Detected, Random/Multiple Cylinder DIY Fix Video
P0400 – Exhaust Gas Recirculation (EGR) Flow Malfunction DIY Fix Video
P0128 – Coolant Thermostat Malfunction DIY Fix Video
These videos are produced by the nonda Auto DIY Center. Visit their YouTube channel for more DTC code troubleshooting guides.
Remember: DIY Diagnostics is Accessible to Everyone!
As you’ve seen, performing a car diagnostic test is not as complex as it might initially seem. It’s absolutely achievable for the average car owner to do it themselves. You don’t need to be a seasoned mechanic to start checking your vehicle. You can begin with minimal prior knowledge and potentially save significant time and money.
Based on the diagnostic codes, you may be able to perform simple repairs yourself, saving considerable money, especially when major repairs are not required, which is often the case. If the diagnostic test reveals a part replacement or more complex diagnostic work is necessary, you can then take your car to a professional mechanic with a basic understanding of the issue, empowering you to avoid unnecessary expenses and potential scams.
Conclusion: Empower Yourself with DIY Car Diagnostics
Regular car diagnostic tests are vital for maintaining your vehicle’s health and preventing minor issues from escalating. While taking your car to a mechanic is a convenient option, learning how to do a car diagnostic test at home can save you money and provide valuable insights into your vehicle’s condition. Even if you don’t feel confident in performing repairs yourself, understanding the diagnostic codes provides you with essential knowledge when consulting with a mechanic, ensuring you’re informed and prepared.
Take the First Step: Try the ZUS Smart Vehicle Health Monitor for FREE
Car diagnostic tests are about more than just clearing check engine lights; they are about gaining a deeper understanding of your vehicle and keeping it running smoothly. To facilitate proactive vehicle monitoring, we developed the ZUS Smart Vehicle Health Monitor, designed to help drivers connect with their cars on a new level.
Here’s how it can benefit you:
- Real-time Vehicle Monitoring: Stay informed about your car’s health continuously.
- Automatic Health Checks: Receive a vehicle health check every time you start your car.
- Simple Setup and Use: Effortless installation and intuitive operation.
- Instant Issue Alerts: Get immediate notifications and code explanations when OBD2 codes appear.
- Historical Code Record: Track all past OBD2 codes for a comprehensive vehicle history.
- FREE Device & App: Enjoy both the device and the app completely free (just pay shipping) on both Android and iOS!
We are currently running a FREE GIVEAWAY campaign for the ZUS Smart Vehicle Health Monitor to make vehicle safety and awareness accessible to more drivers. Don’t miss this opportunity – check it out today!
We encourage you to share your thoughts and questions in the comments section below. We’re committed to expanding this article with more helpful content for our readers.