
Torn car upholstery can quickly diminish the overall appeal of your vehicle’s interior. Even a small rip or burn, especially when the rest of your interior is well-maintained, can be an eyesore. Before you consider expensive solutions like seat covers or professional reupholstering services, you might be surprised to learn that simple DIY car upholstery repair is within your reach and can save you a significant amount of money.
1. Assessing the Damage to Your Car Upholstery
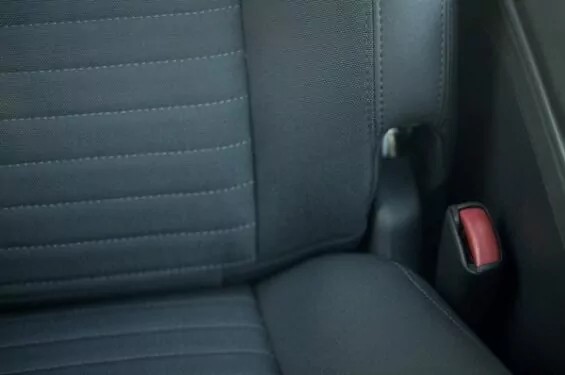
The crucial first step in any car upholstery repair is to thoroughly assess the damage. Understanding the extent and nature of the problem will determine whether it’s a DIY-friendly fix or requires professional intervention. For instance, if you find a significant hole or tear in leather upholstery, the repair process becomes considerably more complex and might not yield satisfactory results with DIY methods. Furthermore, and most importantly, if the damage extends to critical safety components such as the seat belt mechanisms or airbags embedded in the seats, attempting a DIY repair is strongly discouraged. In such cases, the integrity of your car’s safety systems is paramount, and consulting a certified professional is the only responsible course of action. They possess the expertise to address these issues safely and effectively, ensuring your vehicle remains safe and compliant with safety standards.
 repair car upholstery
It’s also important to have realistic expectations about DIY repairs. While you can effectively mend a tear or patch a hole, achieving a factory-new finish is often not possible. If the damage is in a very prominent area of your car’s interior, or if you are planning to keep your vehicle for many years and desire a flawless look, investing in professional car upholstery repair or reupholstering might be the more suitable long-term solution. Professionals have access to specialized tools, materials, and techniques to achieve a higher quality and more durable repair, especially for extensive or complex damage.
2. Sewing Tears in Cloth Car Seats
For cloth seats, mending simple tears can be a straightforward DIY project. If you’re dealing with a clean tear in the fabric, investing in a few specialized tools can make the repair process both easier and more effective. A curved upholstery needle is designed to navigate through the thicker materials commonly used in car seats, making stitching less cumbersome. It’s also essential to choose an extra-strong thread specifically designed for upholstery. These threads are more durable and resistant to wear and tear, ensuring your repair holds up over time. Crucially, take the time to find a thread color that closely matches your car seats. This will help the repair blend in seamlessly with the existing upholstery, making it less noticeable.
Before you begin stitching directly on your car seat, especially if you are new to sewing repairs, it’s a good idea to practice your stitching technique on a spare piece of similar fabric. This allows you to perfect your stitch and tension, ensuring a neat and strong repair on your actual car seat. Once you are confident, carefully bring the edges of the tear together and begin stitching. Aim for small, consistent stitches to create a strong and discreet seam.
After you’ve completely closed the tear, the next step is to prevent fraying and further damage to your repair. Applying a fabric sealant along both sides of the stitched area can significantly reinforce the repair. Fabric sealant acts as a protective barrier, preventing the edges of the fabric from unraveling and adding to the longevity of your DIY fix. Choose a sealant that is designed for upholstery and flexible fabrics to maintain the seat’s comfort and appearance.
3. Patching Small Holes in Car Upholstery
Small holes in cloth car seats, often caused by cigarette burns or pet damage, are generally quite manageable to repair yourself, provided they are smaller than about two inches in diameter. A common and effective method for repairing these types of holes involves using a fabric interfacing that is heat-activated to adhere to fabric. The key to a successful patch is selecting a fabric that is as close as possible in color and texture to your existing car upholstery. This will help the patch blend in and minimize its visibility. You can often find suitable fabrics at craft stores or fabric shops. In addition to the fabric, you’ll need fabric adhesive, also available at craft stores. Choose an adhesive specifically designed for fabric and upholstery for a strong and lasting bond.
Start by accurately measuring the size of the hole you need to patch. Cut a piece of your chosen fabric patch that is slightly larger than the hole, allowing for a small overlap around all edges of the damage. Ensure that the edges of your fabric patch are neat and square for a clean finish.
Next, cut a piece of fabric adhesive interfacing that is slightly larger than the hole itself. Carefully tuck this adhesive piece into the torn area, positioning it underneath the edges of the existing upholstery around the hole. Then, place your fabric patch directly on top, ensuring it covers the hole and overlaps onto the surrounding intact upholstery.
Following the specific instructions provided with your fabric adhesive, use a household iron to apply heat to the fabric patch. The heat will activate the adhesive, bonding the patch to both the interfacing underneath and the surrounding car seat fabric. Apply even pressure with the iron for the recommended duration to ensure a strong and secure bond. Once cooled, the patch should be firmly in place, effectively covering the hole and restoring the appearance of your car seat.
4. Buffing Out Scratches on Leather Car Seats
Leather car upholstery presents a different set of challenges compared to cloth when it comes to repairs. Unfortunately, leather is not as easily repaired with DIY methods, especially for significant damage like tears or deep cuts. However, if you are only dealing with surface-level scratches on your leather seats, there are steps you can take to improve their appearance. For minor scratches, a high-quality leather conditioning cream can be surprisingly effective. Apply a small amount of leather conditioner to a soft cloth and gently buff the scratched area in a circular motion. The conditioner works to moisturize the leather, which can help to minimize the appearance of scratches and restore some of the leather’s natural luster.
If a leather conditioner alone is not sufficient to remove the scratches, you might consider using a specialized spray lacquer designed for leather repair. Apply a very small amount of spray lacquer to the scratched area, following the manufacturer’s guidelines closely. It’s crucial to apply lacquer sparingly and in thin layers. It is always better to apply multiple light coats than one heavy coat, allowing each layer to dry completely in between applications. This gradual approach helps to build up the finish evenly and avoid overdoing it, which can lead to a stiff or unnatural look. Patience is key when using lacquer; take your time and allow it to dry thoroughly between coats to achieve the best possible result.
Another valuable resource for leather car upholstery repair can be your car dealership. Many dealerships offer repair kits specifically designed for the interiors of their vehicles. These kits are often formulated to match the exact type and color of leather used in your car and can be very effective for minor repairs and touch-ups. Contacting your local dealer’s parts or service department to inquire about available repair kits for your specific car model could provide you with a tailored and potentially more successful repair solution.
Whether your seats are leather or cloth, regular cleaning is vital for maintaining their condition. For leather seats, specialized leather cleaners and conditioners are recommended. You can find guides on how to clean leather seats yourself online for detailed instructions and product recommendations.
By following these DIY steps, you can tackle minor car upholstery repairs yourself, saving money and maintaining the appearance of your car’s interior. Remember to assess the damage carefully, choose the right materials and techniques for your upholstery type, and don’t hesitate to seek professional help when dealing with significant damage or safety-related issues.