Few car troubles are as inconvenient as a dead battery. One minute you’re ready to hit the road, and the next, your car won’t even turn over. Understanding how to car battery repair and maintain it can save you from unexpected breakdowns and costly repairs. This guide will walk you through the common causes of dead car batteries, essential repair steps like jump-starting, testing, and even replacing your battery, ensuring you’re equipped to handle battery issues effectively.
Understanding the Common Causes of a Dead Car Battery
Before diving into car battery repair, it’s crucial to understand why batteries fail in the first place. Identifying the root cause can prevent future issues and help you maintain your battery’s health.
User Error: Simple Mistakes, Big Consequences
Often, a dead car battery is a result of simple human oversight. Leaving interior lights on, forgetting to unplug phone chargers from the accessory power source, or prolonged use of car accessories when the engine isn’t running can all drain your battery. Short drives, especially with heavy accessory usage, may not give your alternator enough time to fully recharge the battery after the initial power drain from starting the engine.
Alt text: Interior car light illuminated, illustrating user error as a cause of car battery drain.
Battery Age: The Inevitable Decline
Car batteries, typically lead-acid, multi-cell types, have a limited lifespan. As they age, a natural process called sulfation occurs. This involves the formation of sulfate crystals on the battery’s negative plates. Over time, these crystals accumulate, hindering the battery’s ability to store and deliver power. If your battery is between two to five years old, age-related sulfation might be the reason behind its failure, signaling it might be time for a replacement.
Battery Defects: When It’s Not Just Age
In some cases, a dead battery can be attributed to a manufacturing defect. If you consistently experience battery issues, particularly with a relatively new vehicle or battery, it’s wise to have a professional mechanic conduct a battery test. An internal defect could be preventing the battery from holding a charge or functioning correctly.
Car Charging System Malfunctions: Beyond the Battery Itself
Sometimes, the problem isn’t the battery itself but your car’s charging system. If your battery warning light illuminates while driving, this often indicates a charging system malfunction. Components like the alternator, serpentine belt, battery cables, and terminals could be failing. A mechanic should inspect these components to pinpoint and rectify the issue, ensuring your battery is properly charged while driving.
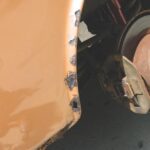
Corrosion on Battery Terminals: A Power Flow Obstruction
Corrosion on battery terminals is another frequent culprit behind dead car batteries. Battery terminals are the connection points between the battery and the car’s electrical system. Corrosion, appearing as a white, ashy buildup, can accumulate on these terminals, impeding the flow of electricity. Cleaning corroded terminals with a wire brush and baking soda solution can often resolve this. However, recurring corrosion might suggest the need to replace the battery, cables, or terminals themselves.
Alt text: Close-up of car battery terminal with visible corrosion, highlighting a common cause of battery issues.
Step-by-Step Guide: Jump-Starting Your Car Battery
When faced with a dead battery, jump-starting is often the quickest solution to get back on the road. This process involves using the battery of another car to provide enough power to start your vehicle.
What You’ll Need for a Jump Start
To jump-start your car, you’ll need:
- Jumper cables: Ensure they are in good condition, without damage to the insulation and with clean, corrosion-free clamps.
- A donor vehicle: A car with a functional battery that can provide the necessary charge.
Safety First: Precautions Before Starting
Before you begin, ensure both vehicles are parked safely, away from traffic, and turned off completely. Engage the parking brakes and ensure both cars are in Park (P) or Neutral (N) for manual transmissions.
The 8 Steps of Jump-Starting a Car Battery
Follow these steps carefully to jump-start your car safely and effectively:
-
Check Jumper Cables: Inspect your jumper cables for any damage, such as frayed wires or corroded clamps. Make sure the clamps are clean and free of debris.
-
Turn Off Engines on Both Cars: Ensure both vehicles are completely turned off. Remove keys from the ignition to prevent accidental starting during the process.
-
“Red on Dead”: Connect to the Dead Battery’s Positive Terminal: Identify the positive (+) terminal on your dead battery. It’s usually marked with a “+” symbol and may have a red cover. Attach the red clamp of the jumper cable to this positive terminal.
-
Clamp to the Live Vehicle’s Positive Terminal: Connect the other red clamp to the positive (+) terminal of the working battery in the donor vehicle.
-
Ground the Dead Vehicle: Connect to a Ground Point: Locate an unpainted metal surface under the hood of your car with the dead battery, away from the battery itself. This could be a metal strut or engine bolt. Attach the black clamp to this ground point to complete the circuit and minimize the risk of sparks near the battery. Do not connect directly to the negative terminal of the dead battery.
-
Clamp to the Live Vehicle’s Negative Terminal: Connect the final black clamp to the negative (-) terminal of the working battery in the donor vehicle.
-
Start the Engine of the Donor Vehicle: Start the engine of the car with the good battery and let it run for a few minutes. This allows some charge to transfer to the dead battery.
-
Start the Engine of the Car with the Dead Battery: After a few minutes, try starting the car with the dead battery. If it doesn’t start immediately, wait a few more minutes and try again. Avoid prolonged cranking, which can overheat the starter motor.
Alt text: Diagram illustrating the correct jumper cable connection sequence for jump-starting a car battery.
What to Do if Jump-Starting Fails
If your car doesn’t start after jump-starting, even after ensuring correct connections and sufficient charging time, the issue might be more complex than just a dead battery. It could indicate a severely discharged battery, a problem with the starter motor, or an issue within the car’s electrical system. In such cases, it’s best to seek professional assistance from a mechanic.
Testing Your Car Battery: DIY and Professional Methods
Regularly testing your car battery is a proactive approach to car battery repair and maintenance. It helps identify potential issues before they lead to complete failure.
When to Test Your Battery
You should consider testing your car battery if:
- Your car is slow to start.
- You notice dim headlights or flickering interior lights.
- Your battery is over two years old.
- You’ve experienced frequent jump starts.
Testing with a Multimeter: A DIY Approach
A multimeter is a handy tool for testing your car battery’s voltage. You can purchase one for around $10-$20 online or at auto parts stores.
Steps to test with a multimeter:
- Set the Multimeter: Set your multimeter to read DC voltage in the 15-20 volt range.
- Connect to Battery Terminals: Connect the red lead of the multimeter to the positive (+) terminal of your car battery and the black lead to the negative (-) terminal.
- Read the Voltage: Observe the voltage reading on the multimeter.
Interpreting Voltage Readings:
- 12.6 volts or higher: Your battery is fully charged and in good condition.
- 12.4 volts: Your battery is at about 75% charge.
- 12.2 volts: Your battery is at about 50% charge.
- 12.0 volts or below: Your battery is significantly discharged and needs recharging or replacement. A reading below 12 volts often indicates a failing battery.
Consult your car’s owner manual for specific voltage recommendations, but generally, a healthy car battery at rest should read around 12.6 volts.
Recognizing Signs of a Weakening Battery
Even without a multimeter, you can often detect a weakening battery through your car’s performance:
- Lazy Engine Cranking: If your engine turns over slowly or takes longer than usual to start, it could be a sign of a weak battery struggling to provide sufficient power to the starter motor.
- Flickering Lights: Dim or flickering headlights or interior lights, especially when the engine is idling, can indicate that the battery is not holding a charge effectively.
Professional Battery Testing
For a more comprehensive battery test, especially if you suspect internal issues or charging system problems, consider professional testing at an auto service shop. Mechanics have specialized equipment to assess battery health, including load testing, which simulates the battery’s performance under heavy load conditions.
Choosing the Right Replacement Car Battery
When testing reveals that your battery needs replacement, selecting the correct new battery is crucial for your vehicle’s performance and reliability. Car battery repair sometimes means replacement, and choosing the right one is key.
Key Considerations for Battery Selection
-
Battery Size and Fit (Group Size): Car batteries come in various sizes, designated by “group sizes.” Your new battery must physically fit into your car’s battery tray. Consult your owner’s manual or use online battery finders to determine the correct group size for your vehicle.
-
Cranking Amps (CA) and Cold Cranking Amps (CCA): Cranking Amps (CA) indicate the battery’s ability to start an engine in warmer temperatures, while Cold Cranking Amps (CCA) measure starting power in freezing conditions (0°F or -18°C). Choose a battery with CCA and CA ratings that meet or exceed your vehicle’s requirements, especially if you live in a colder climate. Your owner’s manual will specify the minimum CCA requirement.
-
Maintenance Type: Maintenance-Required vs. Maintenance-Free:
- Maintenance-required batteries (conventional flooded batteries) have removable caps for adding distilled water to maintain electrolyte levels. They tend to be less expensive initially but require periodic maintenance.
- Maintenance-free batteries (Absorbent Glass Mat – AGM, or Gel Cell) are sealed and don’t require electrolyte level checks. They are more convenient and often have longer lifespans but are generally more expensive.
Consulting Your Owner’s Manual
Your car’s owner’s manual is an invaluable resource for determining the correct battery specifications, including group size, CCA, and CA requirements. Always refer to it when choosing a replacement battery to ensure compatibility and optimal performance.
How to Replace Your Car Battery: A DIY Guide
Replacing a car battery is a task you can often perform at home with basic tools and precautions. This is a fundamental aspect of how to car battery repair that empowers car owners.
Safety Precautions Before Battery Replacement
Safety is paramount when replacing a car battery due to the presence of battery acid and potential for electrical sparks.
- Read Your Owner’s Manual: Always check your owner’s manual for specific safety instructions or precautions.
- Wear Protective Gear: Wear gloves and eye protection to shield yourself from battery acid, which can cause skin and eye irritation.
- Use Insulated Tools: Use wrenches or battery pliers with insulated handles to minimize the risk of electrical shock and short circuits.
- Avoid Sparks: Be cautious to prevent sparks, especially near the battery terminals, as hydrogen gas can be present around batteries and is flammable.
Step-by-Step Battery Replacement
-
Make Certain Your Engine Isn’t Running: Ensure your vehicle is turned off completely and the engine is not running. Engage the parking brake.
-
Detach the Negative Terminal First: Using a wrench or battery pliers, loosen the nut on the negative (-) battery cable clamp. The negative terminal is usually black and marked with a “-” symbol. If corrosion is present, clean it with a baking soda and water solution or a battery terminal cleaner. Once loosened, carefully remove the negative cable and tuck it aside, ensuring it doesn’t accidentally touch the battery terminal.
-
Detach the Positive Terminal: Repeat the process for the positive (+) battery cable. The positive terminal is usually red and marked with a “+” symbol. Remove the positive cable and keep it separate from the negative cable.
-
Remove the Battery Hold-Down Clamp: Locate the battery clamp that secures the battery in the tray. This might be a strap, a clamp across the top, or clamps at the base. Use a wrench or socket to loosen and remove the clamp, freeing the battery.
-
Remove the Dead Battery: Carefully lift the old battery out of the battery tray. Batteries can be heavy, so lift with your legs and keep your back straight. Place the old battery on a level, dry surface away from the work area.
-
Clean the Battery Tray and Terminals: Inspect the battery tray and terminals for corrosion or dirt. Clean the tray and cable terminals using a wire brush and a baking soda and water solution. Rinse with water and dry thoroughly. This ensures good electrical contact for the new battery.
-
Install the New Battery: Place the new battery into the battery tray, ensuring it’s oriented correctly (terminals in the same position as the old battery). Secure the battery using the hold-down clamp, tightening it snugly but not overtightening.
-
Attach the Positive Terminal First: Connect the positive (+) battery cable to the positive terminal of the new battery. Ensure the terminal is clean and the connection is firm. Tighten the cable clamp nut securely.
-
Attach the Negative Terminal: Connect the negative (-) battery cable to the negative terminal of the new battery. Again, ensure a clean and tight connection by securely tightening the cable clamp nut.
-
Double-Check All Connections: After connecting both cables, double-check that all connections are tight and secure. Try to gently wiggle the cables at the terminals; they should not move. Loose connections can lead to starting problems and other electrical issues.
Alt text: Visual guide showing the steps involved in replacing a car battery, emphasizing safety and proper technique.
Safe Disposal of Old Car Batteries: Recycling
Used car batteries are hazardous waste due to their lead and acid content. They should never be thrown in the trash. Instead, recycle your old battery responsibly. Most auto parts stores, service centers like Firestone Complete Auto Care, and recycling centers accept old car batteries for recycling, often offering a small recycling fee credit towards a new battery purchase. Contact your local auto parts store or recycling center for battery recycling options in your area.
By understanding how to car battery repair, including maintenance, jump-starting, testing, and replacement, you can confidently address common battery issues and keep your vehicle running smoothly. Regular battery checks and proactive maintenance can significantly extend battery life and prevent unexpected breakdowns.