Rust is a car owner’s nightmare. If ignored, it can spread relentlessly, turning a vehicle into scrap metal. Cars are manufactured with rust protection, but everyday use and damage can compromise this defense, opening the door for corrosion. The thought of a costly body shop repair is often daunting.
However, don’t despair. If you’re willing to tackle the job yourself, you can effectively stop rust in its tracks and significantly extend the life of your car. It’s a manageable task that primarily requires thoroughness and a commitment to doing it correctly. You can achieve professional-looking results at home.
How Much Can You Save by DIY Rust Repair?
You might be familiar with DIY scratch repair, but rust damage is a more serious issue. Professional rust repair can easily lead to bills reaching hundreds, if not thousands, of dollars, especially if multiple panels are affected.
By taking the DIY route for auto body rust repair, you can save a significant amount of money. The primary expense will be the cost of the necessary tools and repair kit, which is a fraction of what a body shop would charge for labor alone.
Before we proceed, it’s crucial to understand a few key points:
Focusing on Surface Rust Repair
This guide addresses surface rust – corrosion that affects the outer panels but hasn’t compromised the vehicle’s structural integrity. If rust has eaten through floors, created holes in the bodywork, sills, or chassis rails, professional intervention, including welding, is necessary. We are focusing on repairing panel corrosion that hasn’t yet caused structural damage.
About Paint and Finishing
This guide will take you through the rust repair process up to the priming stage, preparing the area for paint. While you can attempt painting yourself, achieving a flawless finish, especially with metallic paints, can be challenging with aerosol cans. Solid colors are more forgiving.
Consider completing the rust repair and priming yourself, then consulting a body shop for professional painting and blending. Their specialized spray equipment is designed for achieving a seamless finish that aerosol cans often cannot replicate.
How to Fix Rust Damage on a Car
Modern vehicles are significantly more rust-resistant than cars from past decades. However, if you live in coastal areas or regions where road salt is used during winter, rust can still develop prematurely, even before mechanical components wear out.
Minor rust damage on non-structural car parts is repairable at home. With careful work and practice, you can restore the affected areas to look as good as new.
Professional classic car restorers often employ cutting and welding techniques to replace rusted sections with new metal. However, for everyday vehicles, using fiberglass epoxy and body filler offers a simpler and more accessible repair method.
Often, rust begins from minor paint damage, such as a chip from road debris or a door ding that cracks the paint. This is why regular car washing and inspections are crucial. Promptly applying touch-up paint to minor chips can prevent rust from developing years down the line, saving you considerable repair work in the future. Follow the step-by-step instructions below to learn how to tackle auto body rust repair.
You will need these tools and materials for effective auto body rust repair:
- Angle grinder with flapper wheels and wire brush attachments
- Wire brush (handheld)
- Fiberglass epoxy gel
- Body filler
- Sandpaper in various grits (80, 400, 600, 1000, 2000)
- Sanding block
- Primer
- Base coat car paint (matching your car’s color)
- 2k clear coat paint (aerosol can)
- Masking tape and paper
- Rubbing compound
- Mineral spirits or Wax and Grease Remover
- Cleaning rags
- Tack cloth
Step-by-Step Guide: How to Remove and Repair Car Rust
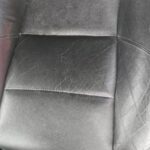
[Image of car rust before repair, alt text: Car panel with significant rust damage before auto body repair process]
Step 1: Preparation and Rust Removal
Begin by thoroughly cleaning the rusted area and the surrounding paintwork. Use soap and water to remove dirt and grime. Once clean and dry, assess the extent of the rust damage.
Attach a flapper wheel to your angle grinder. Carefully grind away the surface rust, working outwards from the center of the rusted area. The goal is to remove all visible rust and a bit of the surrounding paint to ensure proper adhesion for the repair materials. Be cautious not to grind too aggressively and damage the surrounding good metal.
[Image of using angle grinder to remove rust, alt text: Technician using angle grinder with flapper wheel to remove rust from car body panel]
Switch to a wire brush attachment on the angle grinder or use a handheld wire brush to reach tighter spots and remove any remaining loose rust particles within the pitted areas. Clean the area again with mineral spirits or wax and grease remover to eliminate any dust and grease.
Step 2: Apply Fiberglass Epoxy
Fiberglass epoxy is crucial for sealing the metal and preventing future rust. Mix the fiberglass epoxy gel according to the manufacturer’s instructions. Apply a thin, even layer of the epoxy over the entire rust-affected area and slightly beyond onto the bare metal.
[Image of applying fiberglass epoxy, alt text: Close-up showing application of fiberglass epoxy gel to a car rust repair area]
Allow the fiberglass epoxy to cure completely as per the product instructions. This usually takes a few hours. Once cured, the epoxy will provide a hard, waterproof barrier.
Step 3: Body Filler Application
After the epoxy has cured, it’s time to apply body filler to level the repair area with the surrounding bodywork. Mix the body filler with the hardener as directed. Apply a thin layer of body filler using a plastic spreader, pressing it firmly into the repaired area. Work in thin layers, building up gradually to avoid air pockets and ensure proper curing.
[Image of applying body filler, alt text: Auto body technician applying body filler to car panel rust repair area with spreader]
Let each layer of body filler partially cure before applying the next. Once you have slightly overfilled the area, allow the body filler to fully harden.
Step 4: Sanding and Shaping
Now, the shaping process begins. Start with 80-grit sandpaper on a sanding block to roughly shape the body filler, removing the excess and bringing it closer to the level of the surrounding panel. Use progressively finer grits of sandpaper – 400, then 600 – to refine the shape and smooth the surface. Ensure you are sanding evenly and checking the contours frequently to match the original body lines.
[Image of sanding body filler, alt text: Sanding down body filler on car panel during auto body rust repair process]
For the final smoothing before priming, use 1000-grit and then 2000-grit sandpaper, wet sanding with water to achieve an ultra-smooth finish. Clean the repair area thoroughly with a tack cloth to remove any sanding dust.
Step 5: Priming and Painting
Mask off the surrounding area with masking tape and paper to protect it from overspray. Apply several thin coats of primer to the repaired area, allowing each coat to dry according to the primer’s instructions. Primer provides a uniform surface for paint adhesion and helps to reveal any imperfections that may need further attention.
[Image of car panel after priming, alt text: Car body panel after primer application, ready for painting in DIY rust repair]
After the primer is fully dry, lightly wet sand with 2000-grit sandpaper to smooth out any primer texture. Clean the area again. Apply several thin coats of your base coat car paint, matching your car’s color code, followed by 2k clear coat for protection and shine. Allow each coat to dry properly.
Step 6: Blending and Polishing
Once the clear coat is completely cured, you can use rubbing compound to blend the edges of the new paint with the surrounding original paint. This helps to create a seamless transition. Follow the rubbing compound with a polishing compound to enhance the shine and remove any swirl marks.
[Image of finished rust repair, alt text: Finished auto body rust repair, car panel restored to original condition after DIY process]
Conclusion
DIY auto body rust repair is a rewarding and cost-effective way to maintain your vehicle’s condition and prevent further damage from corrosion. By following these steps and taking your time, you can successfully remove rust, restore your car’s appearance, and protect it for years to come. Remember to always prioritize safety by wearing appropriate protective gear during the repair process.