When that check engine light illuminates on your dashboard, it’s your car’s way of saying something isn’t quite right. Modern vehicles are equipped with sophisticated on-board diagnostic (OBD) systems that monitor various aspects of performance and can pinpoint potential problems. Mechanics often talk about retrieving codes from your car’s computer to diagnose these issues. But did you know you can access this information yourself? By learning how to access your car’s computer diagnostic port, you can gain valuable insights into your vehicle’s health and potentially save time and money on repairs.
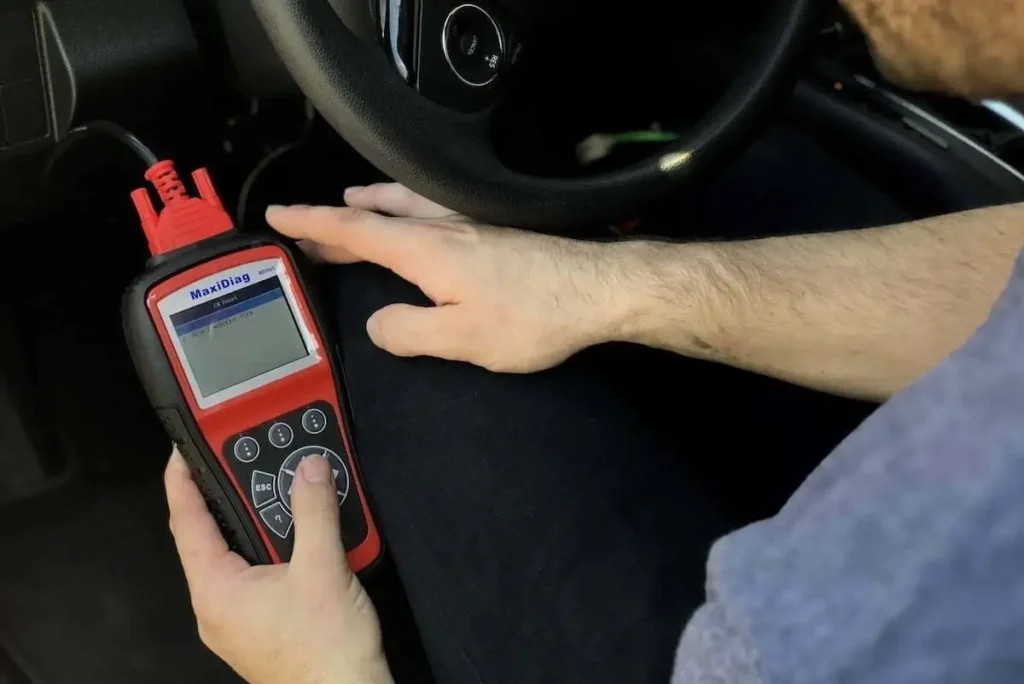 Mechanic using an OBD-II code reader to access a car's computer diagnostic port, illustrating how to diagnose vehicle issues.
Understanding the diagnostic codes triggered by your car can provide peace of mind and sometimes even lead to a simple fix, like tightening a loose gas cap. However, in most cases, a check engine light signals a problem that requires professional attention. Even then, knowing the diagnostic code empowers you to approach your mechanic with a clearer understanding of the issue at hand.
Let’s delve into the workings of the OBD system, guide you through the process of accessing your car’s diagnostic port, and explain how to interpret the diagnostic trouble codes (DTCs) it reveals.
Understanding Your Car’s OBD-II System
The journey of on-board diagnostics began with the need to regulate vehicle emissions. OBD systems were conceived as a way to monitor and control powertrain-related electronics to ensure vehicles were running cleanly. An on-board computer, the engine control unit (ECU), became the central hub for collecting and storing data about system performance.
In the early days, during the 1980s, these diagnostic systems, known as Assembly Line Diagnostic Link (ALDL), lacked standardization. Each car manufacturer had its own unique system, creating a complex landscape for mechanics.
A significant shift occurred when California mandated that all vehicles sold within the state must have a computer interface by 1991. This push for standardization led to the development of OBD-II standards, officially designated by California in 1994 and becoming mandatory in 1996. The systems from 1991 to 1995 were retrospectively classified as OBD-I.
OBD-II brought about a revolution in vehicle diagnostics. The standardization of the diagnostic connector across all car makes drastically reduced the cost of code scanners. This accessibility empowered mechanics and even car owners to diagnose vehicle issues more effectively. No longer were expensive, manufacturer-specific scanners the only option.
The car’s computer diligently stores OBD-II data, which can be readily accessed using a diagnostic tool. These tools range from basic code readers, capable of retrieving and clearing some DTCs, to advanced scan tools that offer comprehensive access to OBD-II functions supported by the ECU. High-end scanners can even provide real-time data streams, offering mechanics a detailed view of the vehicle’s operation.
Exploring OBD-II Modes of Operation
The OBD-II system operates through a series of modes, each designed to access different types of diagnostic information. While there are ten modes in total, not all are necessarily supported by every vehicle manufacturer. For the average DIY enthusiast interested in accessing their car’s computer diagnostic port, Modes 1 through 4 are the most relevant. These modes cover accessing real-time data, freeze frame data, diagnostic trouble codes, and clearing codes.
- Mode 1 — Show Data Parameter IDs (PIDs): This mode displays live sensor data, providing a real-time view of various parameters as your car operates.
- Mode 2 — Show Freeze Frame Data: When a trouble code is logged, this mode captures a snapshot of the vehicle’s PIDs at that precise moment. This “freeze frame” data offers valuable context surrounding the conditions when the fault occurred, although it represents data captured over a short period around the event.
- Mode 3 — Show Stored DTCs: This is the mode most users will utilize to access their car’s computer diagnostic port for fault codes. It displays any diagnostic trouble codes currently stored in the computer’s memory. These codes typically begin with the letter “P” followed by four numerical digits.
- Mode 4 — Clear DTCs: This mode allows you to erase logged trouble codes from the computer’s memory. It’s important to note that clearing codes without addressing the underlying issue will only temporarily turn off the check engine light, and the code will likely return.
The remaining OBD-II modes are geared towards more advanced diagnostics and functions, including accessing pending codes and vehicle identification information. Diagnostic tools often present these modes in a user-friendly manner, replacing technical terms like “Mode $03” with clear labels such as “Display diagnostic trouble codes” or simply “Read codes.”
Step-by-Step Guide: How to Access Your Car’s Diagnostic Port
To access your car’s computer diagnostic port, you’ll need a scan tool or code reader. The market offers a wide range of options, from basic handheld readers to more sophisticated, feature-rich scan tools. Choose a tool that aligns with your needs and desired level of information. For beginners, selecting a tool with a comprehensive user manual can be particularly beneficial.
The diagnostic port itself is a standardized 16-pin connector, and in almost every vehicle, you’ll find it located beneath the dashboard on the driver’s side. Once you’ve located the port, follow these steps to access your car’s data:
- Connect the Diagnostic Tool: Plug your scan tool or code reader securely into the OBD-II diagnostic port.
- Turn On the Ignition: Turn your car’s ignition to the “ON” position. This provides power to the car’s computer and the diagnostic port. You do not need to start the engine.
- Power Up the Tool: Most scan tools will power on automatically once connected to the port. If not, ensure it is powered on according to the manufacturer’s instructions.
- Access Data via Tool Interface: Follow the operating instructions specific to your scan tool to navigate its menu and access vehicle data.
To retrieve diagnostic trouble codes, typically you’ll need to select an option like “Read Codes” or “Display DTCs” within your scan tool’s menu. The tool will then display any codes stored in your car’s computer memory. Unless you’re using a professional-grade or manufacturer-specific tool, you will primarily see “P” codes (Powertrain). These codes are followed by four numbers, such as “P0128”. Sometimes, a letter may appear in place of one of the numbers.
If multiple codes are present, your scan tool may display them sequentially, requiring you to scroll or press a button to view each one. It’s crucial to record all codes in the order they are displayed.
Important Note: Avoid clearing any codes until you have properly diagnosed and resolved the underlying issue. If you require professional mechanic assistance, these codes provide valuable information to the technician, potentially saving diagnostic time and costs. Often, seemingly unrelated codes can offer crucial insights to experienced technicians.
Decoding OBD-II Trouble Codes
Once you have retrieved the diagnostic trouble codes from your car’s computer, the next step is to understand what they mean. A comprehensive OBD-II trouble code chart is an invaluable resource for this. You can find these charts online or often within the documentation of your scan tool.
Start by referencing the first code on your list. By looking up each code, you can discover its meaning, common symptoms associated with it, and potential causes. While some codes might point to simple fixes, the majority will likely necessitate professional diagnosis and repair. However, understanding the codes beforehand empowers you when discussing the issue with your mechanic.
Understanding the Code Structure
OBD-II codes follow a standardized five-character format, which provides a structured way to understand the nature and location of the problem.
- First Letter: As mentioned, most codes begin with “P” for Powertrain, indicating issues related to the engine, transmission, and related systems. Professional-grade scanners may also display codes starting with “B” (Body), “C” (Chassis), or “U” (Network/Communication).
- First Number: The digit following the letter indicates whether the code is generic (standard across all makes) or manufacturer-specific. “0” indicates a generic code (e.g., P0XXX, C0XXX), while “1” signifies a manufacturer-specific code (e.g., P1XXX, C1XXX).
- Second Number: This number specifies the vehicle system affected by the code. For “P” codes:
- “0” and “1”: Fuel and Air Metering
- “2”: Fuel and Air Metering – Injector Circuit
- “3”: Ignition System or Misfire
- “4”: Auxiliary Emission Controls
- “5”: Vehicle Speed Controls and Idle Control System
- “6”: Computer Output Circuit
- “7”, “8”, “9”: Transmission
- “0” (Letter): Hybrid Powertrain System
- “0” (Number) can also indicate Auxiliary Emission Controls in some cases.
- Last Two Numbers: These final digits pinpoint the specific component or circuit within the identified system that is triggering the code. While they offer a more precise clue, remember that a single code can have multiple potential causes. For example, a misfire code could stem from spark plug issues, ignition coil problems, fuel injector faults, or other factors.
Decoding OBD-II codes is a valuable first step in understanding your car’s issues. By learning how to access your car’s computer diagnostic port and interpret these codes, you can become a more informed car owner, better equipped to maintain your vehicle and communicate effectively with automotive professionals.