
The control arms in your vehicle’s suspension system are essential components that connect the wheels to the chassis, ensuring a smooth and stable ride. While often durable, control arms, especially lower control arms, can wear out or get damaged over time, leading to the need for replacement. If you’re experiencing issues with your car’s handling or notice unusual noises, you might be wondering, “how much to repair cars lower arms?” This comprehensive guide will walk you through the factors influencing the cost of lower control arm repair, signs of a failing control arm, and whether it’s a DIY job or best left to a professional.
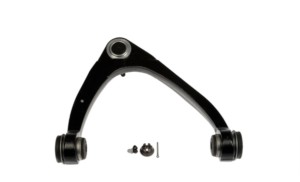
Duralast Gold upper control arm with ball joint for car suspension repair
When to Consider Lower Control Arm Repair or Replacement
Lower control arms are built to last, often exceeding 100,000 miles. However, their lifespan is significantly affected by driving habits and vehicle maintenance. Daily driving stresses, coupled with rough road conditions or accidental impacts, can cause damage to the lower control arm itself, or its bushings and ball joint components. Recognizing the common causes of damage is crucial for timely intervention:
- Control Arm Bushing Deterioration: The bushings, typically made of rubber or polyurethane, are designed to absorb road vibrations and allow controlled movement. Over time, these bushings can crack, wear down, or completely fail, diminishing their ability to dampen vibrations and maintain proper suspension alignment.
- Physical Damage to the Control Arm: Impacts from hitting potholes, curbs, or involvement in collisions can bend or even fracture the lower control arm. Such physical damage compromises the structural integrity of the suspension system.
Ignoring a damaged lower control arm is not advisable. Driving with a faulty control arm can result in compromised steering responsiveness, uneven and accelerated tire wear, and undue stress on other suspension and steering components. These issues can escalate into more costly repairs and, more importantly, create unsafe driving conditions. Addressing a lower control arm problem promptly is key to preventing further damage and ensuring vehicle safety.
How Much Does Lower Control Arm Repair Cost?
The cost to repair or replace lower control arms can vary depending on several factors. Generally, you can expect the cost of parts alone to range from $50 to $200 per lower control arm. Labor costs can add significantly to this, typically ranging from $150 to $500 per arm, depending on your location and the complexity of your vehicle’s suspension system.
Therefore, the total cost to replace one lower control arm can range from $200 to $700, and replacing both lower control arms could cost between $400 and $1400.
Here’s a breakdown of factors that influence the cost:
- Vehicle Make and Model: Luxury vehicles or those with complex suspension systems may have more expensive parts and require more labor time.
- Parts Quality: Opting for aftermarket parts can sometimes be cheaper than Original Equipment Manufacturer (OEM) parts, but quality can vary. Brands like Duralast offer reliable aftermarket options.
- Labor Rates: Mechanic labor rates differ by location and shop. Dealerships generally charge more than independent repair shops.
- Number of Control Arms Replaced: Replacing both lower control arms at the same time is often recommended to ensure balanced suspension performance and can sometimes save on labor costs compared to replacing them individually at different times.
DIY Lower Control Arm Replacement vs. Professional Mechanic
Replacing a lower control arm can be a moderately challenging DIY task, depending on your vehicle and your mechanical skills. For those with experience in car repairs, the right tools, and a repair manual, it’s often manageable. However, if you are unsure or lack experience, consulting a professional mechanic is always the safer route.
DIY Replacement:
If you choose the DIY route, you’ll need to acquire the necessary tools and parts, including:
- New lower control arm(s) compatible with your vehicle
- Torque wrench for proper bolt tightening
- Breaker bar for loosening stubborn bolts
- Pliers for removing clips and pins
- Safety glasses and gloves for protection
- Penetrating oil to loosen rusted components
- Vehicle-specific repair manual for guidance
- Jack and jack stands to safely lift and secure your vehicle
- Socket wrench set for various bolt sizes
Duralast mechanics tool set for DIY car repairs
Steps for DIY Lower Control Arm Replacement (General Guide):
Always consult your vehicle’s repair manual for specific instructions and torque specifications.
- Prepare the Vehicle: Park on a level surface, engage the parking brake, and disconnect the negative battery terminal for safety.
- Lift and Secure the Vehicle: Use a jack to lift the vehicle and securely place it on jack stands. Ensure stability before proceeding.
- Remove the Wheel: Use a lug wrench to loosen the lug nuts, then remove the wheel to access the suspension components.
- Locate the Lower Control Arm: Identify the lower control arm, noting its connection points to the frame and wheel hub/knuckle.
- Disconnect the Ball Joint: Loosen the ball joint nut, and use a ball joint separator tool or hammer to carefully separate the ball joint from the spindle. Remove the nut completely.
- Disconnect from the Frame: Locate and remove the bolts securing the control arm to the vehicle frame. Penetrating oil can be helpful for rusted bolts.
- Remove the Old Control Arm: Carefully slide out the old lower control arm, noting its orientation for easier installation of the new part.
- Inspect and Compare Parts: Compare the new control arm with the old one to ensure correct fit and inspect bushings and ball joint for condition.
- Install the New Control Arm: Align the new control arm, insert frame bolts (don’t fully tighten yet), and attach the ball joint to the spindle, tightening the nut to the specified torque using a torque wrench.
- Tighten Frame Bolts: Return to the frame bolts and tighten them to the manufacturer’s recommended torque specifications.
- Reinstall Wheel and Lower Vehicle: Reattach the wheel, hand-tighten lug nuts, lower the vehicle, and then torque lug nuts to spec.
- Test and Inspect: Double-check all connections, take a test drive, and listen for noises. Re-torque lug nuts after the test drive.
Professional Mechanic:
Choosing a professional mechanic ensures the job is done correctly, especially if you lack experience or specialized tools. Mechanics can also diagnose related issues and provide warranties on their work. While more expensive upfront, professional service can save time and prevent potential errors that could lead to further damage or safety concerns.
Maintaining Your New Lower Control Arms
Proper maintenance will extend the life of your new lower control arms and suspension system. Regular inspections are key:
- Inspect Bushings and Ball Joints: Periodically check for cracks, wear, or damage to the bushings and ball joints.
- Lubricate Ball Joints (if applicable): Some ball joints have grease fittings and require occasional lubrication.
- Avoid Harsh Driving Conditions: Minimize driving on rough roads and avoid potholes when possible to reduce stress on suspension components.
- Schedule Wheel Alignment Checks: Regular alignment checks are crucial to prevent uneven tire wear and ensure all suspension components are working optimally.
Torque wrench for precise car repair
FAQ About Lower Control Arm Repair Cost
How long does lower control arm replacement take?
Replacing a lower control arm typically takes between 1 to 3 hours per arm, depending on vehicle accessibility and mechanic experience.
Can you drive with a bad lower control arm?
It is strongly discouraged. Driving with a damaged lower control arm can compromise steering, cause uneven tire wear, and potentially lead to further suspension damage, making it a safety hazard.
What are the symptoms of a bad lower control arm?
Signs include clunking or knocking noises from the suspension, especially when going over bumps, uneven tire wear, steering wander or looseness, and visible damage to the control arm or bushings.
Is it better to replace both lower control arms at once?
While not always mandatory, replacing both lower control arms at the same time is often recommended. This ensures balanced suspension and handling and can sometimes save on labor costs in the long run, as the labor for alignment is often similar whether you replace one or both.
Where to buy replacement lower control arms?
Reputable auto parts stores like AutoZone offer a wide selection of quality control arms, including brands like Duralast, ensuring you get the right part for your vehicle. Their knowledgeable staff can also provide helpful advice for your repair.