A sagging car ceiling, also known as a headliner, can be an eyesore and a real nuisance. Instead of enjoying your drive, you might find yourself distracted by drooping fabric obstructing your view or simply ruining the interior aesthetics of your vehicle. The good news is, you don’t always need expensive professional repairs to fix this problem. This guide will walk you through effective and budget-friendly methods on how to repair your sagging car ceiling without removing it, saving you time and money. Let’s get your car interior back to its best!
Understanding Your Car’s Headliner
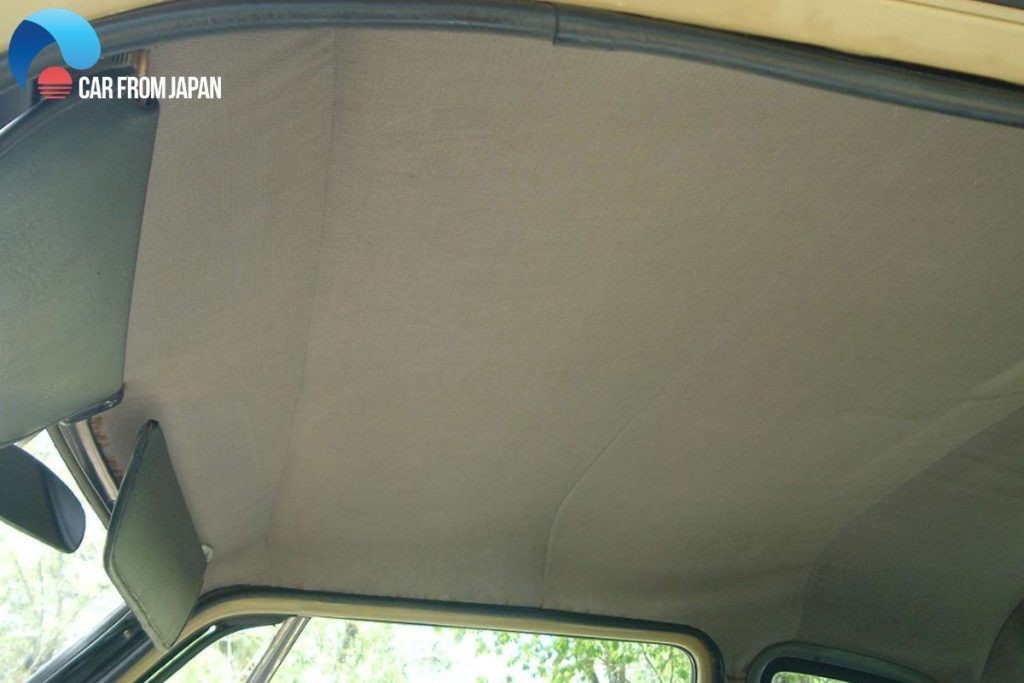
Before diving into repairs, it’s helpful to understand what a car headliner actually is. The headliner is the fabric lining attached to the interior roof of your car. It’s more than just a cosmetic feature; it plays several important roles:
- Aesthetics: It provides a finished, smooth look to the car’s interior, enhancing its overall appeal.
- Insulation: The headliner helps insulate your car’s cabin, keeping it cooler in the summer and warmer in the winter by buffering against external temperatures.
- Noise Reduction: It acts as a sound dampener, absorbing road noise and vibrations, contributing to a quieter and more comfortable ride.
- Acoustics: The headliner can improve the sound quality within the car, optimizing the performance of your car’s audio system.
Typically, a car headliner is constructed from multiple layers. This often includes a foam backing, commonly made of polyurethane, which is bonded to a rigid headliner board. This assembly is then secured to the car’s roof frame.
Why Car Ceilings Sag: Common Causes
Over time, you might notice your car ceiling fabric starting to sag or droop. This is a common problem, and several factors contribute to it. Understanding these causes can help you prevent future issues and choose the best repair method.
- Heat and Sunlight Exposure: Extreme heat, especially from direct sunlight beating down on your car roof, is a primary culprit. The heat degrades the adhesive that bonds the headliner fabric to the backing board, causing it to lose its grip and sag.
- Humidity and Moisture: Moisture, whether from humidity or leaks, can seep into the headliner. The foam backing is particularly susceptible to absorbing moisture, which can weaken its structure and the adhesive, leading to sagging and warping. Leaks from sunroofs, windows, or even condensation can contribute to this problem.
- Degradation of Adhesive: Even without extreme heat or moisture, the adhesive used in headliners naturally degrades over time. This is especially true in older vehicles. As the adhesive breaks down, it loses its ability to hold the fabric firmly in place.
- Poor Initial Installation: In some cases, a sagging headliner can be attributed to a subpar installation from the factory or a previous repair. Insufficient adhesive or improper techniques during manufacturing can lead to premature sagging.
- Physical Stress: While less common, physical stress can also contribute to a sagging headliner. Children or pets playing in the car might pull or scratch at the headliner fabric, putting strain on the adhesive and accelerating the sagging process.
DIY Methods: How to Repair Sagging Car Ceiling Without Removal
Replacing the entire headliner can be a costly and labor-intensive job, often requiring removal of seats and trim. Fortunately, there are several effective DIY methods to repair a sagging car ceiling without the hassle of full removal. These methods are particularly useful for addressing minor to moderate sagging and can save you a significant amount of money.
1. Re-gluing: The Adhesive Solution
For minor sagging, especially around the edges or corners, re-gluing can be a simple and effective fix. This method works best when the fabric is still in relatively good condition and the sagging is not extensive.
What you’ll need:
- Headliner Adhesive Spray: This is a specialized adhesive designed for car headliners, offering strong bonding and heat resistance. Avoid using general-purpose glues as they may not withstand car interior temperatures or bond properly with the headliner materials.
- Masking Tape: To protect surrounding areas and create clean lines.
- Cardboard or Paper: To shield other car interior surfaces from overspray.
- Clean Cloth: For wiping away any excess adhesive.
Steps:
- Preparation: Clean the sagging area of the headliner with a soft brush or vacuum cleaner to remove any dust or loose debris.
- Protection: Mask off the areas around the sagging headliner with masking tape and cardboard or paper to protect them from adhesive overspray.
- Adhesive Application: Shake the headliner adhesive spray can well. Holding the can about 6-8 inches away, apply a light, even coat of adhesive to both the back of the sagging fabric and the corresponding area on the headliner board. Avoid soaking the fabric; a light coat is sufficient.
- Bonding: Allow the adhesive to become slightly tacky – usually a minute or two, as per the product instructions. Gently press the fabric back into place, starting from the center and working outwards to smooth out any wrinkles or air bubbles.
- Secure and Dry: Use your hands or a clean cloth to apply firm, even pressure to the bonded area for a few minutes to ensure a strong hold. Allow the adhesive to dry completely, as per the manufacturer’s instructions, before removing the masking tape. This usually takes a few hours.
2. Pinning: A Quick and Easy Fix
For a fast and inexpensive solution, especially for more significant sagging areas, pinning can be surprisingly effective. This method is straightforward and requires minimal tools.
What you’ll need:
- Sequin Pins or Twist Pins (Headliner Pins): Sequin pins are fine and less visible. Twist pins, also known as headliner repair pins or saggy stoppers, are specifically designed for this purpose and have clear or decorative heads that blend in with the headliner fabric.
- Optional: Pattern Template: If you want a more uniform look, you can create a simple template from cardboard to guide pin placement.
Steps:
- Push Fabric Back: Gently push the sagging headliner fabric back up against the headliner board.
- Insert Pins: Starting at the highest point of the sag, insert pins through the fabric and into the foam backing board. If using sequin pins, push them straight in. If using twist pins, push and then twist the head until it’s firmly in place.
- Pin Pattern (Optional): Arrange the pins in a pattern that is visually appealing and provides even support across the sagging area. You can create rows, diagonal lines, or even a decorative pattern.
- Check and Adjust: Step back and examine the headliner. Add more pins as needed to eliminate sagging and ensure the fabric is held securely against the board.
3. Twist Pins (Saggy Stoppers): Designed for Headliners
Twist pins, often marketed as “saggy stoppers” or “headliner repair pins,” are specifically designed for fixing sagging headliners. They offer a more robust and less visually intrusive solution than standard pins.
What you’ll need:
- Twist Pins (Headliner Repair Pins): These pins typically have a clear or low-profile head and a corkscrew or spiral shank that securely grips the headliner board.
Steps:
- Identify Sagging Areas: Locate the areas where the headliner is sagging most prominently.
- Push and Twist: Push the headliner fabric back into place against the backing board. Position a twist pin against the fabric and push firmly while twisting it into the headliner board. The spiral shank will grip the board, holding the fabric in place.
- Distribute Pins: Space the twist pins evenly across the sagging area, typically every few inches, ensuring you provide adequate support to eliminate the sag.
- Conceal Heads: The clear or low-profile heads of twist pins are designed to be relatively inconspicuous and blend in with most headliner fabrics.
4. Steam Cleaning and Rolling: Re-activating Adhesive
For headliners sagging due to heat-degraded adhesive, steam cleaning can sometimes reactivate the glue, allowing you to re-bond the fabric. This method works best for mild sagging, particularly around the edges, and requires careful execution to avoid damaging the headliner.
What you’ll need:
- Steam Cleaner (Car Detail Steam Cleaner Recommended): A handheld steam cleaner is ideal for focused application. Ensure it has adjustable steam settings to avoid excessive moisture.
- Paint Roller (Soft Foam Roller): To smooth the fabric and ensure even re-adhesion.
- Clean Cloths: To wipe away any moisture or excess adhesive.
Steps:
- Prepare the Area: Clean the sagging headliner area with a soft brush or vacuum cleaner.
- Steam Application: Using the steam cleaner on a low to medium setting, gently apply steam to the sagging fabric. Move the steam cleaner in slow, even strokes, holding it a few inches away from the fabric. The goal is to gently warm the adhesive, not soak the fabric.
- Rolling and Smoothing: Immediately after steaming an area, use the soft foam paint roller to gently roll over the fabric, pressing it back against the headliner board. Work in sections, steaming and rolling, until the sagging is reduced or eliminated.
- Dry Thoroughly: Allow the headliner to air dry completely. Ensure your car is well-ventilated during and after this process to prevent moisture buildup. You can use a fan to speed up drying.
Caution: Be extremely careful when using steam. Excessive heat or moisture can damage the headliner fabric or backing board. Test a small, inconspicuous area first to ensure the steam cleaning method is suitable for your headliner material.
Watch a video tutorial on Truck/Car/Van headliner repair for more visual guidance. (Replace YOUR_YOUTUBE_VIDEO_ID_HERE with a relevant video ID if available)
Preventing Sagging Headliners: Proactive Measures
Prevention is always better than cure. Taking a few proactive steps can significantly extend the life of your car headliner and minimize the chances of sagging.
- Park in the Shade: Whenever possible, park your car in shaded areas or use a car cover, especially during hot and sunny weather. This reduces direct heat exposure to the roof and helps preserve the adhesive.
- Ventilate Your Car: On hot days, crack your windows slightly to allow heat to escape and reduce the buildup of extreme temperatures inside the car.
- Regular Roof and Seal Checks: Inspect your car’s roof and window seals regularly for any signs of leaks. Address any leaks promptly to prevent moisture from damaging the headliner.
- Gentle Interior Care: Be mindful of the headliner when cleaning your car’s interior. Avoid pulling or putting excessive pressure on it.
- Limit Steam Cleaner Use: While steam cleaners can be used for cleaning, avoid excessive steam or pressure on the headliner, as this can weaken the adhesive over time.
- Avoid Hairspray and DIY Home Remedies: Refrain from using home remedies like hairspray, staples, or aggressive adhesives not designed for headliners. These can cause further damage and complicate future repairs.
Cost of Professional Headliner Replacement
While DIY repairs are often effective, in cases of severe damage or if you prefer a professional finish, headliner replacement might be necessary. The cost of replacing a car headliner varies depending on factors like vehicle type, complexity of the headliner design (e.g., sunroof, map lights), and labor rates.
Here’s a general cost summary:
| Vehicle Type | Headliner Replacement Cost (Estimated) |
|---|---|
| Simple Sedan/Hatchback/Coupe (e.g., Accord, Corolla) | $300 – $750 |
| Typical SUV/Crossover (e.g., RAV4, X-Trail) | $500 – $900 |
| Luxury Vehicle (e.g., BMW) | $1,000 – $6,000+ |

Note: These are estimated costs and can vary. Luxury vehicles with complex headliner designs and premium materials will typically have higher replacement costs. Always get a quote from a reputable auto upholstery shop or mechanic for your specific car model.
Conclusion: Taking Control of Your Car Ceiling Repair
A sagging car ceiling doesn’t have to be a major headache or a costly repair. By understanding the causes and utilizing these DIY repair methods, you can effectively restore your car’s interior aesthetics and comfort without removing the entire headliner. Whether you choose re-gluing, pinning, twist pins, or steam cleaning, these techniques offer practical and budget-friendly solutions to tackle a sagging car ceiling. If you’re unsure or dealing with extensive damage, seeking professional help is always a reliable option. Take action today and enjoy a refreshed car interior!
FAQs About Sagging Car Ceilings
How do you know if your ceiling is sagging?
Signs of a sagging car ceiling include:
- A cracking or popping sound from the ceiling area, especially when the car moves or doors are slammed.
- Visibly drooping fabric that hangs down from the roof.
- Wrinkles or creases appearing in the headliner fabric.
- In severe cases, the fabric may start to detach completely from the edges or corners.
Is it OK to fix the headliner sagging myself?
Yes, for many common sagging headliner issues, DIY repairs are perfectly feasible and can save you significant money. Repair kits and individual supplies are readily available online and at auto parts stores. For minor to moderate sagging, the methods outlined in this guide are designed for DIYers. However, if you are uncomfortable with DIY car repairs or if the sagging is very extensive or involves damage to the headliner board itself, professional replacement might be a better option.
Can I paint a headliner?
While technically possible, painting a headliner is generally not recommended. It’s a difficult process to do well without getting paint on trim and windows, requiring extensive preparation and masking. Furthermore, paint can stiffen the fabric, alter its texture, and may not adhere well long-term due to temperature fluctuations inside the car. The time and effort are usually better spent on repairing or replacing the headliner fabric.
Does car insurance cover the cost of car headliner replacement?
Typically, standard car insurance policies do not cover headliner replacement due to wear and tear or cosmetic issues like sagging. Car insurance is primarily designed to cover damages from accidents, theft, or vandalism. Some extended warranties or specific comprehensive policies might offer limited coverage for interior components, but it’s essential to review your policy details to confirm what is included. In most cases, headliner repair or replacement is considered a maintenance or cosmetic issue and is the vehicle owner’s responsibility.