Leather car seats lend a touch of luxury and sophistication to any vehicle. However, over time, wear and tear can take a toll on their pristine appearance. Scratches, cracks, and fading can make your once-gorgeous seats look worn and tired. The good news is, you don’t always need a professional to restore them to their former glory. With a little time and effort, you can often repair your leather car seats yourself and bring back that luxurious feel.
Understanding the Different Types of Damage
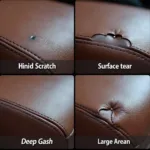
Before you dive into the repair process, it’s crucial to identify the type of damage your leather car seats have sustained. This will help you determine the most effective repair method. Here are some common issues:
- Scratches and Scuffs: These are superficial marks that only affect the top layer of the leather.
- Cracks: These are deeper and often appear in areas with frequent creasing, like the driver’s seat.
- Fading and Discoloration: Prolonged exposure to sunlight can cause the leather to lose its vibrant color.
- Stains: Spills and accidents can leave behind unsightly marks, especially on lighter leather.
- Tears and Rips: These are the most severe type of damage and usually require professional attention.
DIY Leather Car Seat Repair: A Step-by-Step Guide
For minor scratches, cracks, and fading, you can often restore your leather car seats with a DIY approach. Here’s a general guide:
-
Clean the Seats: Before starting any repairs, thoroughly clean your leather car seats using a dedicated leather cleaner. This will remove dirt, grime, and debris that can hinder the repair process.
-
Assess the Damage: Once clean, examine the damage closely. For scratches and scuffs, a leather repair compound or filler can work wonders.
-
Apply the Repair Product: Follow the instructions on your chosen product. Usually, this involves applying a small amount to a clean cloth or sponge and gently working it into the damaged area.
-
Level and Blend: Use a soft cloth to remove any excess product and ensure a smooth, even surface.
-
Color Restoration: If the damage is more severe or has caused discoloration, you might need a leather dye or colorant to match the original shade.
-
Condition the Leather: After the repair is complete, apply a high-quality leather conditioner to nourish and protect the seats. This will prevent future cracking and fading.
how to repair cracking leather car seats
When to Call a Professional
While DIY solutions can be effective for minor damage, some situations call for a professional touch.
- Deep Tears and Rips: These often require specialized tools and techniques to ensure a seamless repair.
- Extensive Damage: If your seats have multiple types of damage or cover a large area, a professional can provide a comprehensive restoration.
- Lack of Confidence: If you’re unsure about tackling the repair yourself, it’s always best to seek professional help to avoid further damage.
repair ripped leather car seat
Preventing Future Damage
Prevention is always better than cure. Protect your investment in your leather car seats by:
- Regular Cleaning: Clean your seats regularly with a leather cleaner to prevent dirt and grime from becoming embedded.
- UV Protection: Park your car in the shade whenever possible or use a sunshade to protect the interior from harmful UV rays.
- Conditioning: Regularly condition your leather seats to keep them supple and prevent drying and cracking.
- Prompt Stain Removal: Address spills and stains immediately to prevent them from setting into the leather.
how to repair a tear in car seat
Conclusion
By understanding the types of damage, following a proper repair process, and practicing preventative measures, you can keep your leather car seats looking their best for years to come. Remember, for significant damage or if you’re unsure about DIY repairs, consulting a professional is always a wise decision.


