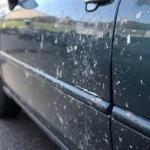
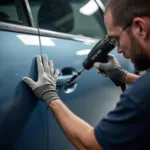
Discovering a deep nick in your car’s paint can be disheartening, especially if you take pride in your vehicle’s appearance. But before you panic, take a deep breath! Repairing deep nicks in car paint is achievable, even for those without prior experience. This comprehensive guide will equip you with the knowledge and step-by-step instructions to tackle those unsightly blemishes and restore your car’s finish like a pro.
Assessing the Damage: When to DIY and When to Call a Pro
Before diving into the repair process, it’s essential to assess the severity of the nick. While minor scratches and chips might be manageable with touch-up paint, deeper nicks often require a more involved approach.
Here’s a quick breakdown:
- Minor Nicks: Scratches or chips that haven’t penetrated the primer layer can often be addressed with touch-up paint and some careful sanding.
- Deep Nicks: If the nick has gone through the primer and exposed the bare metal underneath, you’ll need to take additional steps to prevent rust and ensure a lasting repair.
For very severe damage, such as large areas of chipped paint or dents accompanying the nicks, consulting a professional auto body shop is recommended.
Gathering Your Tools and Materials
Having the right tools and materials on hand is crucial for a successful car paint nick repair. Here’s a checklist:
- Cleaning Supplies: Soap and water, microfiber cloths, rubbing alcohol
- Sandpaper: 220-grit, 320-grit, 400-grit, 600-grit
- Masking Tape and Paper: To protect surrounding areas
- Primer (if necessary): Automotive primer specifically designed for your car’s paint type
- Touch-Up Paint: Obtain the exact color match for your car
- Clear Coat: Provides a protective and glossy finish
- Paint Applicators: Small brushes, toothpicks, or touch-up pens
- Polishing Compound
- Wax
Repairing Deep Nicks: A Step-by-Step Guide
1. Clean the Area: Thoroughly wash the area around the nick with soap and water. Use rubbing alcohol to remove any remaining dirt, wax, or grease.
2. Sand the Nick: Using 220-grit sandpaper, gently sand the nick and the area immediately surrounding it. The goal is to create a smooth and even surface for the primer and paint to adhere to.
3. Apply Primer (if necessary): If the nick has exposed bare metal, apply a thin coat of automotive primer to the affected area. Allow the primer to dry completely according to the manufacturer’s instructions.
4. Apply Touch-Up Paint: Using a fine-tipped brush, toothpick, or touch-up pen, carefully apply thin layers of touch-up paint to the nick. Start from the center of the nick and work your way outwards. Allow each layer to dry completely before applying the next.
5. Sand and Repeat: Once the paint is dry, use progressively finer grits of sandpaper (320, 400, and 600) to smooth out the paint layers. After each sanding, clean the area with a microfiber cloth.
6. Apply Clear Coat: Once you’re satisfied with the paint application, apply 2-3 thin coats of clear coat, allowing each coat to dry before applying the next.
7. Polish and Wax: After the clear coat has fully cured (usually 24-48 hours), use a polishing compound and a soft cloth to buff the area. This will blend the repair seamlessly with the surrounding paint. Finish by waxing your car to protect the newly repaired area and enhance its shine.
Preventing Future Nicks
While some nicks are unavoidable, here are some tips to minimize the risk:
- Regular Washing: Regularly washing your car can help remove dirt and debris that can scratch the paint.
- Protective Coatings: Consider a paint protection film or ceramic coating for an extra layer of defense against scratches and chips.
- Careful Parking: Choose parking spots away from shopping cart traffic and potential door dings.
Conclusion
Repairing deep nicks in your car’s paint might seem daunting, but by following these steps and using the right tools and techniques, you can achieve professional-looking results. Remember that patience is key, and taking your time with each step will ensure a successful repair that restores your car’s finish to its former glory.
FAQs about Repairing Deep Nicks in Car Paint
Can I use nail polish instead of touch-up paint?
While it might be tempting to use nail polish for a quick fix, it’s not recommended. Nail polish isn’t designed to withstand the same environmental conditions as automotive paint and can damage your car’s finish in the long run.
How long does it take for touch-up paint to dry?
Drying times vary depending on the type of touch-up paint and environmental conditions. It’s best to consult the manufacturer’s instructions for specific drying times.
Can I wash my car after repairing a paint nick?
It’s best to wait at least 24-48 hours after applying the clear coat before washing your car.
What if I can’t find an exact color match for my car’s paint?
Most auto parts stores can help you find the closest possible match based on your car’s make, model, and year. You can also contact your car’s dealership for assistance.
Is it necessary to use a clear coat?
Yes, applying a clear coat is crucial for protecting the repaired area, enhancing its shine, and ensuring a long-lasting repair.
Need help with a paint chip repair? Check out our comprehensive guide on paint chip car repair for detailed instructions and tips.
Looking for a quick and easy solution for minor paint scratches? Learn how to use car pen paint repair for effective touch-ups.
If you need further assistance or have a complex car repair issue, don’t hesitate to contact us via WhatsApp at +1(641)206-8880 or email us at [email protected]. Our dedicated team of experts is available 24/7 to provide guidance and support.


