
Well, folks, as the days get shorter and the temperatures drop, it’s time to face the music: winter is coming. And for car enthusiasts in colder climates, that means it’s almost time to bring out the trusty winter beater. If you’re smart, you’ve already started thinking about getting your ride ready for the snow, ice, and salt that winter throws our way. If not, don’t worry, you’re not alone. But listen up, because this is your last call to get things sorted before the real cold hits.
Every year, we’re here to remind you about the importance of winter car prep. Ignoring it is a recipe for a miserable winter driving experience. Procrastinating on car maintenance in the fall always leads to urgent, uncomfortable repairs in the dead of winter. Let me tell you a story to illustrate this point, a tale from my own past with a BMW E83 X3 winter beater.
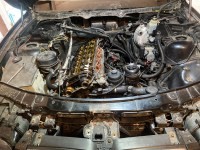
A few years back, I rescued an old X3 and decided to make it my winter warrior. I spent a good chunk of the warmer months wrenching on it, fixing it up to be a reliable daily driver. During those repairs, I noticed a fuel line fitting that looked a bit suspect. Thinking I could get away with it until spring, I decided to postpone that repair. Big mistake.
Fast forward to Thanksgiving, on the way to my fiance’s family’s house, about an hour away. Suddenly, halfway there, the fuel line I’d been worried about decided to give up the ghost. Pop! The car died instantly. And wouldn’t you know it, the weather was classic pre-winter misery: just below freezing, mixed rain and snow. Stranded on the side of the road, the only option was a tow truck back home. Thanksgiving dinner was canceled, and instead, I spent the holiday covered in gasoline in my garage. Why? Because I’d put off a repair. To add insult to injury, I slipped on the spilled fuel and fell flat on my face a few times while trying to push the car into a gas station parking lot. Not my finest moment.
The repair itself wasn’t even that complicated. To do it properly, I knew I should remove the fuel rail, intake manifold, and throttle body to get clear access to the fuel line. But since there weren’t any vacuum leaks at the time, I thought, “Spring project!” Famous last words. My procrastination meant I was wrestling with a fuel line on Thanksgiving Day instead of enjoying turkey. And because I hadn’t planned ahead, I didn’t have all the right parts on hand. All I had was the replacement fuel hose – a small victory, I guess.
The lesson here? Address car problems when you find them, don’t delay them, especially when winter is looming. I usually preach preventative maintenance, and I generally follow my own advice. But with the winter beater, I fell into the “fix it when it breaks” trap. The problem with that approach is that winter beaters are mostly driven in the winter, so problems tend to surface precisely when you don’t want them to. That brings us to this week’s crucial advice: pay attention and start prepping now.
Step 1: Embrace Your Winter Beater Early
For those of us in the snow belt, winter beaters are a necessity. By “winter beater,” I simply mean a car you’re okay with exposing to road salt and harsh winter conditions. It doesn’t need to be a total rust bucket, but cheaper is generally better. And let’s be honest, with European cars, “shitbox” and “cheap” sometimes go hand-in-hand (we say that with love!). This often means there might be a few maintenance items to address before the cold weather sets in and makes you not want to touch a wrench.
If you want to keep your prized possession out of the winter muck, here’s the first step: start driving your winter beater regularly right now.
The best way to uncover hidden issues is to drive the car and let them reveal themselves. Sure, a quick visual inspection can catch obvious problems like a broken CCV hose or a major fluid leak. And basic checks like brakes, tires, and wiper blades are a given. But we’re talking about those sneaky problems, the ones that are on their way out but haven’t given clear warning signs yet. Driving your winter car regularly, and maybe even pushing it a bit harder than usual, will help these issues surface while the weather is still decent enough to work on them comfortably.
So, get behind the wheel of that winter ride. Use it for your daily commute, grocery runs, errands – the kind of driving you’ll be doing all winter. You don’t have to mothball your fun car just yet, but it’s definitely time to choose your winter soldier and start putting it through its paces.
Step 2: Do You Shut Your Car Off to Run a Diagnostic? Yes, and Here’s Why.
After putting some miles on your winter beater, you’ll likely notice a few things that need attention – things you might have forgotten about or new issues that have cropped up. Maybe a new warning light on the dashboard? A mysterious rattle? A persistent misfire? Or perhaps you’re lucky and everything seems fine so far. Don’t get complacent! This is where diagnostics come in.
Grab your Schwaben Professional Scan Tool (or your preferred OBD-II scanner) and perform a full diagnostic scan. Yes, you should shut your car off to run a diagnostic scan accurately. While some basic OBD-II functions can be accessed with the engine running, turning the engine off and sometimes even letting the car sit for a few minutes allows sensors to provide baseline readings without engine interference. This ensures a more accurate and comprehensive diagnostic picture.
A diagnostic scan can reveal problems lurking beneath the surface, issues that haven’t yet triggered a check engine light or become obvious during regular driving. Think of it as a health check-up for your car. The scan tool reads fault codes stored in your car’s computer, pinpointing potential problems in various systems like the engine, transmission, ABS, airbags, and more.
This is your diagnostic step. After running the scan, make a list of all the fault codes and any issues you’ve observed while driving. Anything that appears to be failing, on the verge of failing, or showing up as a fault code needs to be addressed. Order the necessary parts right away. For any issues you can tackle immediately with parts you already have, get started!
Step 3: Don’t Forget Basic Winter Maintenance
If you’ve neglected basic maintenance on your winter beater, now is the time to catch up. Oil changes, filter replacements (oil, air, cabin air), tire checks and rotations, brake pad and rotor inspections, and cooling system flushes – these are all crucial for winter readiness. You might even consider a cooling system refresh if it’s been a while.
These basic maintenance tasks are the foundation for a reliable winter car. They not only prevent breakdowns but also ensure optimal performance in cold weather. And guess what? Your diagnostic scan might even reveal some neglected maintenance items, like a failing oxygen sensor due to an old air filter, or engine misfires pointing to worn spark plugs. Diagnostics and basic maintenance go hand-in-hand.
The goal here is to prepare a car that requires minimal attention throughout the winter, other than simply getting in and driving. The more preventative maintenance you do upfront, the higher your chances of a smooth, trouble-free winter commute in your chosen salt-sponge.
Step 4: Create a Repair Plan and Schedule
Once your parts arrive, or as they start trickling in, it’s time to create a plan of attack. Go back to your list of issues identified through driving and diagnostics. Look for tasks that need to be done in a specific order or can be tackled simultaneously to save time. Group projects together into manageable chunks that you can complete in a day or an afternoon.
Schedule these repair sessions. Put them on your calendar, write them on a sticky note on your bathroom mirror, set reminders on your phone – do whatever it takes to keep these tasks top of mind. You need to constantly remind yourself that these repairs are essential before you rely on this car for daily winter driving. Trust me, life gets busy, and it’s easy to forget. Without a plan, you might just end up in a situation like mine: stranded on the side of the road on a holiday.
Step 5: Stick to Your Winter Car Prep Schedule
Commitment is key. If you’ve scheduled garage time for this Saturday, make sure you’re there, wrenching away and completing the tasks you set out to do. Creating a sense of urgency helps you subconsciously commit to finishing the job. This means that if you encounter unexpected challenges or get stuck on a particular repair, you’ll be more likely to find a solution and push through, rather than giving up and saying, “I’ll get back to it later.”
Remember, the clock is ticking. Time is running out to tackle these winter car projects before the weather turns truly nasty. If you procrastinate, you might not finish in time. Focus on one problem at a time, see it through to completion, and then move on to the next. Sticking to your plan might mean sacrificing some weekend fun with friends or family, but it’s a worthwhile trade-off. It’s far better to miss a few social events now than to miss out on important events later because you’re stuck dealing with car trouble in freezing temperatures.
Step 6: Test Drive and Re-Diagnose
By this stage, you should have addressed all the critical issues you identified through driving and diagnostics. With your winter car seemingly squared away, it’s time to really start driving it again. If I were a betting man, I’d wager that one or two more minor things might pop up, especially if you tackled a more involved project that required significant disassembly. Perhaps a new vacuum leak emerged, maybe you didn’t quite reinstall something correctly, or maybe everything is perfect (unlikely, but possible!).
The only way to know for sure is to get back to driving the car daily. Pay attention to any new noises, smells, or performance issues. And yes, you guessed it, run another diagnostic scan after a week or so of regular driving. This re-scan will catch any new fault codes that might have appeared after your repairs.
Anything you find even slightly annoying or concerning now will be ten times more inconvenient when it’s freezing cold and snowing. So, don’t ignore anything. If you discover a new issue, go back and repeat the steps above. Address it now, rather than suffering later. It’s always better to be slightly inconvenienced on your own schedule than to be completely stranded and miserable at the mercy of winter weather.
If, after this final check, you don’t find anything new, congratulations! You should be ready to drive your winter car all season long with confidence. You’ve hopefully tackled all the preventative maintenance, routine maintenance, and major problems that could affect its reliability and drivability during the winter months.
Wrapping Up: Winter Car Prep is Future-Proofing
Remember, the entire point of this winter car preparation process is to future-proof your ride. It’s always better to plan ahead, diagnose potential issues, and address them on your own terms, rather than facing an emergency breakdown when you’re least prepared and least comfortable. Winter beaters are invaluable because they shield your nicer cars from the harsh realities of winter driving. But their effectiveness depends entirely on your proactiveness.
Anything you ignore now, any maintenance you postpone, any diagnostic codes you dismiss, could, and likely will, become a major problem that takes your winter car off the road precisely when you need it most, in the middle of winter, when it’s too cold to work on it comfortably. Any time you “save” now by skipping winter car prep will inevitably come back to haunt you, forcing you to drive your precious summer car in the salt and snow, or worse, leaving you stranded in the cold.
So, take this advice to heart: if you haven’t already, get started on prepping your winter car today. Save yourself future headaches, ensure reliable transportation all winter long, and enjoy the peace of mind that comes with knowing you’ve done everything you can to prepare for the challenges of winter driving.