Car plastic bumper repair body filler is essential for restoring your bumper’s appearance and structural integrity after damage. Whether it’s a minor scratch or a significant dent, understanding how to properly use body filler can save you time and money. This guide provides a step-by-step approach, expert tips, and answers to frequently asked questions to ensure a professional-quality repair.
Repairing a plastic bumper yourself can be a rewarding experience. It not only saves money but also allows you to learn valuable car maintenance skills. By choosing the right car plastic bumper repair body filler and following the correct procedures, you can achieve a seamless and durable repair. This article covers everything from preparing the surface to the final finishing touches. You’ll also learn about different types of fillers and the best practices for application. Before we dive into the specifics, let’s understand the importance of choosing the correct filler for your bumper repair. Using the appropriate filler will ensure long-lasting results and prevent future issues. Choosing a car plastic bumper repair body filler with hardener & applicator will simplify the process. For local repair options, you might consider Altrincham car bumper repair services.
Choosing the Right Car Plastic Bumper Repair Body Filler
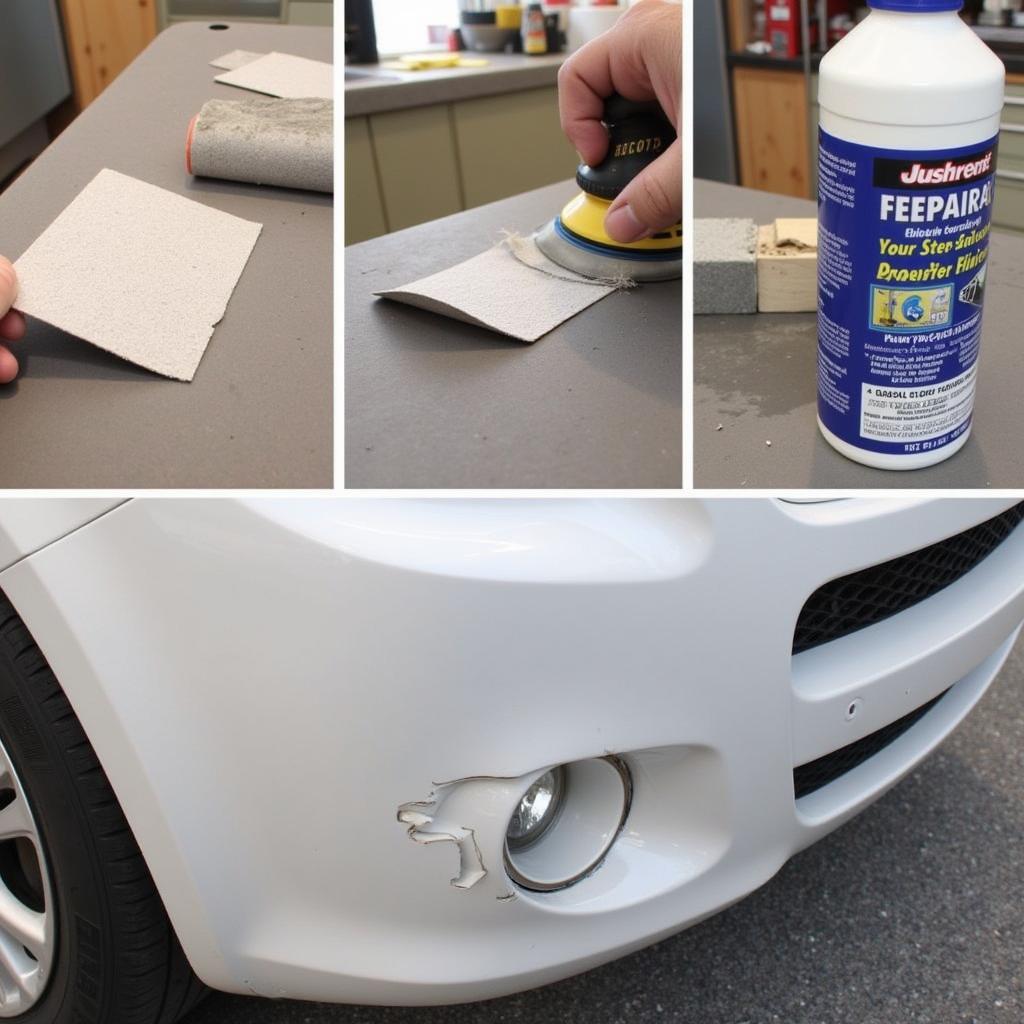
Selecting the appropriate body filler is crucial for a successful repair. Two-part epoxy-based fillers are generally recommended for plastic bumpers due to their strong adhesion and flexibility. These fillers provide excellent durability and are less prone to cracking compared to traditional body fillers designed for metal surfaces. Consider the extent of the damage when choosing your filler. For minor scratches and imperfections, a lightweight filler is sufficient. However, for deeper dents and cracks, a reinforced filler designed for structural repairs is necessary.
Do you have a hole in your bumper? Check out our guide on how to repair hole in car bumper.
Preparing the Bumper for Body Filler
Proper surface preparation is key to ensuring the body filler adheres correctly and provides a long-lasting repair. Start by thoroughly cleaning the damaged area with soap and water to remove any dirt, grease, or debris. Next, sand the area around the damage with coarse grit sandpaper (80-180 grit) to create a rough surface for the filler to grip. If the damage involves cracks or splits, use a plastic welding kit or specialized adhesive to fuse the pieces together before applying the filler. This crucial step strengthens the repair and prevents future cracking. Finally, clean the sanded area with a wax and grease remover to ensure optimal adhesion.
Applying the Car Plastic Bumper Repair Body Filler
Once the surface is prepared, mix the body filler and hardener according to the manufacturer’s instructions. Use a plastic spreader to apply the filler to the damaged area, working in thin, even coats. Overfilling can lead to excessive sanding and an uneven finish. Allow each coat to dry and cure completely before applying the next. For deeper repairs, build up the filler in multiple layers, ensuring each layer has sufficient time to dry.
For bumper repair costs and services, check out car front bumper repair cost.
Sanding and Finishing
After the final coat of filler has cured, sand the area smooth using progressively finer grits of sandpaper, starting with 120 grit and working your way up to 400 grit. This process will create a smooth, even surface ready for priming and painting. Use a sanding block to ensure even pressure and prevent dips or waves in the finished surface. Once the sanding is complete, clean the area thoroughly to remove any dust or debris.
Priming and Painting
Before painting, apply a thin coat of automotive primer to the repaired area. This will help the paint adhere properly and provide a uniform finish. Once the primer has dried, apply several thin coats of automotive paint that matches your bumper’s original color. Allow each coat of paint to dry before applying the next. After the final coat of paint has dried, apply a clear coat to protect the paint and give it a glossy finish.
If you’re in the Altrincham area, you can find reliable car bumper repair Altrincham services.
Conclusion
Repairing a plastic bumper with body filler is a manageable DIY project that can save you money and provide a sense of accomplishment. By following the steps outlined in this guide and choosing the right car plastic bumper repair body filler, you can achieve a professional-looking repair that restores your bumper’s appearance and functionality. Remember to prioritize proper surface preparation and apply the filler in thin, even coats for optimal results.
FAQ
- What type of body filler is best for plastic bumpers? Two-part epoxy-based fillers are generally recommended.
- How long does it take for body filler to dry? Drying times vary depending on the product, but typically range from 15-30 minutes per coat.
- Can I use regular body filler on a plastic bumper? While possible, it’s not recommended. Epoxy-based fillers are better suited for plastic.
- Do I need to prime before painting? Yes, priming is essential for proper paint adhesion.
- How much body filler do I need? The amount depends on the size and depth of the damage.
Common Car Bumper Repair Scenarios
- Scratches and Scuffs: Minor scratches can often be addressed with a light application of filler and sanding.
- Dents and Cracks: Deeper damage requires a more robust filler and potentially plastic welding.
- Holes and Tears: Significant damage might necessitate patching or replacement of the affected section.
Further Reading and Resources
Explore additional resources on our website for more specific car repair topics. We offer detailed guides on various repairs and maintenance procedures.
Need assistance? Contact us via WhatsApp: +1(641)206-8880 or Email: [email protected]. Our customer service team is available 24/7.


