Finding the right car bumper repair kit at Canadian Tire can seem daunting with so many options available. This guide will help you navigate the process, understand what to look for, and ultimately achieve a professional-looking repair right in your driveway. We’ll cover everything from assessing the damage to choosing the right kit and executing the repair effectively.
Understanding Your Bumper Damage
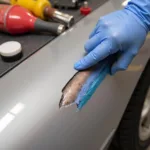
Before heading to Canadian Tire, carefully assess the damage to your bumper. Is it a minor scratch, a deep gouge, a crack, or a dent? The type and extent of the damage will dictate the appropriate repair kit and method. Small scratches might only require a touch-up paint pen, while deeper damage necessitates a more comprehensive kit involving fillers, adhesives, and sandpaper. Accurately evaluating the damage is the first crucial step in a successful bumper repair.
Choosing the Right Car Bumper Repair Kit at Canadian Tire
Canadian Tire offers a variety of car bumper repair kits, each designed for specific types of damage. Consider the following factors when making your selection:
- Type of Plastic: Bumpers are typically made of thermoplastic olefin (TPO) or polypropylene (PP). Ensure the kit you choose is compatible with your bumper’s material.
- Extent of Damage: For minor scratches and scuffs, a simple touch-up paint and polishing kit might suffice. Deeper damage requires a kit with fillers, hardeners, and reinforcing mesh.
- Included Components: Some kits include everything you need, from sandpaper to applicators and even color-matched paint. Others require you to purchase additional items separately.
- Your Skill Level: Some kits are designed for beginners, while others require more advanced skills and experience.
Step-by-Step Bumper Repair Guide
Once you’ve chosen the right kit, follow these steps for a successful repair:
- Clean the Area: Thoroughly clean the damaged area with soap and water, then degrease it with a suitable cleaning agent. This ensures proper adhesion of the repair materials.
- Prepare the Surface: Sand the damaged area with the provided sandpaper to create a rough surface for the filler to adhere to.
- Apply the Filler: Mix the filler and hardener according to the kit’s instructions. Apply the filler to the damaged area, ensuring it fills the cracks or dents completely.
- Sand and Shape: After the filler dries, sand it down to create a smooth, even surface that blends seamlessly with the surrounding bumper.
- Prime and Paint: Apply primer to the repaired area, then follow up with color-matched paint. Several thin coats are better than one thick coat.
- Finish and Polish: Once the paint dries, apply a clear coat to protect the repair and give it a glossy finish. Finally, polish the area to blend it perfectly with the rest of the bumper.
Tips for a Professional-Looking Repair
- Patience is Key: Don’t rush the process. Allow ample drying time for each step, especially the filler and paint.
- Practice Makes Perfect: If you’re unsure about your skills, practice on a scrap piece of plastic before working on your bumper.
- Color Matching is Crucial: Use a color-matched paint specifically designed for your car’s make and model. Canadian Tire staff can assist you in finding the correct paint code.
“A common mistake people make is not properly preparing the surface before applying the filler,” says John Smith, Certified Automotive Technician at ABC Auto Repair. “This can lead to poor adhesion and ultimately a failed repair.”
Finding the Right Car Bumper Repair Kit at Canadian Tire: FAQs
- Can I repair a cracked bumper myself? Yes, minor cracks can be repaired using a car bumper repair kit. However, severe cracks might require professional repair.
- What type of sandpaper should I use? The sandpaper grit required depends on the extent of the damage and the stage of the repair process. Most kits include the necessary sandpaper.
- How long does it take for the filler to dry? Drying times vary depending on the product and ambient temperature. Consult the kit’s instructions for specific drying times.
“Investing in a high-quality car bumper repair kit can save you hundreds of dollars compared to professional repair,” adds Jane Doe, Automotive Paint Specialist at XYZ Auto Body. “Just make sure you follow the instructions carefully.”
Conclusion
Repairing your car bumper with a kit from Canadian Tire can be a cost-effective and rewarding DIY project. By understanding the damage, choosing the right kit, and following the proper steps, you can achieve a professional-looking repair and restore your bumper to its former glory. Remember to carefully assess your specific car bumper repair kit Canadian Tire needs and select the appropriate product for the task.
Other Helpful Resources
- Check out our article on how to choose the right car wax for your vehicle.
- Learn more about maintaining your car’s exterior with our detailing guide.
Need help? Contact us via WhatsApp: +1(641)206-8880, Email: cardiagtechworkshop@gmail.com. We have a 24/7 customer support team.


