Car bumper repair adhesive offers a cost-effective and convenient way to fix minor bumper damage. Whether you’re dealing with a crack, dent, or scratch, understanding the different types of adhesives and the proper application techniques can save you a trip to the body shop. This guide provides comprehensive information on everything you need to know about car bumper repair adhesive, from choosing the right product to achieving a professional-looking finish.
Choosing the Right Car Bumper Repair Adhesive
Selecting the appropriate adhesive is crucial for a successful bumper repair. Several factors influence your decision, including the type of plastic your bumper is made of, the extent of the damage, and your budget. Common types of car bumper repair adhesive include epoxy, polyurethane, and plastic welding adhesives. Epoxy adhesives are versatile and offer excellent adhesion, while polyurethane adhesives are known for their flexibility and impact resistance. Plastic welding adhesives create a strong bond, ideal for more significant damage. For minor repairs, you might consider a plastic car bumper repair kit.
What kind of adhesive works best on plastic bumpers? Generally, epoxy and polyurethane adhesives are suitable for most plastic bumper repairs.
Preparing the Damaged Area
Before applying any car bumper repair adhesive, proper surface preparation is essential. Thoroughly clean the damaged area with soap and water, then degrease it with a specialized cleaning agent. Sanding the area around the damage with fine-grit sandpaper creates a rough surface that promotes better adhesion. After sanding, ensure the area is clean and dry before proceeding. For deeper cracks, you may need to use a car bumper repair epoxy for a stronger bond.
How do I clean a bumper before applying adhesive? Use soap and water followed by a degreasing agent to ensure a clean and adhesive-ready surface.
Applying Car Bumper Repair Adhesive
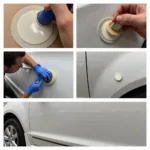
Follow the manufacturer’s instructions carefully when applying the adhesive. For most adhesives, you’ll need to mix two components together before application. Use a mixing stick or applicator provided in the kit to achieve the correct ratio. Apply the adhesive evenly to the damaged area, ensuring complete coverage. If the damage is a crack, use a putty knife or similar tool to push the adhesive into the crack and ensure a strong bond. A car bumper repair kit canadian tire can be a convenient option for finding all the necessary tools and materials.
How much adhesive should I apply? Apply enough to cover the damaged area completely, following the manufacturer’s recommendations.
Curing and Finishing
Allow the adhesive to cure completely according to the manufacturer’s instructions. This typically takes several hours or even overnight. Avoid touching or disturbing the repaired area during the curing process. After the adhesive has cured, you can sand and paint the repaired area to blend it seamlessly with the rest of the bumper. For information on repairing cracks, see our guide on how to repair a crack in car bumper.
How long does it take for car bumper repair adhesive to cure? Curing time varies depending on the specific product, but it typically takes several hours to overnight.
Tips for a Professional Finish
- Use masking tape to protect the surrounding areas of the bumper during the repair process.
- Use a sanding block for even sanding and a smooth finish.
- Apply primer before painting to improve adhesion and color match.
- Consider using a clear coat to protect the repaired area and enhance its durability.
John Smith, a seasoned auto body repair technician, advises, “Always choose a high-quality car bumper repair adhesive for optimal results. Proper surface preparation and application technique are key to achieving a long-lasting repair.”
Is a soldering iron a viable option for bumper repair? Find out more about using a soldering iron for car bumper repair in our article: can i repair car bumper with regular soldering iron.
Conclusion
Car bumper repair adhesive provides a DIY solution for addressing minor bumper damage. By carefully selecting the right adhesive, preparing the surface properly, and following the application instructions, you can achieve a durable and aesthetically pleasing repair. Remember that patience and attention to detail are crucial for a successful outcome using car bumper repair adhesive.
FAQs
- Can I use super glue for car bumper repair? While super glue might seem like a quick fix, it’s not recommended for car bumper repair due to its brittleness and lack of flexibility.
- What type of adhesive is best for plastic bumpers? Epoxy and polyurethane adhesives are generally well-suited for plastic bumper repair.
- How do I remove excess adhesive? Use a solvent recommended by the adhesive manufacturer to remove excess adhesive before it cures.
- Can I paint over car bumper repair adhesive? Yes, you can paint over the repaired area after the adhesive has cured and been sanded smooth.
- How can I prevent future bumper damage? Practice safe parking habits and be mindful of obstacles to minimize the risk of bumper damage.
- Can I repair a severely damaged bumper with adhesive? For significant damage, it’s best to consult a professional auto body repair shop.
- Where can I find car bumper repair adhesive? Car bumper repair adhesive is available at most auto parts stores and online retailers.
Need help with your car repair? Contact us via WhatsApp: +1(641)206-8880, Email: [email protected]. Our customer support team is available 24/7.


