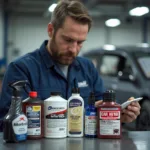
After a fresh paint job or meticulous car body repair, one crucial step remains: applying car wax. While it may seem like a simple task, understanding the nuances of how to apply wax to a car can make all the difference in achieving a showroom-worthy shine and protecting your vehicle’s paintwork.
Why is Applying Wax Important After Car Body Repair?
Think of car wax as a protective shield for your vehicle’s paint. It acts as a barrier against the elements, preventing damage from UV rays, dirt, grime, and even minor scratches.
“Applying wax after car body repair is like putting the finishing touch on a masterpiece,” says Kevin Parker, a veteran auto detailer with over 20 years of experience. “It not only enhances the shine but also helps preserve the integrity of the new paint, ensuring it looks its best for years to come.”
Choosing the Right Car Wax
Selecting the appropriate car wax depends on your desired outcome and the condition of your car’s paint. Here’s a quick breakdown:
- Carnauba Wax: This natural wax offers a deep, warm shine and excellent protection, making it ideal for newer vehicles or those with well-maintained paint.
- Synthetic Wax: These waxes are more durable and longer-lasting than carnauba waxes, making them suitable for cars exposed to harsh weather conditions.
- Cleaner Wax: This type of wax combines cleaning agents with wax, making it a good option for vehicles with light oxidation or swirl marks.
How to Apply Wax to a Car Like a Pro
Applying car wax is a straightforward process, but mastering the technique can significantly impact the final result. Here’s a step-by-step guide:
- Wash and Dry Your Car: Ensure your car is free from dirt and debris before waxing. Use a pH-neutral car wash soap and a microfiber wash mitt for a gentle yet effective clean.
- Prepare Your Wax Applicator: Use a clean, soft foam applicator pad designed for applying wax. Avoid using old rags or towels, as they can leave behind lint and scratches.
- Apply Wax in Thin, Even Layers: Apply the wax using gentle, overlapping circular motions. Avoid applying too much pressure, as this can create streaks. It’s better to apply multiple thin layers than one thick layer.
- Let the Wax Haze Over: Allow the wax to dry and haze over according to the manufacturer’s instructions. This usually takes between 5-15 minutes, depending on the type of wax.
- Buff to a Shine: Once the wax has hazed, use a clean, soft microfiber buffing towel to remove the wax in gentle, back-and-forth motions. Work in small sections and flip the towel frequently to ensure a streak-free finish.
 Applying Car Wax: A Step-by-Step Guide
Common Car Waxing Mistakes to Avoid
Even with the best intentions, it’s easy to make mistakes when waxing your car. Here are some common pitfalls to avoid:
- Applying Wax in Direct Sunlight: This can cause the wax to dry too quickly, making it difficult to buff out and potentially leaving streaks.
- Using Too Much Wax: Applying a thick layer of wax doesn’t necessarily equate to more protection. In fact, it can make the buffing process much more challenging and result in an uneven finish.
- Not Allowing the Wax to Haze Properly: Removing the wax too early or too late can affect its ability to bond to the paint and provide optimal protection.
Conclusion
Applying car wax is an essential part of car care, especially after car body repair. By following the steps outlined above and avoiding common mistakes, you can ensure your vehicle’s paintwork is protected and looking its best for years to come.
For those seeking professional car body repair services, including expert wax application, consider exploring the offerings of reputable shops like those found in car body repairs mid sussex or car body repairs hilsea.
Remember, a little wax goes a long way in maintaining the beauty and value of your vehicle.


