
Discovering a puddle of coolant under your car or seeing your temperature gauge creep into the red zone can be alarming. One common culprit behind these issues is a radiator leak. If you’re wondering, “can you repair a car radiator leak?”, the answer is often yes, at least temporarily. This guide from Car Repair Online will walk you through recognizing the signs of a radiator leak, identifying its source, and exploring both DIY repair methods and when it’s time to seek professional help. Understanding your options will help you address the problem effectively and keep your vehicle running smoothly.
Recognizing the Telltale Signs of a Radiator Leak
Early detection of a radiator leak is crucial to prevent more serious engine damage and costly repairs. A seemingly minor leak can quickly escalate, leading to overheating and potential engine failure. Being vigilant and knowing what to look for can save you significant trouble down the road.
Common Symptoms to Watch For:
-
Rising Temperature Gauge: Keep a close eye on your car’s temperature gauge. If it starts climbing higher than usual, especially during normal driving conditions, it could indicate a coolant leak. A slight increase might be due to other factors, but a consistently high or rapidly rising temperature is a red flag. Ignoring this can lead to severe engine overheating, potentially warping cylinder heads or cracking the engine block – repairs that are far more expensive than addressing a simple radiator leak.
-
Coolant Puddles Under Your Vehicle: One of the most obvious signs is finding puddles of liquid beneath your car, particularly towards the front of the engine bay. It’s important to distinguish coolant from other fluids. Air conditioning systems also produce condensation, which is usually clear and odorless water. Motor oil leaks are typically dark brown or black and have a distinct oily smell. Coolant, on the other hand, is often bright green, orange, pink, or blue and has a sweet, slightly syrupy odor. If the puddle is brightly colored and sweet-smelling, it’s highly likely to be coolant from a radiator leak.
-
Low Coolant Reservoir: Regularly check your coolant reservoir level. This translucent plastic container, usually located near the radiator, holds excess coolant. A consistently low coolant level, even after topping it off, suggests a leak in the cooling system. If you find yourself frequently adding coolant, it’s a strong indication that coolant is escaping somewhere, possibly from a radiator leak.
-
Discoloration or Rust in Your Engine Bay: Inspect the engine bay, especially around the radiator and surrounding components, for signs of discoloration or rust. Dried coolant can leave behind a crusty, whitish, or colored residue. Rust around hose connections, the radiator core, or end tanks can also be a sign of a slow, ongoing leak that has been present for some time, leading to corrosion.
 Radiator stop leak product for sealing minor coolant leaks
Pinpointing the Source: How to Identify a Radiator Leak
While noticing the symptoms is the first step, accurately identifying the source of the radiator leak is crucial for effective repair. Leaks can be tricky to spot, especially small hairline cracks that only open up when the system is pressurized. Fortunately, there are several tools and techniques to help you pinpoint the leak’s origin.
Tools and Techniques for Leak Detection:
-
Cooling System Pressure Tester: This tool is invaluable for diagnosing radiator leaks. A cooling system pressure tester allows you to manually pressurize the cooling system, even when the engine is off and cool. It typically attaches to the radiator cap neck or the coolant reservoir. By pumping air into the system to its normal operating pressure (usually around 10-15 PSI – check your vehicle’s specifications), you simulate the conditions that cause leaks to appear when the engine is running. If there’s a leak, the pressure gauge on the tester will slowly drop, and you’ll be able to visually inspect for coolant escaping from the radiator, hoses, or connections. This method is particularly effective for finding leaks that are not obvious when the system is not under pressure.
-
UV Dye and Light Kit: For less obvious leaks, a UV dye and light kit can be very helpful. This kit includes a special fluorescent dye that you add to your coolant. After running the engine for a short period to circulate the dye, you use a UV light (also included in the kit) to inspect the cooling system in a darkened area. The UV light will cause the dye to glow brightly, making even small coolant leaks easily visible. This method is excellent for tracing slow, weeping leaks that might evaporate before they form a puddle, or leaks in hard-to-reach areas.
-
Smoke Machine: Although less common for DIY use, a smoke machine can also be used to detect radiator leaks. This device pumps a safe, visible smoke into the cooling system, typically through the radiator cap opening when the system is cool and empty (or partially drained). The smoke, under slight pressure, will escape from any leaks in the system, making them easily visible as plumes of smoke emerge from the source. Smoke machines are particularly useful for finding leaks in the radiator core itself or in areas that are difficult to access visually.
Using Your Senses to Detect Leaks:
Even without specialized tools, your senses can provide valuable clues:
-
Visual Inspection: Carefully examine the radiator, hoses, hose connections, water pump, and thermostat housing. Look for:
- Steam: Visible steam escaping from under the hood, especially after the engine has warmed up, is a strong indicator of a coolant leak, often from a hot area of the radiator or hoses.
- Coolant Trails: Trace any visible coolant drips or streams upwards to find their origin. Look for wet spots or trails of coolant running down the radiator, engine block, or hoses.
- White Crusty Residue: Dried coolant often leaves a chalky, white, or colored residue around the leak point. This is particularly noticeable around hose connections, radiator seams, and welds.
-
Smell: Coolant has a distinctive sweet, sugary odor. If you notice this smell, especially after driving or when the engine is warm, it’s a strong indication of a coolant leak somewhere in the system, potentially from the radiator. The “burnt sugar” smell is especially noticeable when coolant is leaking onto hot engine components.
DIY Radiator Leak Repair: Temporary and Semi-Permanent Fixes
For minor radiator leaks, especially in emergency situations or as a temporary measure, DIY repair options can be effective. However, it’s important to understand that these are often not permanent solutions, and professional repair or radiator replacement might be necessary for long-term reliability.
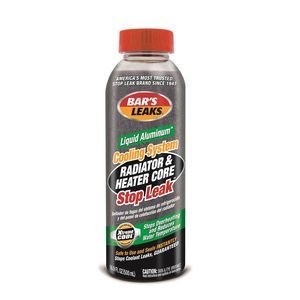
Radiator Stop Leak Additives: A Quick Fix
Radiator stop leak additives are commercially available products designed to seal small leaks from within the cooling system. They typically consist of particles or chemicals that circulate with the coolant and are drawn into leaks by the escaping coolant flow. These particles then accumulate and solidify, creating a seal.
Pros:
- Ease of Use: Stop leak additives are very easy to use. You simply pour the product into the radiator or coolant reservoir.
- Quick Action: They can often seal small leaks relatively quickly, sometimes within minutes of circulating through the system.
- Temporary Fix: Effective for minor leaks and can provide a temporary solution to get you to a repair shop or home.
Cons:
- Not a Permanent Solution: Stop leak is generally considered a temporary fix. The seal may degrade over time or under pressure.
- Potential Clogging: In some cases, stop leak additives can potentially clog narrow coolant passages in the radiator or heater core, especially if used excessively or in older cooling systems.
- Masking Underlying Issues: While sealing the leak, stop leak doesn’t address the underlying cause of the radiator damage, which could worsen over time.
How to Use Radiator Stop Leak:
- Prepare Your Work Area: Park your vehicle on a level surface and ensure the engine is completely cool. Never work on a hot cooling system as it is pressurized and can cause severe burns. Open the hood and locate the radiator cap or coolant reservoir cap.
- Find the Source (If Possible): While not strictly necessary for using stop leak, briefly inspect the radiator area to get a general idea of where the leak might be.
- Pour in Stop Leak: Carefully follow the instructions on the stop leak product packaging. Typically, you will pour the recommended amount of stop leak directly into the radiator (if the cap is on the radiator itself) or into the coolant reservoir.
- Top Off Coolant: After adding the stop leak, top off the cooling system with the appropriate type of coolant (refer to your vehicle’s owner’s manual for the correct coolant type). Mix coolant with distilled water if necessary, according to the coolant concentrate instructions.
- Run the Engine: Replace the radiator cap or coolant reservoir cap securely. Start the engine and let it run for about 10-15 minutes, or as directed by the stop leak product instructions. This circulation allows the stop leak to distribute throughout the system and reach the leak point.
- Let it Sit (Optional): Some stop leak products recommend allowing the vehicle to sit overnight after running the engine to allow the sealant to fully cure. Check the product instructions.
- Check for Seal: After the recommended time, check the coolant level and inspect for any signs of leaks. Monitor the temperature gauge during a test drive to ensure the leak is sealed and the engine is not overheating.
Radiator Epoxy: For Visible Cracks
Radiator epoxy is a two-part adhesive that, when mixed, creates a strong, waterproof, and heat-resistant bond. It’s suitable for repairing visible cracks or small holes in plastic or metal radiator components, such as end tanks or hose necks.
Pros:
- Strong and Durable: Epoxy provides a more durable and longer-lasting seal compared to stop leak, especially for visible cracks.
- Direct Application: Epoxy is applied directly to the damaged area, providing a targeted repair.
- Semi-Permanent Fix: When applied correctly, epoxy can be a more semi-permanent solution compared to stop leak, potentially lasting for a significant period.
Cons:
- Requires Surface Preparation: The area to be repaired must be thoroughly cleaned and dried for epoxy to adhere properly.
- Visible Repair: Epoxy repairs can be visible and may not be aesthetically ideal.
- Limited to Visible Cracks: Epoxy is only effective for repairing cracks or holes that are accessible and visible for direct application.
- Not for Core Damage: Epoxy is not suitable for repairing leaks within the radiator core itself, which is often made of thin, delicate fins.
How to Use Radiator Epoxy:
- Prepare the Area: Ensure the engine is cool and the cooling system is not pressurized. Locate the visible crack or leak. Thoroughly clean the area around the crack using brake cleaner or rubbing alcohol to remove any dirt, grease, coolant residue, or rust. Allow the area to dry completely. For metal surfaces, you might lightly roughen the area with fine-grit sandpaper to improve adhesion.
- Mix the Epoxy: Squeeze out equal parts of the resin and hardener from the two tubes of the radiator epoxy onto a clean, disposable surface (like a piece of cardboard). Thoroughly mix the two parts together using a mixing stick or toothpick until you achieve a uniform color and consistency. Work quickly as radiator epoxy typically has a limited working time.
- Apply the Epoxy: Using the mixing stick or a small applicator, apply the mixed epoxy directly to the crack or hole, pressing it firmly into the damaged area. Create a patch that extends slightly beyond the edges of the crack for a good seal. For larger cracks or holes, you can build up the epoxy in layers, allowing each layer to partially cure before applying the next. Aim for a thickness of at least 1/8 inch for a strong repair.
- Cure Time: Allow the epoxy to cure completely according to the manufacturer’s instructions. Cure times can vary from a few hours to overnight, depending on the product and temperature. Avoid disturbing the repair while it is curing.
- Test the Seal: Once the epoxy is fully cured, refill the cooling system with coolant. Start the engine and check for leaks around the repaired area. Monitor the coolant level and temperature gauge to ensure the repair is successful.
When Professional Radiator Repair is Necessary
While DIY repairs can address minor radiator leaks, there are situations where professional intervention is necessary for a reliable and lasting solution.
Seeking Professional Help:
- Difficulty Accessing the Leak: If the leak is located in a hard-to-reach area of the radiator, such as behind the air conditioning condenser or deep within the engine bay, DIY repairs may be difficult or impossible.
- Persistent Leaks After DIY Attempts: If you’ve tried stop leak or epoxy and the leak persists or returns shortly after repair, it indicates a more significant problem that requires professional attention.
- Major Radiator Damage: Large cracks, significant damage to the radiator core, or leaks from multiple locations often indicate that the radiator is beyond effective DIY repair and needs professional servicing.
- Overheating Issues: If you’re experiencing engine overheating in conjunction with a radiator leak, it’s crucial to seek professional diagnosis and repair promptly to prevent further engine damage.
- Lack of Experience or Tools: If you are not comfortable working on your car’s cooling system or lack the necessary tools for diagnosis and repair, it’s always best to consult a qualified mechanic.
Radiator Replacement: The Permanent Solution
In some cases, radiator repair may not be feasible or cost-effective. If the radiator is severely damaged, corroded, or has numerous leaks, replacement is often the most reliable and long-term solution.
When Radiator Replacement is Recommended:
- Extensive Damage: Significant physical damage to the radiator core, end tanks, or structural components often necessitates replacement.
- Age and Corrosion: Radiators have a lifespan, and older radiators are prone to corrosion and fatigue. If your radiator is old and leaking, replacement is often a more prudent choice than repair.
- Cost-Effectiveness: For severely damaged radiators, the cost of professional repair might approach or even exceed the cost of a new radiator. In such cases, replacement provides a new component with a fresh lifespan and warranty.
- Peace of Mind: Replacing a radiator offers the most peace of mind, knowing that you have a brand new component and are less likely to experience cooling system issues in the near future.
Maintaining Your Cooling System and Preventing Future Leaks
Preventive maintenance is key to avoiding radiator leaks and ensuring the longevity of your cooling system. Regular checks and proactive care can save you from unexpected breakdowns and costly repairs.
- Regular Coolant Checks and Flushes: Check your coolant level regularly and ensure it is at the proper level and concentration. Follow your vehicle manufacturer’s recommended intervals for coolant flushes and replacements. Fresh coolant helps prevent corrosion and maintains optimal cooling efficiency.
- Inspect Hoses and Clamps: Periodically inspect radiator hoses for cracks, bulges, or softness. Check hose clamps for tightness and corrosion. Replace hoses and clamps as needed to prevent leaks and failures.
- Proper Coolant Type: Always use the coolant type recommended for your vehicle. Using the wrong type can lead to corrosion and damage to cooling system components, including the radiator.
- Avoid Harsh Chemicals: Avoid using harsh chemicals or abrasive cleaners in your cooling system, as they can damage seals and radiator materials.
- Regular System Inspections: During routine maintenance, have a mechanic inspect your entire cooling system, including the radiator, hoses, water pump, and thermostat, for any signs of wear, leaks, or potential problems.
FAQs About Radiator Leaks and Repairs
1. What are the common causes of radiator leaks?
Common causes of radiator leaks include:
- Corrosion: Over time, coolant can become acidic and cause internal corrosion of the radiator core and metal components.
- Stone Impact: Road debris, like stones and gravel, can strike the radiator, especially the thin fins of the core, causing punctures and leaks.
- Vibrations: Engine vibrations and road shocks can stress radiator connections and seams, leading to cracks over time.
- Age and Wear: Radiator materials can degrade over time due to heat cycling and exposure to coolant chemicals.
- Electrolysis: Stray electrical currents in the cooling system can cause galvanic corrosion, especially in radiators with dissimilar metals.
2. How can I temporarily seal a radiator leak until I can get it fixed?
For temporary sealing, you can use:
- Commercial Radiator Sealant (Stop Leak): As discussed earlier, this is a readily available and easy-to-use temporary fix for minor leaks.
- Radiator Epoxy: For visible cracks, radiator epoxy provides a stronger temporary seal than stop leak.
- High-Temperature Tape: In an emergency, heat-resistant tape (like exhaust tape) can be wrapped tightly around a hose leak as a very short-term measure to reduce leakage until you can apply a more proper fix.
3. How do I know if the radiator leak repair is successful?
You’ll know the radiator leak repair is successful if:
- Coolant Level Remains Steady: After repair and refilling, the coolant level in the reservoir should remain stable and not drop over time.
- No Visible Leaks: Inspect under the vehicle and around the radiator for any signs of coolant drips or puddles after the repair.
- Engine Temperature is Normal: The temperature gauge should operate within its normal range, and the engine should not overheat, even under normal driving conditions.
- No Sweet Coolant Smell: The sweet smell of coolant should no longer be noticeable after the repair.
4. Can I drive my car with a radiator leak?
It’s generally unsafe and not recommended to drive your car with a radiator leak, especially if it’s significant or causing overheating. Driving with a leak can lead to:
- Engine Overheating: Reduced coolant levels can quickly lead to engine overheating, causing severe engine damage (warped heads, cracked block).
- Further Damage: Continued driving with a leak can worsen the leak itself and potentially damage other cooling system components.
- Breakdown: Severe overheating can cause your car to break down completely, leaving you stranded.
If you must drive a short distance with a minor leak (e.g., to get to a repair shop), do so with extreme caution:
- Monitor Temperature Gauge Constantly: Watch the temperature gauge closely and pull over immediately if it starts to rise excessively.
- Drive Short Distances: Limit driving to only what is absolutely necessary and as short a distance as possible.
- Keep Coolant Level Topped Up: If safe to do so, and if you have coolant available, frequently top up the coolant reservoir to try to maintain coolant level.
5. How often should I check my radiator for leaks?
You should check your radiator and cooling system for leaks:
- Regularly during routine maintenance: Ideally, check coolant levels and visually inspect for leaks at least monthly or as part of your regular car maintenance schedule.
- Before long trips: Always check coolant levels and inspect for leaks before embarking on any long journeys to prevent breakdowns on the road.
- If you notice any symptoms: If you observe any of the signs of a radiator leak (temperature gauge rising, coolant puddles, etc.), inspect the system immediately.
By understanding the signs of a radiator leak, knowing your repair options, and practicing preventative maintenance, you can effectively manage radiator issues and keep your vehicle running reliably. For all your car repair needs and parts, visit your local AutoZone. If you prefer professional assistance, AutoZone’s Preferred Shops network can connect you with trusted mechanics in your area.