Car paint clear coat failure can be a real eyesore. Whether it’s from sun damage, scratches, or just plain old age, that peeling, bubbling clear coat can make your car look far older than it is. But don’t despair! While fixing car paint clear coat failure isn’t exactly a drive in the park, it is achievable, even for a DIY enthusiast. This guide will walk you through the process, from identifying the issue to achieving a professional-looking finish.
Understanding Clear Coat Failure: Why is My Paint Peeling?
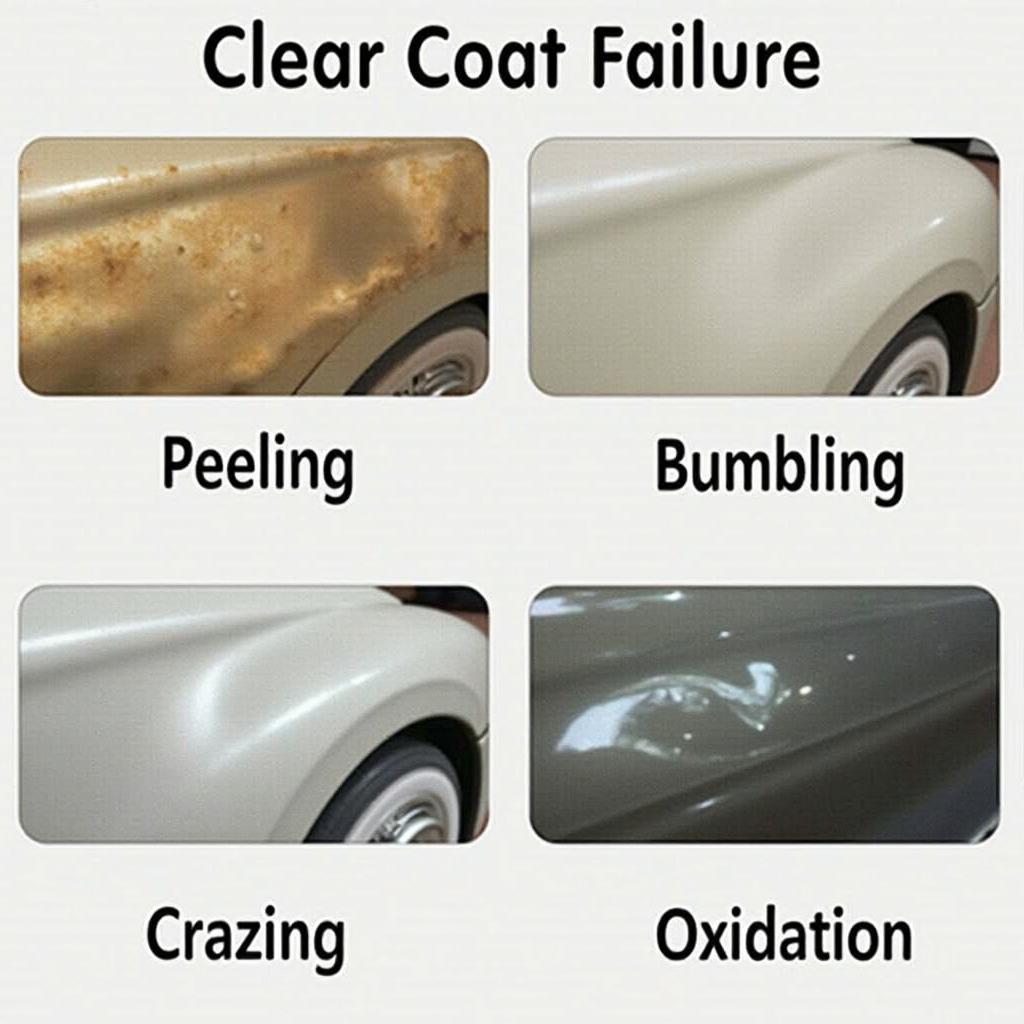
Before diving into the “how-to,” it’s helpful to understand why clear coat fails in the first place. Clear coat is like a protective shield for your car’s paint, guarding it against UV rays, scratches, and the elements. When this shield weakens, it manifests in various ways:
- Peeling or flaking: The clear coat literally lifts away from the base coat, creating unsightly patches.
- Bubbling: Small, raised bubbles appear on the surface, often a sign of moisture trapped underneath.
- Crazing: A network of fine cracks, often resembling spiderwebs, indicating severe clear coat deterioration.
- Oxidation: A gradual fading or chalking of the paint, making it look dull and lifeless.
Common culprits behind these issues include:
- Sun damage: Prolonged exposure to UV rays breaks down the clear coat’s chemical bonds.
- Oxidation: Exposure to air pollutants and environmental contaminants.
- Improper washing techniques: Using harsh chemicals or abrasive materials can strip away the clear coat.
- Poor quality clear coat: Low-grade products are more susceptible to premature failure.
DIY Car Paint Clear Coat Repair: A Step-by-Step Guide
Fixing clear coat failure yourself can be rewarding and save you a trip to the auto shop. Here’s a step-by-step guide to tackling the issue head-on:
1. Assess the Damage and Gather Your Supplies
Examine the affected area closely. Is the damage widespread, or is it confined to a small area? For minor clear coat issues, a DIY approach is often feasible. However, if the damage is extensive or involves deep scratches in the base coat, professional help might be necessary.
You’ll need the following:
- Car wash soap and water
- Microfiber wash mitts and drying towels
- Masking tape and paper
- Sandpaper (various grits: 1000, 1500, 2000)
- Rubbing compound
- Polishing compound
- Automotive clear coat
- Clear coat spray gun (for larger areas) or touch-up brushes (for small areas)
- Safety equipment (gloves, mask, safety glasses)
2. Prepare the Surface
Thoroughly wash and dry your car, paying extra attention to the area you’ll be repairing. Any dirt or grime left behind can interfere with the repair process. Once clean, use masking tape and paper to protect surrounding areas that don’t require treatment.
3. Sand the Affected Area
This is where the real work begins. Start with the lowest grit sandpaper (1000) and sand the damaged clear coat using smooth, back-and-forth motions. The goal is to feather the edges of the peeling or damaged area to create a smooth transition.
Pro Tip: Keep the sandpaper wet by regularly dipping it in a bucket of soapy water. This prevents clogging and ensures a smoother finish.
4. Progress to Finer Grits
Gradually work your way up to finer grits of sandpaper (1500, then 2000), each time sanding in a different direction. This process helps to further refine the surface and remove any scratches left by the coarser grits.
5. Clean and Prepare for Clear Coat Application
Once you’ve achieved a smooth, uniform surface, wash the area thoroughly to remove all sanding residue. Allow it to dry completely before moving on to the next step.
6. Apply the Clear Coat
If you’re using a spray gun, follow the manufacturer’s instructions carefully. Apply thin, even coats, allowing each coat to dry completely before applying the next. For smaller areas, a touch-up brush might suffice.
7. Allow for Curing Time
Once you’ve applied the final coat of clear coat, be patient. Allow ample time for the clear coat to cure completely. This might take anywhere from a few hours to a couple of days, depending on the product used and environmental conditions.
8. Polish for a Professional Finish (Optional)
For an extra touch of shine, you can polish the repaired area using a polishing compound and a microfiber cloth. This will help blend the new clear coat with the surrounding paintwork, resulting in a seamless and professional-looking finish.
When to Call in the Pros
While DIY clear coat repair can be effective for minor issues, there are times when professional intervention is the best course of action:
- Extensive damage: If the clear coat failure covers a large area of your car, it’s best left to the experts.
- Deep scratches: Scratches that penetrate the base coat require more than just a clear coat touch-up.
- Color matching issues: Matching the new clear coat to the existing paint can be tricky, especially on older cars.
Preventing Future Clear Coat Failure
Prevention is always better than cure. Here are some tips to protect your car’s paint and prevent future clear coat problems:
- Regular washing: Wash your car regularly using a pH-neutral car wash soap and microfiber mitts.
- Waxing: Applying a layer of wax every few months provides an extra layer of protection against UV rays and environmental contaminants.
- Covered parking: Whenever possible, park your car in a garage or under a carport to shield it from direct sunlight.
FAQs: How to Repair Car Paint Clear Coat Failure
Q: Can I use nail polish as a clear coat for my car?
A: No, using nail polish on your car is not recommended. Nail polish is not designed to withstand the harsh conditions that car paint endures and can actually damage your car’s finish.
Q: How long does it take for car clear coat to dry?
A: Drying time varies depending on the type of clear coat used and the environmental conditions. In general, it’s best to allow at least 24 hours for the clear coat to dry completely before driving your car.
Q: Can I apply clear coat over old, faded paint?
A: While you can apply clear coat over old paint, it might not deliver the desired results if the paint is severely faded or damaged. It’s best to consult with a professional to determine the best course of action.
Q: What causes clear coat to peel on a new car?
A: Clear coat peeling on a new car is often a sign of a factory defect or improper paint application. If you’re experiencing this issue with a new car, contact your dealership immediately.
Conclusion: Restoring Your Car’s Shine
Repairing car paint clear coat failure doesn’t have to be a daunting task. By understanding the causes, following the right steps, and using the right products, you can restore your car’s shine and protect its paint for years to come. Remember, patience is key, and for more extensive damage, professional help is always an option.
Need a helping hand with car paint touch-up or scratch repair? Check out our guides on car touch up paint repair and chipped paint repair car for expert tips and advice.


