Repairing the rubber molding inside your car window is crucial for maintaining a comfortable and dry driving experience. A damaged window seal can lead to water leaks, wind noise, and even structural damage over time. This comprehensive guide will walk you through everything you need to know about identifying, repairing, and preventing damage to your car’s window molding.
Understanding the function and importance of this seemingly small component is the first step. The rubber molding acts as a barrier against the elements, keeping water and air out while also providing a cushion for the glass. Neglecting damage can lead to more costly repairs down the line. Now, let’s explore the common signs of wear and tear.
Recognizing the Signs of Damaged Window Molding
How do you know if your car window’s rubber molding needs attention? Look for telltale signs such as:
- Water leaks: Notice water droplets on the inside of your car after rain? This could indicate a compromised seal.
- Wind noise: Excessive wind noise, especially at higher speeds, can signal a gap in the molding.
- Visible damage: Cracks, tears, or dry rot in the rubber are obvious indicators of necessary repair.
- Mold or mildew: Moisture trapped by a damaged seal can lead to mold growth, presenting a health hazard.
Inspect your window moldings regularly for these signs. Early detection can save you time and money. Speaking of saving money, let’s discuss some cost-effective DIY repair solutions.
DIY Repair Options for Rubber Molding
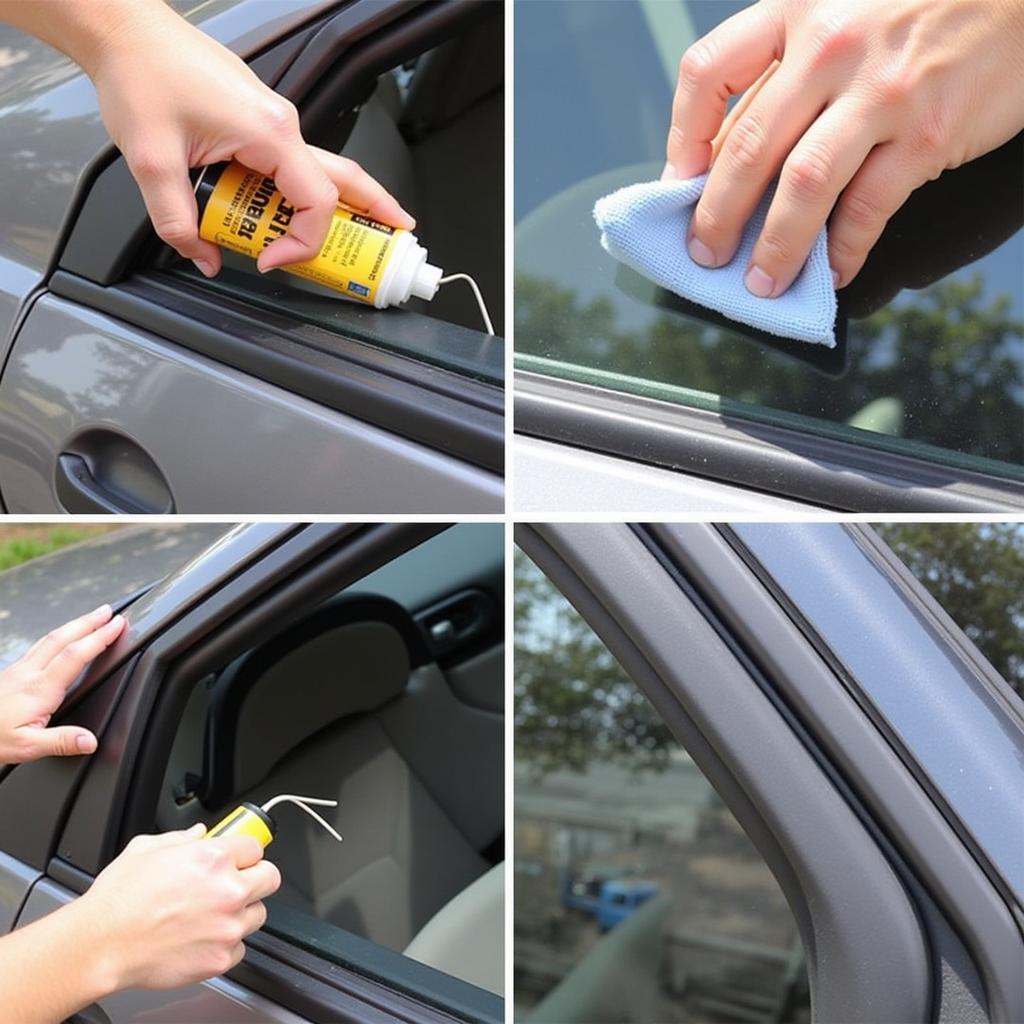
Minor damage to the rubber molding can often be addressed with DIY solutions. Here’s a step-by-step guide for a simple repair:
- Clean the area: Thoroughly clean the damaged area with a suitable cleaner and allow it to dry completely.
- Apply adhesive: Use a specialized rubber sealant or adhesive designed for automotive applications. Follow the manufacturer’s instructions for application.
- Smooth the sealant: Use a tool or your finger to smooth the sealant and ensure a proper seal.
- Allow to dry: Give the sealant ample time to dry before operating the window.
For more extensive damage, replacement might be the better option. This will be discussed in the next section. Check our guide on car door trim and window repair for detailed instructions and helpful tips.
When to Replace Your Car Window Molding
While DIY repairs can be effective for minor issues, significant damage requires professional repair or replacement. Here are some scenarios where replacement is recommended:
- Extensive cracking or tearing: If the damage is widespread, patching may not be a long-term solution.
- Dry rot: Dry rot weakens the rubber and makes it prone to further deterioration.
- Missing sections: If portions of the molding are missing, replacement is essential.
Replacing the molding involves removing the old molding, cleaning the area, and installing the new one. While it can be a DIY project, professional installation ensures a proper fit and prevents future issues. You can find more information about the associated costs on our page about car window trim seal repair cost.
Preventing Damage to Your Window Molding
Prevention is always better than cure. Here are some simple steps you can take to protect your car window molding:
- Regular cleaning: Clean the molding regularly with a mild soap and water solution to remove dirt and debris.
- Avoid harsh chemicals: Harsh chemicals can damage the rubber, leading to premature wear.
- Protect from extreme temperatures: Extreme heat or cold can weaken the rubber over time. Park in shaded areas whenever possible.
- Lubricate the molding: Applying a rubber conditioner can help maintain its flexibility and prevent cracking.
By following these preventative measures, you can significantly extend the life of your window molding. If you’re facing persistent water leaks, our guide on car window leak repair near me might be helpful.
 Applying Rubber Conditioner to Car Window Molding
Conclusion
Repairing rubber molding inside your car window is essential for maintaining a comfortable and damage-free vehicle. By recognizing the signs of damage and taking appropriate action, you can prevent more costly repairs down the line. Whether you choose a DIY fix or professional help, addressing this issue promptly ensures a pleasant driving experience and protects your car’s overall integrity. For more insights on repairing the molding strip, you can refer to our article on repair car window molding strip. Alternatively, you can find information on sealant repair on our car window sealant repair page.
FAQ
- How long does it take for rubber sealant to dry? Drying time varies depending on the specific product, but it typically takes between 24 and 48 hours.
- Can I use any type of adhesive for repairing rubber molding? No, it’s crucial to use a specialized automotive rubber sealant or adhesive.
- How often should I clean my car window molding? Cleaning it every few months is generally sufficient, but more frequent cleaning might be necessary in dusty or harsh environments.
- What are the signs of dry rot in rubber molding? Dry rot appears as cracks, brittleness, and a faded appearance in the rubber.
- Is replacing window molding a difficult DIY project? While it can be done yourself, professional installation is recommended for optimal results.
- Can damaged window molding affect my car’s resale value? Yes, neglecting repairs can negatively impact your car’s resale value.
- How can I prevent mold growth around my car windows? Ensure proper sealing of the window molding and address any water leaks promptly.
Need assistance? Contact us via WhatsApp: +1(641)206-8880, or email: [email protected]. Our customer service team is available 24/7.


