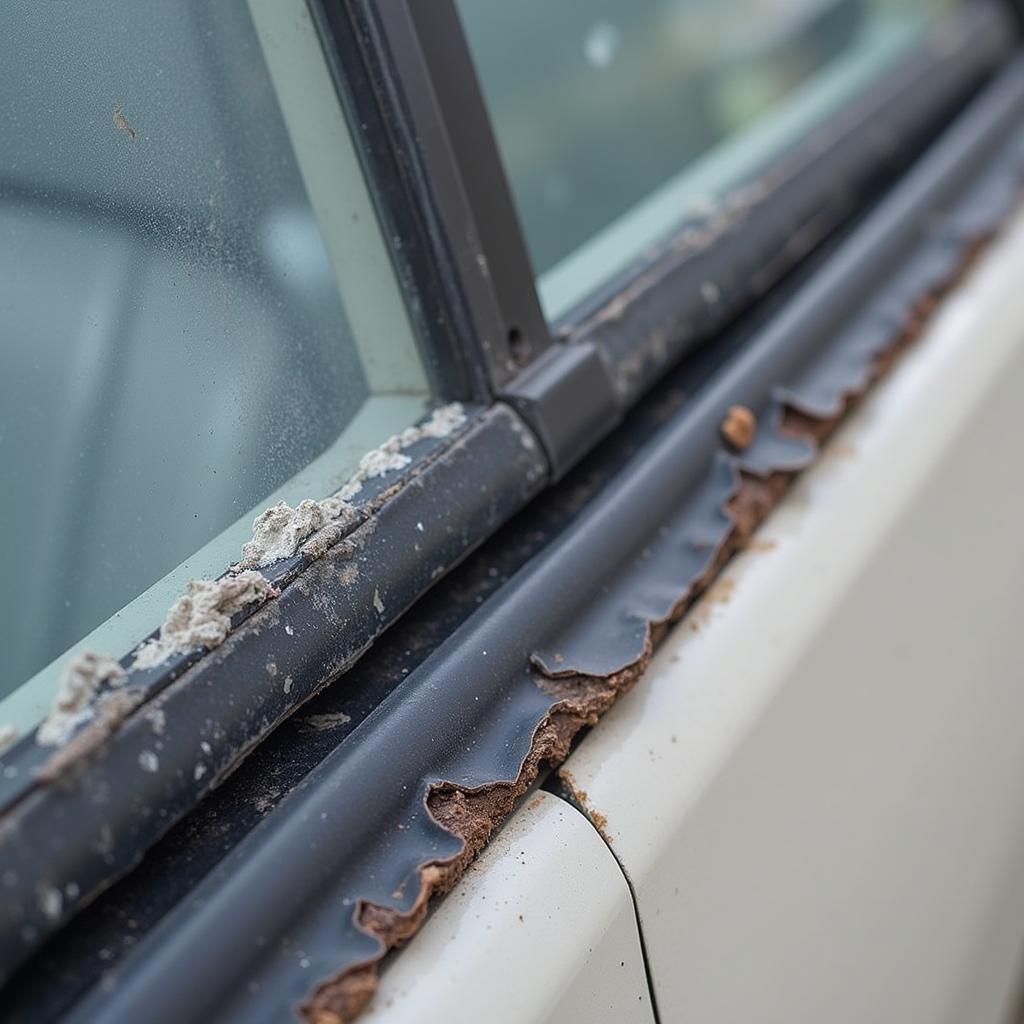
Replacing a worn-out car window trim rubber seal is a surprisingly common car maintenance task. Whether you’re dealing with wind noise, water leaks, or simply aesthetic deterioration, knowing how to repair a car window trim rubber seal can save you a trip to the mechanic and keep your vehicle in top shape. This guide provides a comprehensive walkthrough of the process, offering valuable tips and insights to ensure a successful repair.
Understanding the Importance of Car Window Trim Rubber Seals
These seemingly insignificant rubber seals play a crucial role in maintaining your car’s comfort and structural integrity. They create a watertight and airtight barrier, preventing rain, wind, and debris from entering your vehicle. A damaged seal can lead to a variety of problems, from annoying wind noise and water leaks to more serious issues like rust and mold growth. Ignoring a damaged seal can even compromise the effectiveness of your car’s climate control system, making it work harder and less efficiently.
Gathering the Necessary Tools and Materials
Before you begin, assemble the following tools and materials:
- New rubber seal: Ensure it’s the correct size and type for your specific car model.
- Adhesive remover: This will help clean the old adhesive residue.
- Plastic pry tool or a small flathead screwdriver: For carefully removing the old seal.
- Clean rags or paper towels: For cleaning the window frame.
- Adhesive promoter (optional): Enhances the bond of the new seal.
- Automotive adhesive: Specifically designed for bonding rubber to metal.
Step-by-Step Guide to Replacing the Seal
- Remove the old seal: Gently pry the old seal away from the window frame using the plastic pry tool or screwdriver. Be careful not to scratch the glass or damage the surrounding paintwork.
- Clean the window frame: Thoroughly clean the window frame where the old seal was attached. Remove all traces of old adhesive using the adhesive remover and a clean rag.
- Prepare the new seal: If using an adhesive promoter, apply it to the window frame where the new seal will be attached. This will help create a stronger bond.
- Apply adhesive to the new seal: Follow the instructions on the automotive adhesive packaging. Apply a thin, even bead of adhesive to the back of the new seal.
- Install the new seal: Carefully press the new seal onto the window frame, ensuring it’s aligned correctly. Start at one end and work your way around the entire frame, pressing firmly to secure the seal in place.
- Allow the adhesive to cure: Refer to the adhesive instructions for the recommended curing time. Avoid closing the window or disturbing the seal during this period.
Troubleshooting Common Issues
- Seal doesn’t fit properly: Double-check you’ve purchased the correct seal for your car model. Trim any excess material if necessary.
- Adhesive isn’t sticking: Ensure the window frame is clean and dry. Using an adhesive promoter can also help.
- Water leaks persist: Inspect the surrounding area for other potential leaks or damage.
Preventing Future Damage
Regularly cleaning and conditioning your car window trim rubber seals can help prevent premature wear and tear. Avoid using harsh chemicals or abrasive cleaners, which can damage the rubber. Applying a rubber protectant can help keep the seals supple and prevent cracking.
Conclusion
Repairing a car window trim rubber seal is a straightforward process that can be easily accomplished with the right tools and a little patience. By following these steps, you can effectively address issues like wind noise and water leaks, preserving the integrity of your vehicle and enhancing your driving experience. Remember, maintaining your car’s rubber seals is a small investment that can prevent more costly repairs down the road. How to repair a car window trim rubber seal is essential knowledge for every car owner.
You can find more information about car window repairs in places that repair car windows. For specific repair services in Golden, Colorado, visit car window repair golden co.
FAQ
- How often should I replace my car window trim rubber seals?
- Can I use any type of adhesive for this repair?
- What are the signs of a damaged car window trim rubber seal?
- How can I prevent my car window trim rubber seals from drying out?
- Is it necessary to use an adhesive promoter?
- What should I do if the new seal still leaks?
- Can I repair a small tear in the rubber seal instead of replacing the entire thing?
Common Scenarios and Questions
Scenario: Wind noise is coming from the driver’s side window.
Question: Could a damaged window trim rubber seal be the cause of the wind noise?
Scenario: Water is leaking into the car during heavy rain.
Question: How can I determine if the water leak is coming from the window trim rubber seal?
Scenario: The rubber seal is cracked and deteriorated.
Question: Can I just replace the damaged section of the seal, or do I need to replace the entire thing?
Further Resources
Check out our other articles on car maintenance and repair for more helpful tips and advice. You can also learn more about specific car window repair services in your area.
Need Help? Contact Us!
For any assistance with car repair and diagnostics, feel free to reach out to our team. We offer 24/7 customer support via WhatsApp: +1(641)206-8880 and Email: [email protected].


