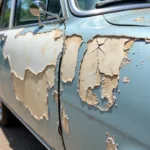
Painting a car repair with shaker cans can seem daunting, but with the right preparation and technique, it can be a cost-effective DIY solution. This guide provides a step-by-step approach, covering everything from surface preparation to achieving a professional-looking finish.
Understanding the Basics of Shaker Can Car Painting
Before diving into the process, it’s crucial to understand the limitations and advantages of using shaker cans. Shaker cans, also known as rattle cans, offer convenience and affordability, making them a popular choice for small repairs or touch-ups. They are readily available, require minimal equipment, and are relatively easy to use. However, they may not be ideal for large areas or achieving a flawless factory finish.
Why Choose Shaker Cans for Car Repair?
- Cost-Effective: Shaker cans are significantly cheaper than professional spray guns and compressor setups.
- Convenience: They are easy to use and require minimal cleanup.
- Accessibility: Readily available at most auto parts stores.
Limitations of Shaker Cans
- Limited Color Matching: Matching the exact color of your car can be challenging.
- Durability: The paint from shaker cans may not be as durable as professionally applied paint.
- Finish Quality: Achieving a perfectly smooth, factory-like finish can be difficult.
Preparing the Surface for Painting
Proper surface preparation is the key to a successful paint job, regardless of whether you’re using a professional spray gun or shaker cans. A well-prepared surface ensures proper adhesion and a smooth, even finish.
Cleaning and Degreasing
Thoroughly clean the area to be painted with soap and water, then degrease it with a wax and grease remover. This removes any contaminants that could interfere with paint adhesion.
Sanding and Priming
Sand the area with fine-grit sandpaper to create a smooth surface for the primer to adhere to. Apply a thin, even coat of automotive primer, allowing it to dry completely before moving on to the next step. This creates a uniform base for the paint.
Applying the Paint
Shake the can vigorously for at least two minutes to ensure the paint is properly mixed. Hold the can about 10-12 inches away from the surface and apply thin, even coats, overlapping each pass by about 50%. Avoid heavy coats, which can lead to runs and drips. Allow each coat to dry completely before applying the next.
Achieving a Smooth Finish
Multiple thin coats are better than one thick coat. Patience is key to achieving a professional-looking result. Don’t rush the process.
Tips for Applying Paint with Shaker Cans
- Practice on a scrap piece of metal: This helps you get a feel for the spray pattern and avoid mistakes on your car.
- Use light, sweeping motions: Avoid holding the can in one place for too long.
- Work in a well-ventilated area: Wear a respirator to avoid inhaling paint fumes.
Protecting the Finish
Once the final coat of paint is dry, apply a clear coat to protect the finish and add gloss. This adds durability and UV protection, helping to prevent fading and chipping.
Choosing the Right Clear Coat
Choose a clear coat that is compatible with the paint you used. Some clear coats are specifically designed for use with acrylic lacquer paints, while others are for enamel paints.
Applying the Clear Coat
Apply the clear coat in the same manner as the paint, using thin, even coats and allowing each coat to dry completely before applying the next.
Conclusion
Painting a car repair with shaker cans can be a successful DIY project when done correctly. By following these steps and taking your time, you can achieve a satisfactory result. Remember, proper surface preparation and applying thin, even coats are crucial for a professional-looking finish. While painting a car repair with shaker cans offers a cost-effective solution, remember that achieving a flawless, factory-like finish might require professional expertise.
FAQs
- How many coats of paint should I apply? Typically, 3-4 thin coats are sufficient.
- How long should I wait between coats? Refer to the paint manufacturer’s instructions for drying times.
- Can I use shaker cans for large repairs? While possible, larger repairs are generally better suited for professional spray equipment.
- How can I match my car’s paint color exactly? Consult an auto parts store for color matching services.
- How long will the paint job last? With proper care, a shaker can paint job can last several years.
Need help with your car repair or diagnostics? Contact us via WhatsApp: +1(641)206-8880 or Email: [email protected]. Our customer support team is available 24/7.
We also offer a variety of other helpful resources on our website, including:
- Choosing the Right Paint for Your Car
- Understanding Car Paint Codes
- Common Car Repair Mistakes and How to Avoid Them
Contact us today for all your car repair needs!


