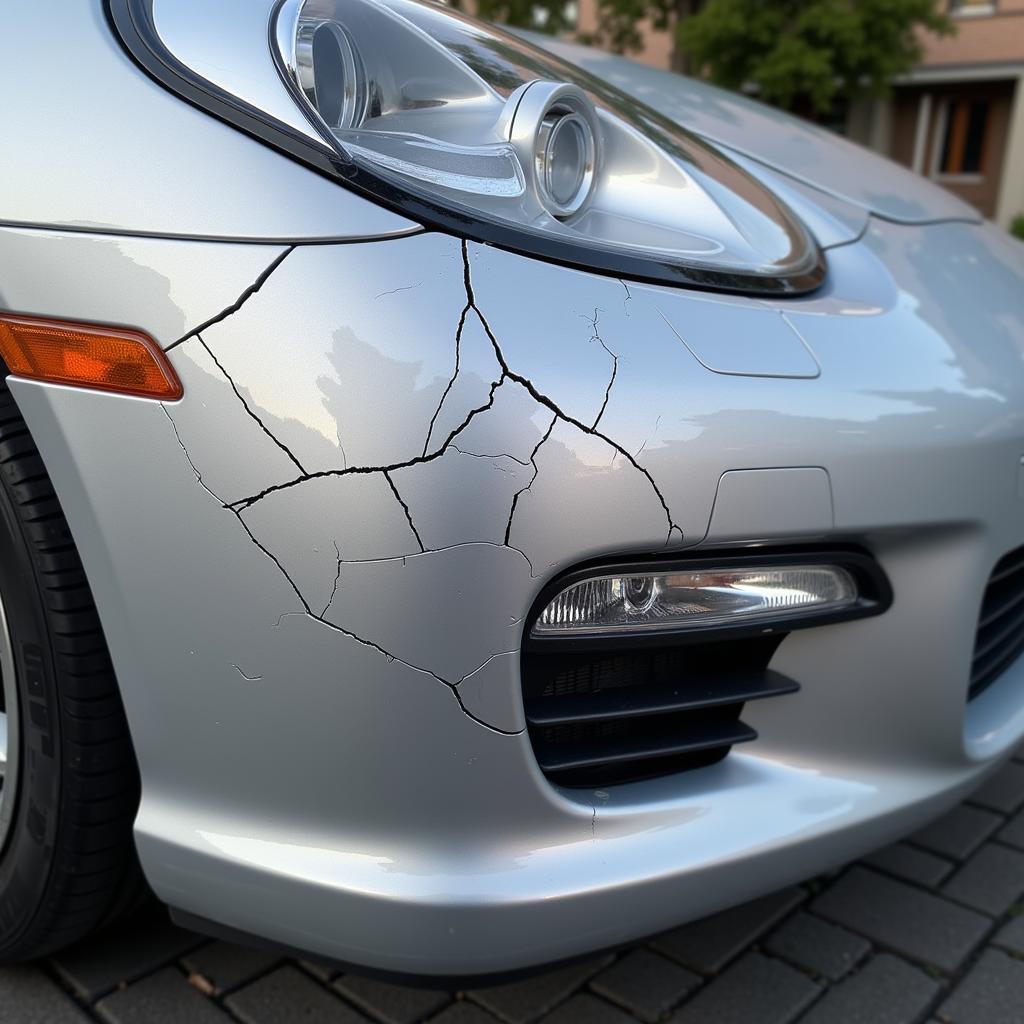
Cracked paint on your car bumper isn’t just an eyesore; it can expose the underlying metal to the elements, leading to rust and further damage. Thankfully, repairing cracked paint is often a manageable DIY project. This comprehensive guide will equip you with the knowledge and steps to effectively tackle this issue and restore your bumper’s appearance.
Knowing how to repair cracked paint on car bumper can save you a significant amount of money compared to professional repairs. A cracked bumper can detract from the overall aesthetic of your vehicle, but it also signifies potential structural damage. Addressing the issue promptly prevents further deterioration and maintains the vehicle’s value. We’ll explore various repair methods, ranging from simple touch-ups to more involved procedures for larger cracks. You’ll learn how to assess the damage, choose the right materials, and execute the repair with professional-looking results. Learn about car bumper repair la plata here.
Assessing the Damage: Know Your Enemy
Before diving into the repair process, carefully examine the cracked paint. Determine the extent of the damage, noting the size, depth, and number of cracks. Is the crack superficial, affecting only the clear coat and paint layers? Or does it extend to the primer or even the bumper material itself? This initial assessment will guide your repair strategy.
Types of Cracks and Their Causes
Understanding the type of crack can help you pinpoint the cause and choose the right repair method. Stress cracks, often caused by impacts or flexing of the bumper, usually appear as thin, spiderweb-like lines. Chip cracks, resulting from stones or road debris, are typically smaller and more localized. Larger, deeper cracks might stem from more significant impacts and could require more extensive repair work.
Gathering Your Supplies: The Right Tools for the Job
Having the correct supplies ensures a smooth and successful repair. For minor cracks, you might need touch-up paint, primer, sandpaper, masking tape, and a polishing compound. Deeper cracks may require a plastic filler, adhesion promoter, and potentially a heat gun or hairdryer. Investing in quality materials will yield better and longer-lasting results. Looking for a repair kit? Check out this helpful resource on car bumper plastic repair kit.
Repairing the Cracked Paint: A Step-by-Step Guide
The repair process varies depending on the severity of the damage. For small, hairline cracks, cleaning the area thoroughly and applying touch-up paint might suffice. Larger cracks require more meticulous preparation, including sanding, filling, priming, and painting.
Step 1: Preparing the Surface
Clean the damaged area with soap and water, then degrease it with a suitable cleaning agent. Lightly sand the cracked area to create a smooth surface for the repair materials to adhere to. Mask off the surrounding area to protect the undamaged paint.
Step 2: Filling Deeper Cracks
For deeper cracks, apply a plastic filler, following the manufacturer’s instructions. Allow the filler to dry completely and sand it smooth, blending it seamlessly with the surrounding bumper surface.
Step 3: Priming and Painting
Apply a thin coat of primer to the repaired area. Once dry, apply several thin coats of touch-up paint, allowing each coat to dry before applying the next. Finally, apply a clear coat to protect the paint and enhance its shine. Wondering about fixing bumper scratches? Learn about how to repair a car bumper scratch here.
Step 4: Finishing Touches
After the paint has dried completely, use a polishing compound to blend the repaired area with the surrounding paint, achieving a seamless and professional finish.
Preventing Future Cracks: Proactive Measures
While repairs can effectively address existing cracks, taking preventive measures can minimize the risk of future damage. Regularly washing and waxing your car can protect the paint from the elements. Avoid parking too close to other vehicles or objects to prevent bumps and scratches. Being mindful of road debris and driving cautiously can also help prevent chip cracks. Need help with a broken bumper? This resource might be useful: car broken bumper repair.
Conclusion: Restoring Your Bumper’s Glory
Repairing cracked paint on your car bumper is a rewarding task that can significantly improve your vehicle’s appearance and protect it from further damage. By following the steps outlined in this guide and using the right materials, you can achieve professional-looking results and extend the life of your bumper. Don’t let cracked paint diminish your car’s appeal – take action and restore its pristine condition! You might also find information about how much is it to repair a car front bumper helpful.
FAQ
- Can I use any type of paint for touch-ups? No, using the correct color code for your car is essential for a seamless repair.
- How long does the repair process take? Depending on the extent of the damage, the repair can take a few hours to a full day.
- Do I need to remove the bumper for repairs? Not always. Minor cracks can often be repaired without removing the bumper.
- What if the crack is very deep? For deep cracks, consult a professional for optimal results.
- How can I prevent future cracks? Regular maintenance, careful parking, and cautious driving can help prevent future damage.
- Can I use a hairdryer instead of a heat gun? A hairdryer can sometimes be used, but a heat gun provides more controlled heat.
- What if the crack extends to the plastic bumper itself? You may need to repair the plastic using a specialized filler or consider replacing the bumper.
Do you have further car repair questions? We have a team of experts ready to assist you 24/7. Contact us via WhatsApp: +1(641)206-8880, or Email: [email protected].


