DIY paint repair car offers a cost-effective way to address minor paint damage, from scratches to chips. Whether you’re a seasoned DIYer or a beginner, this guide provides the knowledge and steps to achieve professional-looking results from the comfort of your garage. Learn how to assess the damage, choose the right repair kit, and master the techniques for a flawless finish. Let’s dive into the world of DIY car paint repair.
Fixing minor paint imperfections yourself can save a significant amount of money compared to professional body shops. This guide will walk you through the process of assessing your car’s paint damage and choosing the best DIY paint repair method for your specific situation. You’ll learn about different repair kits, including car paint chip repair kit options, and essential techniques for a seamless repair.
Assessing the Damage: Know Your Enemy
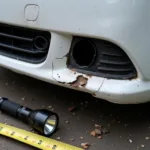
Before you start your diy paint repair car project, it’s crucial to understand the extent of the damage. Is it a light scratch, a deep gouge, or a stone chip? The type of damage dictates the repair approach. For instance, a minor scratch might only require a rubbing compound, while a deep chip will necessitate a filler and touch-up paint. Accurately assessing the damage is the first step towards a successful DIY paint repair.
Choosing the Right DIY Car Paint Repair Products
The market is flooded with DIY car paint repair products, each promising a miracle fix. However, selecting the right one is key to achieving professional results. Consider the type and depth of the damage. For minor scratches, a car paint scratch repair spray might suffice. Deeper damage might require a dupli color body paint repair kit car scratch remover and a clear coat. Research different brands and read reviews before making your purchase. Don’t hesitate to consult online forums or automotive experts for advice.
What type of paint should I use for DIY car paint repair?
Matching the paint color is crucial for a seamless repair. Most DIY kits offer a color-matching system, but it’s advisable to double-check against your car’s paint code, usually found on a sticker inside the driver’s side doorjamb or under the hood.
What is the best way to prepare the damaged area?
Proper preparation is essential for a professional-looking finish. Clean the area thoroughly with soap and water, then degrease it with a wax and grease remover. If there’s any rust, remove it with a wire brush or sandpaper. For deeper scratches and chips, sanding the area smooth is crucial before applying any filler or paint. You might find our guide on how to sand and repair car paint helpful.
Executing the Repair: A Step-by-Step Guide
- Clean and Prepare: Wash the damaged area thoroughly with soap and water, then degrease it with a wax and grease remover. Allow the area to dry completely.
- Sand (If Necessary): If the damage is deep, use sandpaper to smooth the edges of the chip or scratch. Start with a coarser grit and gradually move to a finer grit for a smooth surface.
- Apply Filler (If Necessary): For deep chips, apply a thin layer of automotive filler, following the product instructions. Let the filler dry and sand it smooth.
- Apply Primer (If Necessary): Primer helps the paint adhere to the surface. Apply a thin, even coat of primer and let it dry.
- Apply Paint: Using a small brush or touch-up pen, apply thin coats of paint to the damaged area. Allow each coat to dry completely before applying the next.
- Apply Clear Coat (If Necessary): A clear coat protects the paint and gives it a glossy finish. Apply several thin coats, allowing each to dry.
- Sand and Buff: Once the clear coat is dry, use fine-grit sandpaper to smooth out any imperfections. Finish with a rubbing compound and polishing compound for a professional shine.
DIY Car Paint Repair: Common Mistakes to Avoid
- Rushing the process: Take your time and allow each coat of paint or clear coat to dry completely.
- Using the wrong products: Choosing the correct repair kit for your specific damage is essential.
- Ignoring surface preparation: Proper cleaning and degreasing are vital for paint adhesion.
- Applying thick coats: Multiple thin coats are better than one thick coat, which can lead to runs and drips.
“Patience is key in DIY car paint repair,” advises John Smith, Senior Automotive Technician at Smith’s Auto Repair. “Take your time, follow the instructions, and don’t be afraid to ask for help if needed.”
Conclusion
DIY paint repair car can be a rewarding experience, saving you money and giving you a sense of accomplishment. With proper preparation, the right tools, and a little patience, you can achieve professional-looking results. Remember to carefully assess the damage, select the appropriate repair kit, and follow the instructions meticulously. DIY paint repair offers an affordable and effective solution for maintaining your car’s appearance. For more specific guidance on DIY car scratch repair at home, you can check out this resource: car paint scratch repair at home.
FAQ
- How long does it take for touch-up paint to dry?
- Can I use household paint for car touch-ups?
- What is the best way to remove rust before painting?
- How can I prevent future paint chips and scratches?
- When should I consider professional car paint repair instead of DIY?
- What are the common signs that a DIY paint repair has gone wrong?
- How can I blend the repaired area seamlessly with the surrounding paint?
Other Questions?
Need more information about specific paint repair products, like the Dupli-Color kit? Check out our review on Dupli-Color Body Paint Repair Kit Car Scratch Remover.
Need help with sanding and repairing car paint? Our detailed guide provides step-by-step instructions: how to sand and repair car paint.
Need assistance or have a specific question about your car’s paint repair? Contact us via WhatsApp: +1(641)206-8880 or Email: [email protected]. Our customer service team is available 24/7 to assist you.


