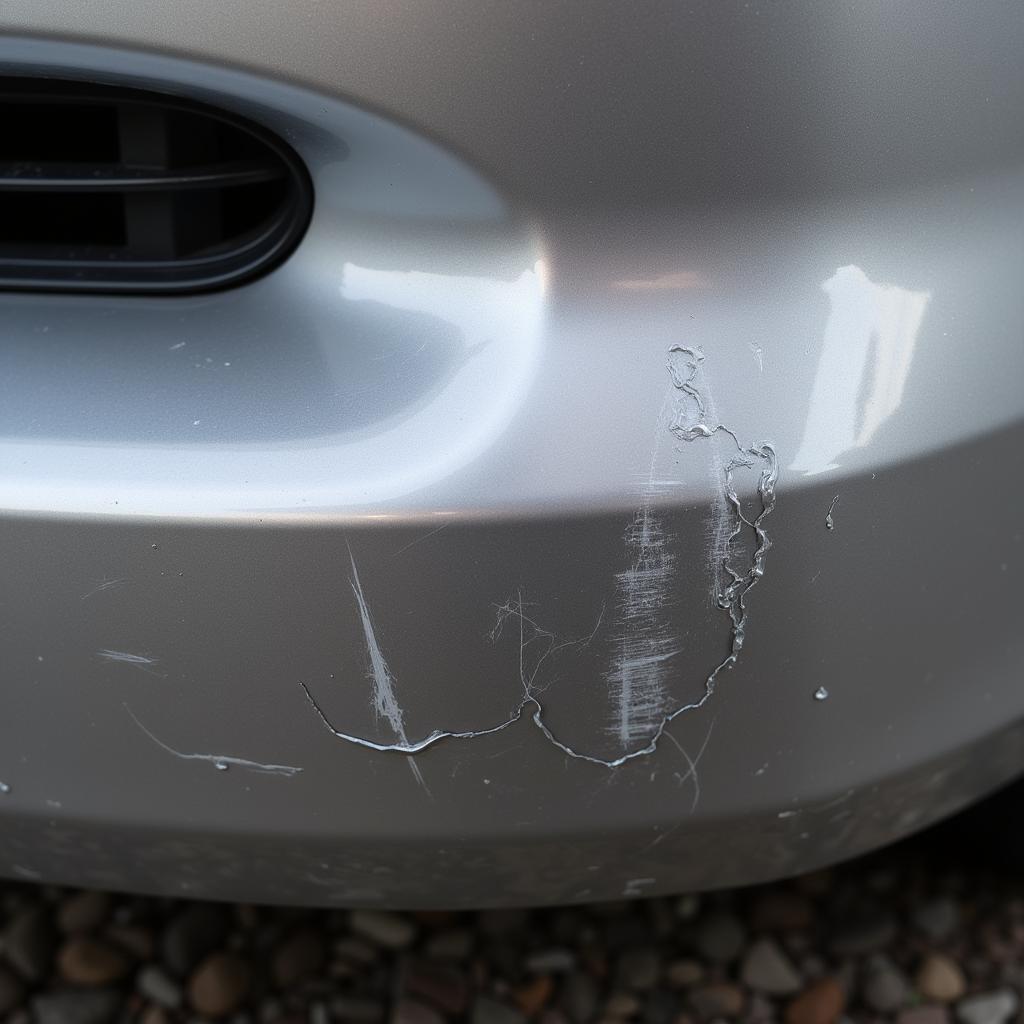
A cracked or dented bumper is an eyesore, but thankfully, plastic bumper repair is often a manageable DIY project. Whether you’ve scuffed a parking barrier or had a minor fender bender, knowing how to assess the damage and choose the right repair method can save you time and money.
Assessing the Damage: A Crucial First Step
Before you grab your tools, you need to understand the extent of the damage to your bumper.
- Minor Scratches and Scuffs: These are often superficial and can be addressed with simple techniques like buffing and paint touch-ups.
- Cracks and Splits: These require more involved repairs, often involving plastic welding or the use of epoxy fillers.
- Dents and Deformations: These might necessitate heating and reshaping the plastic or using specialized tools to pull out the dent.
DIY Repair Methods for Plastic Car Bumpers
Depending on the severity of the damage, there are various methods for repairing a plastic car bumper:
1. Repairing Minor Scratches and Scuffs
- Clean the Area: Start by thoroughly washing the damaged area with soap and water to remove dirt and grime.
- Sanding: Use fine-grit sandpaper (around 200-grit) to smooth out the scratches.
- Buffing: Apply a rubbing compound to a buffing pad and gently work it over the sanded area. This will further refine the surface and remove any remaining scratches.
- Touch-Up Paint: If the scratches have gone through the paint, you’ll need to apply touch-up paint. Ensure you choose the correct color code for your car.
2. Repairing Cracks and Splits
- Cleaning and Preparation: As with scratches, thoroughly clean the area around the crack. Use masking tape to protect the surrounding paintwork.
- Plastic Welding: For deep or wide cracks, plastic welding is often the most effective method. This involves using a specialized tool to melt and fuse plastic filler rods into the crack, creating a strong bond.
- Epoxy Resin: For smaller cracks, epoxy resin can be a viable solution. Mix the resin according to the manufacturer’s instructions and apply it to the crack. Clamp the area if necessary to close the gap while the resin cures.
- Reinforcement Mesh: For added strength, especially on larger cracks, consider using fiberglass mesh or reinforcement tape in conjunction with the plastic welding or epoxy.
3. Addressing Dents and Deformations
- Heat Gun Technique: For minor dents, you can try using a heat gun. Carefully apply heat to the dented area, making the plastic more pliable. Gently push the dent from behind while the plastic is warm. This method requires caution as excessive heat can damage the bumper.
- Specialized Dent Pullers: For more stubborn dents, you might need to use a dent puller. These tools use suction or leverage to pull the dent out.
When to Call in a Professional
While many plastic bumper repairs can be tackled at home, some situations call for professional assistance:
- Extensive Damage: If the bumper is severely cracked, broken, or missing large chunks, a professional repair shop is your best bet.
- Structural Damage: Damage that extends beyond the bumper itself, such as damage to the car’s frame or underlying components, requires professional expertise.
- Safety Concerns: If you’re unsure about any aspect of the repair process or if the damage affects the car’s safety features, it’s best to consult a professional.
Conclusion
Repairing a plastic car bumper can be a rewarding DIY endeavor, saving you money and restoring your car’s appearance. By carefully assessing the damage and choosing the appropriate repair method, you can achieve impressive results. However, always remember that safety and proper execution are paramount. When in doubt, consult a professional for guidance or to ensure the job is done right.
FAQs
1. Can I use superglue to fix a crack in my car bumper?
While it might seem tempting, superglue is not recommended for car bumper repairs. It doesn’t bond well with plastic and can become brittle over time, leading to a weak and potentially dangerous repair.
2. How long does it take for epoxy resin to cure on a car bumper?
Curing time varies depending on the specific epoxy product you’re using. However, most epoxies will be dry to the touch within a few hours and fully cured within 24 hours.
3. Can I paint over the repaired area on my bumper?
Yes, you can paint over the repaired area once the filler or resin has fully cured. Ensure you sand the area smooth, prime it properly, and use automotive-grade paint that matches your car’s color.
4. Is it safe to drive my car with a cracked bumper?
Driving with a cracked bumper can potentially compromise your safety, especially if the crack is significant or affects other parts of the car. It’s best to address the issue as soon as possible.
5. How much does it typically cost to have a plastic car bumper repaired professionally?
The cost of professional repair can vary widely depending on the severity of the damage and the location. However, you can expect to pay anywhere from a few hundred dollars for minor repairs to over a thousand dollars for more extensive damage.
Need more help with your car repairs? Check out our other articles:
- [How to change your car oil.](link to your article)
- [Troubleshooting common car battery problems.](link to your article)
Have more questions? We’re here to help! Contact our team 24/7 via WhatsApp: +1(641)206-8880, or Email: [email protected].


