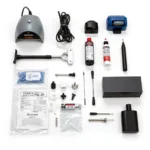
Dealing with a cracked or chipped windshield? Don’t panic! A car window screen repair kit can be your saving grace. This guide provides you with all the essential information you need to know about car window screen repair kits, empowering you to tackle minor windshield damage confidently.
Understanding the Importance of Timely Repairs
Even a small chip in your windshield can compromise its structural integrity. Ignoring it can lead to:
- Safety Hazards: A weakened windshield provides less protection in an accident.
- Increased Repair Costs: Small chips can quickly spiderweb into larger cracks, leading to expensive replacements.
- Failed Vehicle Inspections: Significant windshield damage is often a reason for failing safety inspections.
Car Window Screen Repair Kits: Your DIY Solution
A car window screen repair kit offers a cost-effective and convenient way to fix minor windshield damage, including:
- Bullseyes: Circular cracks with a small impact point.
- Star Cracks: Small cracks resembling a star shape.
- Combination Breaks: A combination of bullseyes and star cracks.
Expert Insight from John Miller, Certified Automotive Technician: “Using a car window screen repair kit for minor chips and cracks is a smart move. It’s a fraction of the cost of windshield replacement and can be done right in your driveway.”
Choosing the Right Car Window Screen Repair Kit
Not all repair kits are created equal. Consider these factors when making your selection:
- Type of Resin: Look for kits with high-quality resin that cures clear and strong.
- Applicator Design: An easy-to-use applicator ensures proper resin application.
- Curing Method: Some kits use UV light for curing, while others air dry. Choose what suits your needs and environment.
- Additional Features: Some kits include extra features like a glass scraper for debris removal.
Step-by-Step Guide to Using a Car Window Screen Repair Kit
Repairing your windshield with a DIY kit is easier than you think. Follow these steps:
- Clean the Area: Thoroughly clean the damaged area and surrounding windshield with the provided cleaner or rubbing alcohol.
- Prepare the Applicator: Following the kit’s instructions, assemble the applicator and load it with the resin.
- Apply the Resin: Carefully position the applicator over the chip or crack and apply gentle pressure to inject the resin.
- Remove Air Bubbles: Use the provided tools or a plastic card to gently push out any air bubbles trapped within the resin.
- Cure the Resin: Follow the kit’s instructions for curing time and method. UV-cured resins require exposure to direct sunlight or a UV lamp.
- Remove Excess Resin: Once the resin is cured, use a razor blade to carefully scrape off any excess resin from the windshield surface.
Tips for a Successful Repair:
- Act Quickly: Repair the damage as soon as possible to prevent dirt and debris from contaminating the area.
- Work in the Shade: Avoid direct sunlight while applying and curing the resin, as excessive heat can affect the curing process.
- Be Patient: Allow ample curing time for optimal results.
When to Consult a Professional
While DIY kits are effective for minor damage, some situations warrant professional intervention:
- Large Cracks: Cracks longer than a few inches or those that reach the edge of the windshield require professional repair or replacement.
- Deep Damage: If the damage extends through multiple layers of the windshield glass, a DIY kit won’t suffice.
- Complex Cracks: Cracks that obstruct the driver’s view or are located near the windshield’s edge require professional attention.
Conclusion
A car window glass repair kit is a valuable tool for any car owner. By addressing minor windshield damage promptly and effectively, you can enhance safety, save money, and maintain the structural integrity of your vehicle.
Remember: While DIY kits are effective for minor repairs, don’t hesitate to seek professional help for extensive or complex damage.

