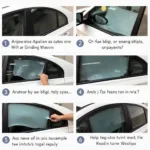
Seeing bubbles form on your freshly tinted car windows can be frustrating. These imperfections not only detract from the sleek look of your vehicle but can also hinder visibility. Fortunately, most bubbles in tinted car windows are easily fixable with the right approach. This guide will provide you with a step-by-step breakdown of how to tackle those pesky bubbles and restore your car windows to their pristine, bubble-free glory.
Understanding Why Bubbles Appear
Before we dive into the repair process, it’s helpful to understand why these bubbles form in the first place. The most common culprit is trapped moisture or air. This can occur during the tint application process, especially if the window surface wasn’t thoroughly cleaned and prepped.
“Think of it like applying a screen protector to your phone,” explains Mark Stevenson, a seasoned automotive detailer with over 20 years of experience. “Any dust, lint, or even tiny air pockets can lead to those annoying bubbles.”
Other factors that can contribute to bubbling include:
- Poor quality tint: Low-grade window tint may be more prone to bubbling and other issues.
- Improper installation: Inexperience or rushing the application can lead to trapped air and moisture.
- Extreme temperatures: Extreme heat can cause the tint to expand and bubble.
How to Get Rid of Bubbles in Tinted Car Windows
Don’t panic if you spot bubbles in your tinted windows. Here’s a simple guide to help you remove them:
What You’ll Need
- A heat gun or hairdryer
- A plastic squeegee or credit card
- A microfiber cloth
- Soapy water solution (Mix a few drops of dish soap with water)
Step-by-Step Instructions
- Prepare your solution: Mix a few drops of dish soap with water in a spray bottle.
- Clean the window: Thoroughly clean the window surface with the soapy water solution to remove any dirt or debris.
- Apply heat: Using a heat gun or hairdryer on a low setting, gently heat the area with the bubbles. Move the heat source continuously to avoid overheating. This will soften the tint film.
- Push out the bubbles: While the tint is still warm, use your squeegee or credit card to gently push the bubbles towards the edges of the window. Start from the center of the bubble and work your way outwards.
- Repeat if necessary: For stubborn bubbles, you may need to reapply heat and repeat the process.
- Clean the window: Once the bubbles are gone, clean the window again with the soapy water solution and wipe it dry with a microfiber cloth.
Tips for Best Results:
- Work in a shaded area: Avoid direct sunlight when fixing the bubbles, as excessive heat can damage the tint.
- Be patient: Don’t rush the process. Take your time and work carefully to avoid damaging the tint.
- Small bubbles may disappear on their own: Tiny bubbles often disappear naturally within a few days as the tint cures.
When to Call a Professional
While minor bubbles can be fixed using the DIY methods above, some situations call for professional intervention:
- Large or numerous bubbles: If the bubbles are large, numerous, or cover a significant portion of the window, it’s best to consult a professional tint installer.
- Damaged tint: If you notice any tears, creases, or other damage to the tint film, attempting to fix it yourself might worsen the problem.
- Persistent bubbles: If the bubbles persist despite your best efforts or reappear after attempting to fix them, a professional can determine the underlying cause and provide a lasting solution.
Conclusion
Dealing with bubbles in tinted car windows can be a nuisance, but it doesn’t have to be a major headache. By following the steps outlined in this guide, you can often remove those pesky imperfections and enjoy crystal-clear windows once again. Remember, patience and a gentle touch are key. And if you’re ever in doubt, don’t hesitate to call a professional tint installer for assistance.

