Leather car seats add a touch of luxury and class to any vehicle. However, they’re not immune to wear and tear. Tears, scratches, and cracks can mar their appearance and even affect their structural integrity. But don’t worry, a tear in your leather car seat doesn’t necessarily mean a costly trip to the upholsterer. You can often fix it yourself with a little patience and the right materials. This comprehensive guide will walk you through the steps on how to repair a tear in your leather car seat, helping you restore its beauty and extend its lifespan.
Assessing the Damage: Is it a DIY Job?
Before you grab your toolkit, it’s important to assess the severity of the tear. Small cracks and minor tears can often be addressed with DIY repair kits. However, large gashes, tears affecting the seat’s seams, or damage involving the seat’s internal structure are best left to professional upholsterers.
Gathering Your Leather Repair Arsenal
Once you’ve determined that the tear is DIY-repairable, gather the following materials:
- Leather Repair Kit: These kits are widely available online and at auto parts stores. Choose a kit that closely matches the color of your leather car seat.
- Cleaning Solution: Opt for a dedicated leather cleaner or a mild soap solution (mix a few drops of gentle dish soap with water). Avoid harsh chemicals or household cleaners that can damage the leather.
- Microfiber Cloths: You’ll need these for cleaning and applying the repair compound.
- Scissors: For trimming any loose threads or frayed edges around the tear.
- Masking Tape: To protect the surrounding leather during the repair process.
- Hair Dryer (optional): To speed up the drying time of the repair compound.
How to Repair a Tear in a Leather Car Seat: A Step-by-Step Guide
Follow these steps to repair the tear in your leather car seat:
-
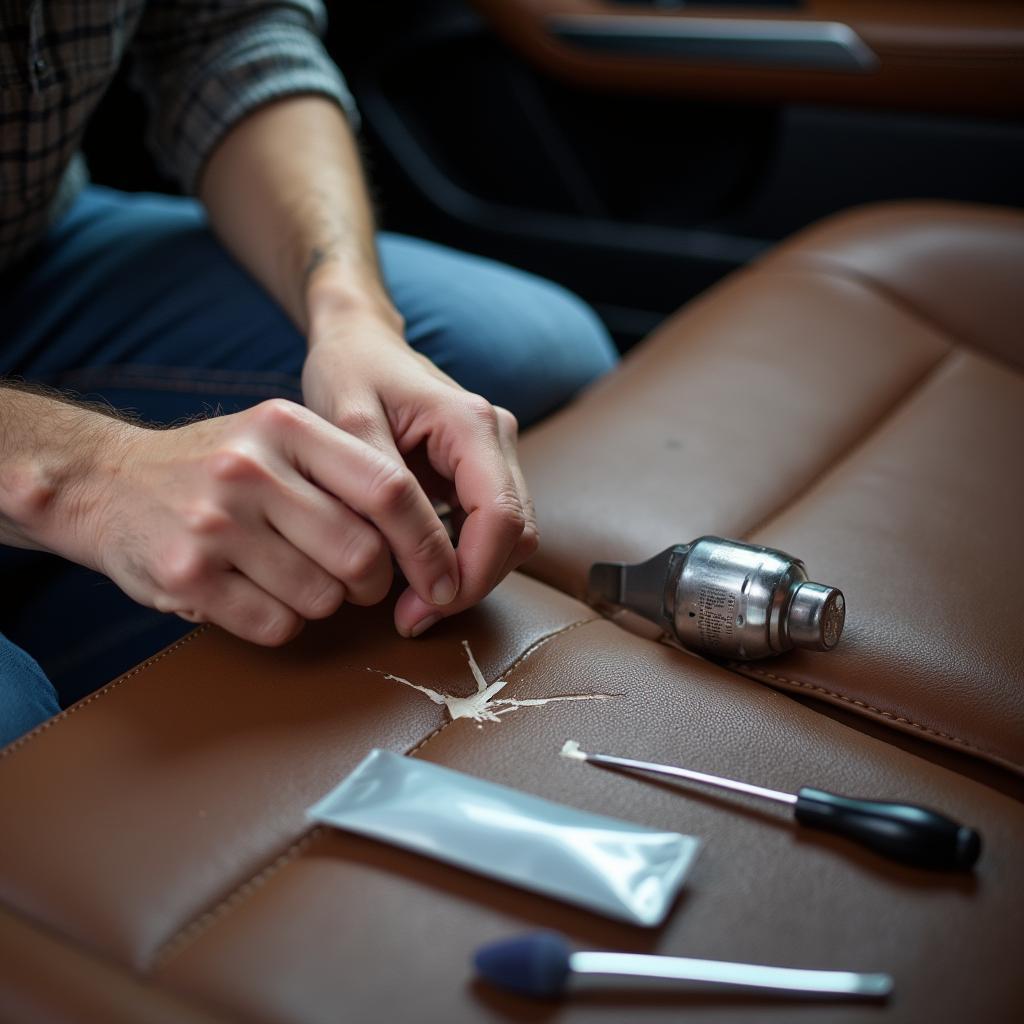
Clean the Area: Thoroughly clean the torn area and the surrounding leather with a leather cleaner or a mild soap solution. Use a microfiber cloth to wipe away any dirt, grime, or residue. Let the area dry completely before moving to the next step.
-
Trim Loose Threads (If Necessary): If there are any loose threads or frayed edges around the tear, carefully trim them with scissors. Avoid cutting into the leather itself.
-
Apply Backing Fabric (If Needed): For larger tears, some repair kits come with a backing fabric. Cut a piece of backing fabric slightly larger than the tear and insert it into the tear using tweezers. This acts as a support structure for the repair compound.
-
Mix and Apply the Repair Compound: Follow the instructions provided with your specific leather repair kit. In most cases, you’ll need to mix a small amount of the repair compound to match the color of your car seat. Use the provided spatula or a similar tool to carefully apply the compound to the tear, filling it evenly and smoothing out the surface.
-
Allow to Dry: Let the repair compound dry completely. This may take several hours, or you can use a hair dryer on a low setting to speed up the drying process.
-
Apply Additional Layers (If Needed): Depending on the severity of the tear and the type of repair compound, you may need to apply multiple thin layers, allowing each layer to dry completely before applying the next.
-
Blend and Smooth: Once the final layer is dry, use a clean microfiber cloth to gently blend the repaired area with the surrounding leather. Buff the surface to restore its natural sheen.
-
Apply Leather Conditioner: After the repair is complete, apply a high-quality leather conditioner to the entire seat to keep the leather supple and protected.
Preventing Future Tears: Proactive Care for Your Leather Seats
Prevention is always better than cure. Here are some tips to prevent future tears in your leather car seats:
- Regular Cleaning: Regularly clean your leather seats with a dedicated leather cleaner or a mild soap solution.
- Conditioning: Apply a high-quality leather conditioner every few months to keep the leather moisturized and prevent drying and cracking.
- Avoid Sharp Objects: Be mindful of sharp objects like keys, pens, or tools that can scratch or puncture the leather.
- Sun Protection: Prolonged exposure to sunlight can fade and dry out leather. Use a sunshade or park your car in the shade whenever possible.
When to Call in the Pros
While minor tears can be tackled with DIY methods, some situations call for professional expertise. If you’re dealing with any of the following, it’s best to consult a professional upholsterer:
- Large Tears or Gashes: Extensive damage often requires specialized tools and techniques best handled by professionals.
- Tears on Seams: Repairs involving seams can be tricky and may weaken the structural integrity of the seat if not done correctly.
- Damage to Internal Structure: If the tear is accompanied by damage to the seat’s foam or frame, professional intervention is necessary.
FAQs: Addressing Common Leather Car Seat Tear Concerns
Q: Can I use super glue to repair a tear in my leather car seat?
A: It’s strongly advised against using super glue or other strong adhesives on leather car seats. These adhesives can create a rigid bond that can crack or peel over time. Moreover, they can damage the surrounding leather and make professional repairs more difficult in the future.
Q: How long will a DIY leather repair last?
A: The longevity of a DIY leather repair depends on the severity of the tear, the quality of the repair kit used, and the care taken during the repair process. A well-executed repair can last for several years, while a poorly done repair may only last a few months.
Q: Can I change the color of my leather car seats during the repair process?
A: While you can use a leather repair kit to change the color of small areas, it’s challenging to change the color of the entire seat successfully. If you’re looking for a complete color change, it’s best to consult with a professional leather dyeing specialist.
how to repair torn cloth car seats
Q: How much does it cost to have a leather car seat tear repaired professionally?
A: The cost of professional repair varies widely depending on the severity of the damage, the type of leather, and the location of the repair shop. Minor repairs can range from $50 to $150, while more extensive damage can cost several hundred dollars or more.
how much to repair a torn front seat of car
Q: Can I prevent future tears by using seat covers?
A: While seat covers can offer some protection against spills and dirt, they don’t necessarily prevent all tears. Sharp objects or excessive pressure can still damage the leather underneath.
Maintaining That Luxurious Feel: Keep Your Car Interior Pristine
A tear in your leather car seat doesn’t have to be a permanent blemish. By following the steps outlined in this guide, you can often repair minor tears yourself and restore your seats’ appearance. However, remember that prevention is key to maintaining the luxurious feel of your car’s interior. Regular cleaning, conditioning, and mindful use will go a long way in keeping your leather car seats looking their best for years to come.
how to repair car carpet front seat
Remember, for those more significant tears or when in doubt, don’t hesitate to seek professional help. Expert upholsterers can provide the necessary expertise to restore your leather car seats to their former glory, ensuring a comfortable and stylish driving experience.
Need help with that stubborn car repair? We’re just a message away! Reach out to our 24/7 customer support team via WhatsApp: +1(641)206-8880, or Email: [email protected].


