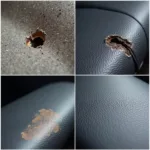
Pleather seats offer a luxurious look and feel without the hefty price tag of genuine leather. However, pleather can be prone to scratches, cracks, and fading over time. The good news is that repairing minor damage on your car’s pleather seats is often a DIY project you can tackle with the right tools and a little patience. This comprehensive guide will walk you through the steps of how to repair pleather seats in your car, helping you restore their appearance and extend their lifespan.
Assessing the Damage: Knowing When to Repair or Replace
Before diving into the repair process, it’s crucial to assess the severity of the damage. While minor scratches and cracks can be effectively addressed with DIY methods, extensive damage like large tears, deep gouges, or widespread peeling might require professional intervention or even seat cover replacements.
Essential Tools and Materials for Pleather Seat Repair
Gathering the necessary tools and materials beforehand will streamline the repair process. Here’s a checklist:
- Cleaning Supplies: Mild soap, warm water, microfiber cloths
- Repair Compound: Leather or vinyl repair kit (choose a color-matched kit for best results)
- Applicator Tools: Spatula, palette knife, or cotton swabs (depending on the repair compound)
- Heat Gun or Hair Dryer: For heat-activated repair compounds
- Leather Conditioner: To moisturize and protect the repaired area
Step-by-Step Guide to Repairing Pleather Car Seats
1. Clean the Damaged Area:
Thoroughly clean the damaged area with mild soap and warm water, removing any dirt, grime, or debris. Allow the area to dry completely before proceeding.
2. Prepare the Repair Compound:
Follow the instructions provided with your chosen leather or vinyl repair kit. Some compounds require mixing, while others come pre-mixed and ready to apply.
3. Apply the Repair Compound:
Using a spatula, palette knife, or cotton swab, carefully apply the repair compound to the damaged area. For cracks and scratches, work the compound into the crevices. If using a heat-activated compound, follow the manufacturer’s instructions for heat application using a heat gun or hair dryer.
4. Smooth and Blend:
Once the compound is applied, use the applicator tool to smooth the surface and blend the edges seamlessly with the surrounding pleather. For a textured finish, you can use a textured paper or fabric while the compound is still wet.
5. Allow for Drying and Curing:
Drying and curing times vary depending on the repair compound used. Refer to the manufacturer’s instructions for specific guidelines. Avoid touching or using the seat during this time.
6. Apply Leather Conditioner (Optional):
After the repair compound has fully cured, apply a leather conditioner to the repaired area and the surrounding pleather. This will help moisturize the material and prevent future cracking.
Maintaining Your Repaired Pleather Car Seats
Following these maintenance tips will help prolong the lifespan of your repaired pleather seats:
- Regular Cleaning: Clean your seats regularly with a damp microfiber cloth and mild soap to prevent dirt and grime buildup.
- UV Protection: Park your car in the shade or use a sunshade to protect your seats from harmful UV rays, which can cause fading and cracking.
- Leather Conditioner: Apply a leather conditioner every few months to keep the pleather supple and prevent drying and cracking.
- Avoid Harsh Chemicals: Refrain from using harsh chemicals or cleaners on your pleather seats, as these can damage the material.
Conclusion: Enjoy Your Refreshed Car Interior
Repairing minor damage on your car’s pleather seats is an achievable DIY project that can save you money and restore the interior’s appearance. By following the steps outlined in this guide and practicing regular maintenance, you can keep your pleather seats looking their best for years to come. Remember, for extensive damage, seeking professional help is always recommended.
FAQs
Q: Can I use super glue to repair a tear in my pleather car seat?
A: While super glue might seem like a quick fix, it’s not recommended for pleather repairs. Super glue can create a stiff, noticeable bond that’s prone to cracking and peeling over time. Opt for a flexible leather or vinyl repair compound designed for such applications.
Q: How do I choose the right color repair compound for my pleather seats?
A: Most repair kits offer a range of colors. Try to find a kit that closely matches the color of your seats. For a precise match, consider visiting an automotive upholstery specialist.
Need Help? We’re Here for You!
For expert guidance and support on your car repair journey, don’t hesitate to reach out to our dedicated team at CarRepairOnline. Contact us via WhatsApp: +1(641)206-8880 or email: [email protected]. Our 24/7 customer support is ready to assist you.


