Torn or ripped car seats are an unsightly problem that can affect the overall look and value of your vehicle. Whether it’s due to wear and tear, sharp objects, or accidents, knowing the best way to repair a torn car seat can save you from costly replacements or professional upholstery services. This comprehensive guide will walk you through the options and provide step-by-step instructions to help you achieve professional-looking results.
Assessing the Damage: What Kind of Tear Are You Dealing With?
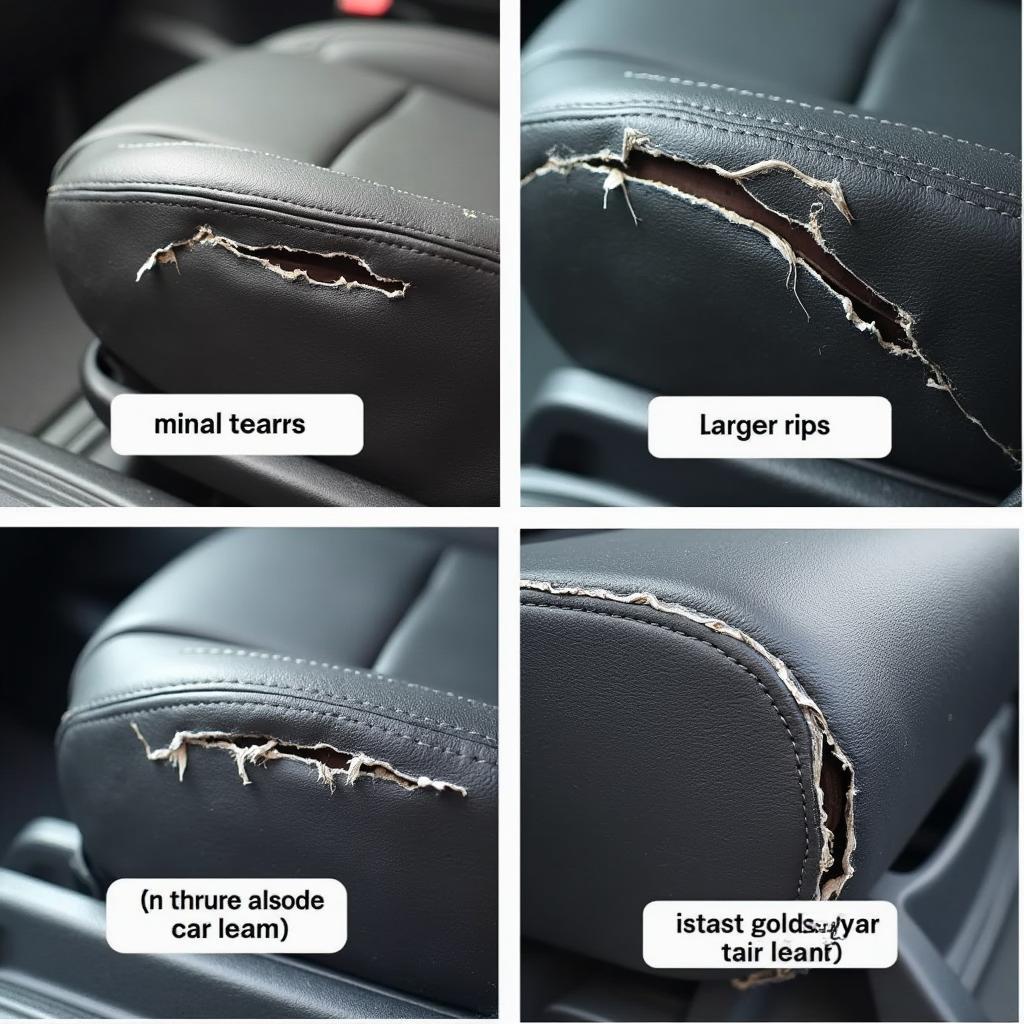
Before diving into repair methods, it’s crucial to assess the extent of the damage. The appropriate repair technique will depend on the severity of the tear, the material of your car seat, and your budget.
- Minor Tears and Snags: Small cuts or snags on the surface of the material can often be repaired using simple DIY methods and readily available repair kits.
- Larger Tears and Holes: These typically require more advanced techniques and materials, like patching or using a liquid leather repair kit.
- Tears on Seams: Tears along the seams require specialized sewing techniques or adhesive solutions designed for heavy-duty fabric bonding.
DIY Car Seat Repair: Affordable and Effective Solutions
For minor tears and those on a budget, DIY car seat repair is a practical option. Here are some common methods:
1. Using a Car Seat Repair Kit
Car seat repair kits are readily available online and at auto parts stores. These kits generally include a bonding agent, a color matching kit, and various grains or textures to mimic the look and feel of your car’s upholstery.
Here’s a step-by-step guide on how to use a car seat repair kit:
- Clean the Area: Thoroughly clean the torn area with soap and water, ensuring it is free of dirt, debris, and grease. Let it dry completely.
- Apply the Bonding Agent: Apply a thin layer of the bonding agent to the underside of the torn edges. Use a toothpick or a small brush for precise application.
- Press and Secure the Tear: Carefully align the edges of the tear and press them firmly together. Use masking tape or clamps to hold the edges together while the adhesive dries.
- Fill the Gap (if necessary): For larger tears, use the filler provided in the kit to fill the gap and create a smooth surface. Follow the manufacturer’s instructions for drying time.
- Color Matching: Use the color matching guide in the kit to find the closest shade to your car’s upholstery. Apply the colorant in thin layers, allowing each layer to dry completely before applying the next.
- Apply Texture (if needed): Some kits come with grain paper to create a textured finish. Place the grain paper over the repaired area and apply heat with an iron or hairdryer to transfer the texture.
2. Patching the Tear
Patching is a suitable option for larger tears or holes where a simple repair kit might not be enough. Here’s what you’ll need:
- Matching Fabric: Choose a fabric that closely resembles your car’s upholstery in terms of color, texture, and weight.
- Fabric Adhesive: Opt for a strong, flexible adhesive specifically designed for fabric bonding.
- Scissors
Follow these steps to patch a torn car seat:
- Prepare the Patch: Cut a patch from the matching fabric slightly larger than the tear on all sides. Round the corners of the patch to prevent fraying.
- Apply Adhesive: Apply a thin, even layer of fabric adhesive to the underside of the patch and around the edges of the tear.
- Position and Press: Carefully position the patch over the tear, ensuring it aligns properly. Press firmly and evenly to secure the patch in place.
- Let it Dry: Allow the adhesive to dry completely according to the manufacturer’s instructions.
Professional Upholstery Repair: When to Consider It
While DIY methods can effectively address minor tears, professional upholstery repair is recommended for:
- Extensive Damage: Large tears, burns, or deep cuts that compromise the structural integrity of the seat.
- Luxury or Classic Cars: High-end vehicles often require specialized knowledge and materials to ensure a perfect match and preserve their value.
- Lack of Confidence in DIY: If you’re not confident in your abilities, it’s best to entrust the repair to experienced professionals.
Preventing Future Tears: Proactive Measures
Prevention is always better than cure. Here are some tips to prevent future car seat tears:
- Be Mindful of Sharp Objects: Avoid placing sharp objects on your car seats that could potentially cause punctures or tears.
- Regular Cleaning: Regularly cleaning your car seats can prevent dirt and grime from embedding in the material and weakening its fibers.
- Seat Covers: Consider using seat covers, especially if you frequently transport pets or cargo.
- Careful Entry and Exit: Be mindful of how you enter and exit your vehicle, especially if you carry keys or other sharp objects in your pockets.
Frequently Asked Questions about Torn Car Seat Repair
Can I use super glue to repair a torn car seat?
While super glue might seem like a quick fix, it’s not recommended for car seat repairs. Super glue can create a stiff, inflexible bond that may crack or peel over time. It can also damage certain types of upholstery. It’s best to use adhesives specifically designed for fabrics or upholstery.
How long does a car seat repair last?
The lifespan of a car seat repair depends on the severity of the damage, the quality of the repair materials used, and the level of care taken afterward. A well-executed repair using appropriate techniques and materials can last for several years.
Can I repair a torn leather car seat myself?
Yes, you can repair minor tears in leather car seats using DIY methods and leather repair kits. However, for larger tears or if you’re dealing with high-quality leather, it’s advisable to consult a professional upholstery specialist. You can learn more about DIY leather car seat repair in our detailed guide: do it yourself leather car seat repair.
Need Help with Your Car Seat Repair?
A torn car seat doesn’t have to be a permanent blemish on your vehicle’s interior. By understanding the best way to repair a torn car seat and following the right techniques, you can restore its appearance and value. Whether you opt for a DIY approach or seek professional assistance, addressing the issue promptly will prevent further damage and ensure a comfortable and visually appealing driving experience. If you’re dealing with other car interior repairs like a damaged seat belt or need to know how to repair a vinyl car seat, explore our other informative guides: how to repair car seat belt and how to repair vinyl car seat. For faux leather car seats, we have a comprehensive guide on how to repair faux leather car seat. If you’re looking to fix a burn hole in your black car seat, our guide on how to repair burn hole in black car seat provides step-by-step instructions. Remember, maintaining your car’s interior is an investment that pays off in the long run. For any assistance or inquiries, reach out to our 24/7 customer support on WhatsApp: +1(641)206-8880 or email us at [email protected].


