Vinyl seats are a popular choice for car owners because they’re durable, easy to clean, and relatively affordable. However, like any material, vinyl can become damaged over time. Scratches, cracks, and tears can make your car’s interior look worn and detract from its overall value. The good news is that repairing minor vinyl seat damage is often a manageable DIY project.
This comprehensive guide will walk you through the steps on how to repair vinyl seats in your car, helping you restore their appearance and keep your car’s interior looking its best.
Assessing the Damage: What Kind of Repair Do You Need?
Before diving into the repair process, it’s essential to assess the type and extent of the damage to your vinyl car seats. This will help you determine the appropriate repair method and materials needed.
Here are some common types of vinyl seat damage:
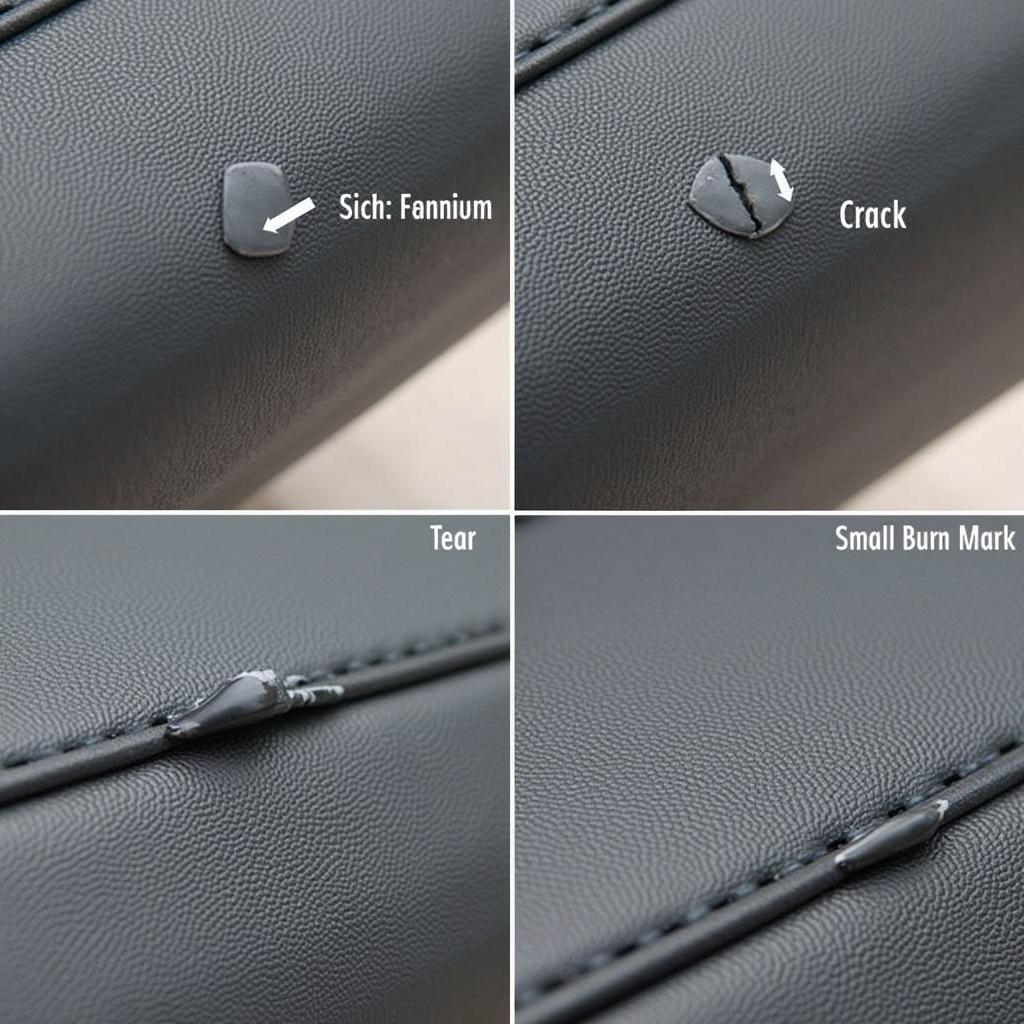
- Scratches and Scuffs: These are superficial damages that appear on the surface of the vinyl.
- Cracks: These are linear splits in the vinyl, often caused by age, heat, and UV exposure.
- Tears: Tears are more severe damages where the vinyl has ripped or punctured.
- Burns: Cigarette burns or other heat sources can create small holes or discoloration on the vinyl.
Once you’ve identified the type of damage, you can gather the necessary materials and proceed with the appropriate repair method.
Gathering Your Vinyl Repair Arsenal: Tools and Materials You’ll Need
Having the right tools and materials is crucial for a successful vinyl seat repair. Here’s a list of items you’ll likely need:
- Vinyl Repair Kit: Opt for a high-quality kit that includes a vinyl filler, color matching guide, adhesive promoter, grain paper, and application tools.
- Cleaning Supplies: Isopropyl alcohol, microfiber cloths, and mild soap.
- Heat Gun or Hair Dryer: To soften the vinyl and help with adhesion.
- Masking Tape and/or Painter’s Tape: To protect surrounding areas during the repair.
- Scissors or Utility Knife: For trimming and cutting materials.
- Gloves: Protect your hands from chemicals and ensure a clean working surface.
Having these readily available will make the repair process smoother and more efficient.
Step-by-Step Guide: How to Repair Vinyl Seats in Your Car
Follow these steps to tackle those unsightly vinyl blemishes and bring your car seats back to life:
1. Preparation is Key: Begin by thoroughly cleaning the damaged area and its surrounding surface with isopropyl alcohol and a microfiber cloth. This removes dirt, grime, and any residues that could interfere with the adhesion of repair materials.
2. Addressing Cracks and Tears: For cracks and tears, use a vinyl filler that matches the color of your seats. Apply the filler to the damaged area, ensuring it fills the entire crevice or tear. Use a plastic spreader or a credit card to smooth out the surface and remove any excess filler.
3. Heat for Adhesion: Once the filler is applied, use a heat gun or a hair dryer on a low setting to gently heat the area. This helps the filler to cure and bond more effectively with the vinyl.
4. Recreating the Texture: If your vinyl seats have a textured surface, use a piece of grain paper included in your vinyl repair kit to replicate the original texture onto the repaired area. Place the grain paper over the cured filler and apply gentle heat while pressing it down. This will transfer the texture pattern onto the filler.
5. Color Matching and Final Touches: After the filler has dried and the texture is recreated, use the color matching guide in your repair kit to find the closest match to your vinyl’s color. Apply the colorant in thin, even coats, allowing each coat to dry completely before applying the next.
6. Sealing the Deal: Once the colorant is dry, apply a vinyl sealant to protect the repaired area from fading, cracking, and further damage. This step also helps to blend the repair seamlessly with the surrounding vinyl.
Pro Tips for a Seamless Repair
- Work in a well-ventilated area: Vinyl repair products often contain chemicals that release fumes.
- Test any product on a hidden area first: This ensures color compatibility and prevents unwanted reactions with your specific vinyl type.
- Patience is key: Allow ample drying time between each step for optimal results.
- Consider professional help for extensive damage: If you’re dealing with large tears, deep punctures, or widespread damage, it might be best to consult a professional automotive upholsterer.
How to Prevent Future Vinyl Seat Damage
Preventing future damage is always easier than repairing it. Here are some tips to keep your vinyl car seats looking their best:
- Regular Cleaning: Wipe down your seats regularly with a damp cloth and mild soap to remove dirt and grime.
- UV Protection: Park your car in the shade or use a sunshade to protect your seats from harmful UV rays that can cause fading and cracking.
- Avoid Sharp Objects: Be mindful of sharp objects like keys, pens, and tools that can scratch or puncture the vinyl.
FAQs About Repairing Vinyl Car Seats
Can I repair vinyl car seats myself?
Yes, minor repairs like scratches, cracks, and small tears can often be tackled with a DIY approach using a vinyl repair kit and following the proper steps.
What is the best vinyl repair kit for car seats?
Best vinyl repair kit for car seats will depend on your specific needs and budget. Look for kits that offer a range of color options, a durable filler, and positive customer reviews.
Can you repair ripped vinyl car seats?
How to repair ripped vinyl car seats will depend on the severity of the rip. Small tears can be repaired using a vinyl repair kit. However, larger rips might require patching or professional upholstery services.
Can you repair vinyl trim to leather car seats?
If your leather car seats have vinyl trim that’s damaged, the repair process is similar to repairing vinyl seats. However, it’s crucial to use products specifically designed for vinyl repair to avoid damaging the adjacent leather. Learn more about how to repair vinyl trim to leather car seats in our dedicated guide.
How much does it cost to have a vinyl car seat repaired professionally?
The cost of professional vinyl car seat repair can vary widely depending on the extent of the damage, the type of repair needed, and the location. It’s always best to contact local automotive upholstery shops for quotes.
Keep Your Car Looking Sharp
Repairing vinyl seats in your car is a great way to maintain your car’s interior, preserve its value, and enhance your driving experience. By following these steps and using the right techniques, you can achieve professional-looking results and enjoy your refreshed car interior for years to come. If you’re unsure about tackling the repair yourself, remember that professional automotive upholsterers are available to handle more complex repairs and ensure a flawless finish. For more helpful guides and tips on car maintenance and repair, explore our other articles on how to repair car vinyl seats and other related topics.


