A torn or ripped seam on your leather car seat can be an eyesore and negatively impact the overall look of your car’s interior. Luckily, with the right tools and a bit of patience, you can often repair a leather car seat seam yourself and avoid costly professional repairs. This comprehensive guide will walk you through the steps to effectively repair that unsightly tear and restore your car’s interior to its former glory.
Assessing the Damage and Gathering Your Supplies
Before diving into the repair process, it’s crucial to assess the extent of the damage to your leather car seat seam. Examine the seam closely to determine the length and depth of the tear.
Once you’ve assessed the damage, gather the necessary supplies, which may include:
- Leather cleaner and conditioner
- Heavy-duty nylon or upholstery thread (color-matched to your leather)
- Curved upholstery needle
- Leather adhesive (optional)
- Small scissors
- Masking tape
- Soft cloth
Step-by-Step Guide to Repairing the Seam
Follow these steps to effectively repair your leather car seat seam:
-
Clean the Area: Begin by thoroughly cleaning the damaged area with a dedicated leather cleaner to remove any dirt, grime, or debris. This will ensure proper adhesion of the adhesive and a cleaner repair.
-
Prepare the Seam: If the tear is significant, you can use masking tape to temporarily hold the edges of the seam together. This will help maintain alignment while you stitch.
-
Thread the Needle: Cut a length of heavy-duty thread, making sure it’s long enough to complete the entire repair. Thread your curved upholstery needle with the thread, leaving a tail of a few inches.
-
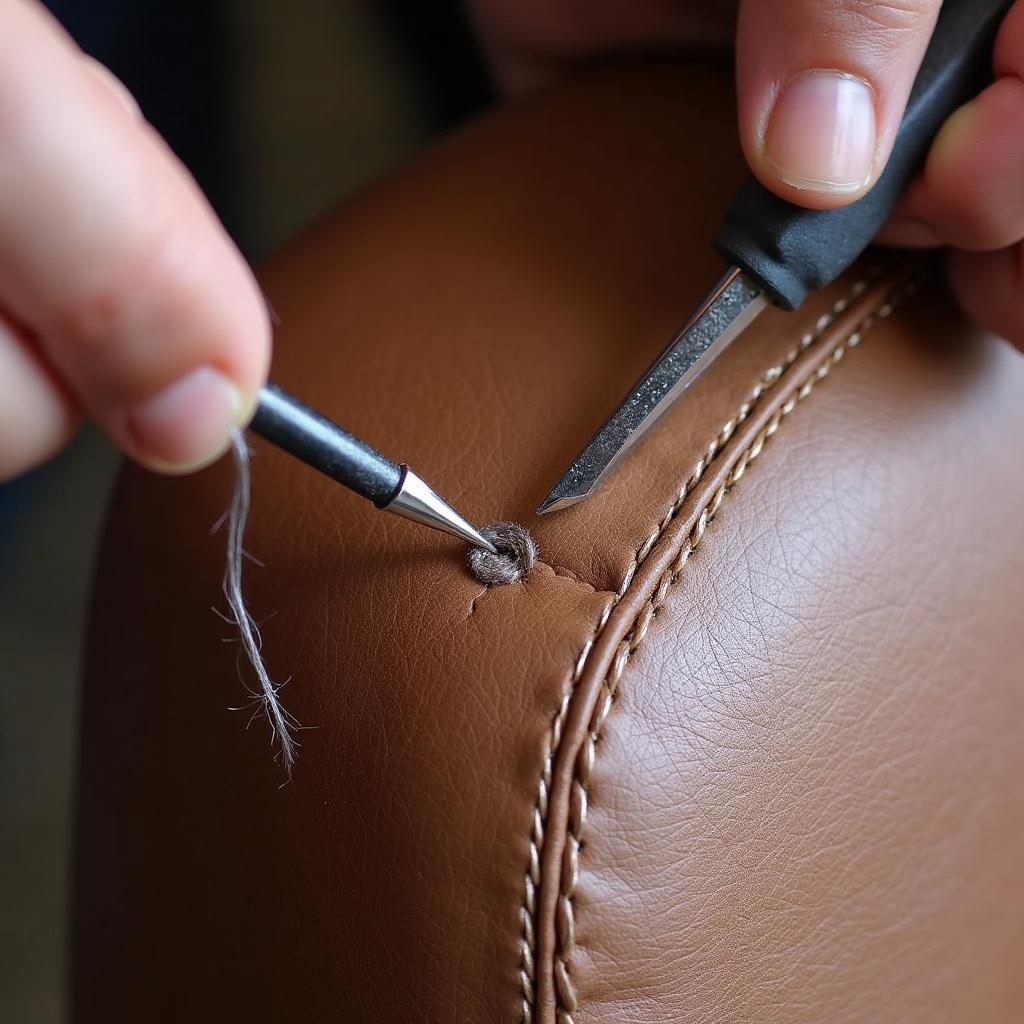
Begin Stitching: Starting a short distance from the beginning of the tear, insert the needle through the existing stitch hole on one side of the seam. Pull the thread through, leaving the tail at the starting point.
-
Continue Stitching: Carefully align the edges of the torn seam and continue stitching along the original seam line. Insert the needle through the existing holes if possible; otherwise, create new holes at regular intervals, ensuring a consistent and neat appearance.
-
Knotting the Thread: Once you reach the end of the tear, knot the thread securely on the underside of the leather to prevent unraveling. Trim any excess thread.
Optional: Using Leather Adhesive
For added durability, especially with larger tears, you can apply a thin layer of leather adhesive to the edges of the seam before stitching. This will help bond the leather together and create a stronger repair.
Be sure to use a leather adhesive that is flexible and dries clear to avoid any stiffness or discoloration. Allow the adhesive to dry completely according to the manufacturer’s instructions before proceeding with the stitching.
Caring for Your Repaired Leather Car Seat
Once you have successfully repaired the seam on your leather car seat, it’s important to properly care for it to prevent future damage and maintain its appearance:
- Regular Cleaning: Use a leather cleaner to remove dirt and grime regularly.
- Conditioning: Apply a leather conditioner to keep the leather supple and prevent drying and cracking.
- Avoid Direct Sunlight: Park your car in the shade or use a sunshade to protect your leather seats from UV damage.
- Address Spills Immediately: Wipe away spills as soon as they occur to prevent staining.
When to Consult a Professional
While repairing a leather car seat seam can be a DIY project, there are instances when it’s best to consult a professional:
- Extensive Damage: If the tear is very large, complex, or involves multiple layers of material, it’s best to seek professional help.
- Airbag Seams: Never attempt to repair seams near or on airbags, as this could interfere with their deployment.
- Lack of Confidence: If you’re uncomfortable with the repair process or unsure about your skills, a professional upholsterer can ensure a quality repair.
If you’re looking for professional help to repair your leather car seats, check out our services: car leather seat repair birmingham. We offer a range of car upholstery repair services including car seat upholstery repair.
Conclusion
Repairing a leather car seat seam yourself can save you money and is often a manageable DIY project with the right guidance. By following these steps and using the proper techniques, you can restore your car’s interior and prolong the life of your leather seats.
If you found this guide helpful, you might also find our article on how to repair cloth car seats useful. And if you have a tear in your Mercedes Benz car seat, be sure to check out our guide on how to repair tear in mb car seat. For those with cloth seat tears, our guide on how to repair a cloth car seat tear can be a lifesaver.


